
Is your computer feeling slow or struggling to keep up with your tasks? Upgrading your RAM memory might be the simple fix you need to boost your system’s speed and performance.
Imagine opening multiple apps without delay or enjoying smoother gaming and video editing. In this guide, you’ll learn exactly how to upgrade your RAM step-by-step, even if you’re not a tech expert. Keep reading, and you’ll gain the confidence to make your computer faster and more efficient today.
Signs You Need More Ram
Knowing when your computer needs more RAM is important. RAM helps your computer run programs smoothly. Without enough RAM, tasks slow down. Here are clear signs your system needs a memory upgrade.
Slow Performance And Lag
Your computer takes longer to open apps. Switching between tasks feels sluggish. Videos or games stutter or freeze. These problems often mean RAM is too low.
Frequent Freezing Or Crashing
Programs stop responding or close suddenly. Your system may freeze without warning. This happens when RAM cannot handle running software. More memory helps prevent these crashes.
High Memory Usage Alerts
Your computer shows warnings about low memory. You may see messages asking to close apps. These alerts signal that RAM is fully used. Adding RAM reduces these interruptions and improves flow.

Credit: www.avast.com
Choosing The Right Ram
Choosing the right RAM is key to a smooth upgrade. The correct RAM improves your computer’s speed and multitasking ability. Picking the wrong RAM causes errors or won’t fit your system. Understanding what your computer needs helps you buy the perfect memory module.
Checking Compatibility With Your System
Start by checking your motherboard’s specifications. It shows the type and maximum RAM supported. Look for the number of RAM slots available too. Use system tools or manuals to find this information. Installing incompatible RAM can cause your computer not to start.
Understanding Ram Types And Speeds
RAM comes in different types like DDR3, DDR4, and DDR5. Your system only supports one type. RAM speed is measured in MHz and affects performance. Faster RAM lets your system access data quicker. Match the RAM type and speed to your motherboard’s requirements.
Determining The Right Capacity
Choose RAM size based on your tasks and needs. For basic use, 8GB is usually enough. Heavy tasks like video editing need 16GB or more. Check how much RAM your system can handle. Avoid buying more than your motherboard supports.
Preparing For The Upgrade
Preparing for a RAM upgrade is an important step. It helps avoid problems during the process. Taking simple precautions saves time and protects your data.
Before opening your computer case, get ready properly. This part explains key steps to prepare for your RAM upgrade.
Backing Up Important Data
Save your important files to an external drive or cloud. This protects your data from loss. Power failures or mistakes can cause data loss. Backups keep your files safe during hardware changes.
Gathering Necessary Tools
Collect tools before starting your upgrade. You usually need a small screwdriver. Have a clean cloth to work on. Make sure your workspace is bright and tidy. Having everything ready helps the process go smoothly.
Ensuring Proper Static Precautions
Static electricity can damage computer parts. Touch a metal object to discharge static before handling RAM. Use an anti-static wrist strap if possible. Work on a non-carpeted floor to reduce static. Protect your computer parts from static damage.
Credit: www.avast.com
Step-by-step Ram Installation
Upgrading your RAM can boost your computer’s speed and performance. The process is simple and quick. This guide breaks down each step clearly. Follow these instructions to install new memory safely and correctly.
Opening Your Computer Case
Turn off your computer. Unplug all cables and power cords. Place the computer on a clean, flat surface. Use a screwdriver to remove screws from the side panel. Slide or lift the panel off to open the case.
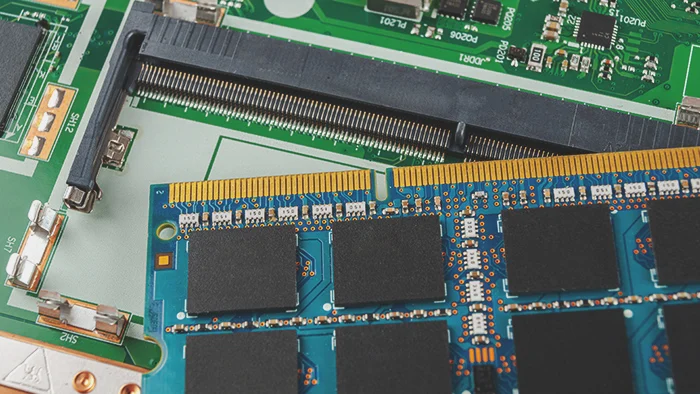
Locating The Ram Slots
Look for long, thin slots near the CPU. These slots hold the RAM modules. They often sit side by side. Check for small clips on each end of the slots. These clips hold the RAM in place.
Removing Old Ram Modules
Push the clips outward gently. The old RAM will pop up slightly. Hold the module by its edges. Pull it straight out without bending. Set the old RAM aside safely.
Installing New Ram Modules
Align the notch on the RAM with the slot. Insert the module straight down firmly. Press until the clips snap back and lock it. Check both sides to ensure it’s secure.
Securing And Closing The Case
Replace the side panel carefully. Screw it back tightly but not too hard. Reconnect all cables and power cords. Power on your computer to check the new RAM.
Post-installation Checks
After installing new RAM, checking its performance is crucial. These checks confirm the memory is working correctly. They help avoid system errors and crashes later. Follow these steps carefully to ensure your upgrade is successful.
Booting Up And Bios Detection
Turn on your computer and watch the startup screen. The BIOS should detect the new RAM automatically. Look for the total memory amount displayed on the screen. If the new RAM doesn’t show up, power off and check the installation. Make sure the RAM sticks are firmly seated in their slots.
Verifying Ram In Operating System
After booting, open your system settings or control panel. Find the section that shows system information or memory details. Confirm the total RAM matches the installed amount. This step ensures the operating system recognizes the upgrade properly. If the RAM size is less, reseat the sticks or try different slots.
Running Memory Diagnostics
Run a memory test tool to check for errors. Many operating systems include built-in diagnostics you can start easily. These tests scan the RAM for faults and stability issues. Let the test run fully to catch any problems. If errors appear, consider replacing the faulty RAM module.
Optimizing Performance After Upgrade
Upgrading your RAM boosts your computer’s speed and multitasking ability. To get the best from the new memory, some extra steps help your system run smoother. These actions tune your settings and software to match the new hardware.
Adjusting Virtual Memory Settings
Virtual memory works like extra RAM on your hard drive. After adding more RAM, adjust virtual memory for better balance. Go to your system settings and find the virtual memory option. Set it to “system managed” or customize it based on your total RAM size. This helps prevent slowdowns and crashes.
Updating Drivers And Firmware
Drivers control how hardware and software communicate. New RAM may need updated motherboard drivers or BIOS firmware. Visit your computer or motherboard manufacturer’s website. Download and install the latest drivers and firmware updates. This step ensures your system uses the new RAM properly.
Managing Background Applications
Many apps run in the background and use memory. After upgrading RAM, check which apps start automatically. Disable unnecessary programs from running at startup. Use task manager or system tools to see memory usage. Keeping fewer apps active frees up RAM and improves speed.
Troubleshooting Common Issues
Troubleshooting common issues after upgrading RAM is important. Many users face problems that stop their computers from working properly. Understanding the causes helps fix the issues quickly. This section covers the most frequent problems and how to solve them.
System Fails To Boot
The computer may not start after installing new RAM. This happens if the RAM is not seated correctly. Turn off the computer and unplug it. Open the case and press the RAM firmly into the slot. Listen for a click sound. If the problem continues, check if the RAM is compatible with your motherboard.
Ram Not Recognized
Your system might not show the new RAM size. This can be due to dirty or damaged RAM slots. Clean the slots gently with a soft brush or compressed air. Also, check the BIOS settings to ensure the memory is detected. Updating the BIOS can help if your motherboard is old.
Unexpected System Crashes
Random crashes can occur after a RAM upgrade. Faulty or mismatched RAM modules cause this. Run a memory test using software like MemTest86. Replace any RAM sticks that fail the test. Make sure all RAM sticks have the same speed and brand for best results.

Credit: www.youtube.com
Frequently Asked Questions
How Do I Check My Current Ram Size?
You can check your current RAM size through system settings or BIOS. On Windows, use Task Manager; on Mac, use About This Mac. This helps determine if you need an upgrade and what capacity to consider.
What Type Of Ram Is Compatible With My Pc?
Compatibility depends on your motherboard and processor. Check your PC manual or use online tools to find supported RAM types like DDR3, DDR4, or DDR5. Installing incompatible RAM can cause system issues or failure to boot.
How Much Ram Should I Upgrade To?
For general use, 8GB is sufficient; for gaming or editing, 16GB or more is ideal. Consider your workload and future needs to choose the best upgrade size for performance improvement.
Can I Install Ram Myself Or Need A Technician?
Upgrading RAM is usually simple and safe for most users. Ensure you follow safety guidelines and watch tutorials if unsure. Professional help is recommended if you lack confidence or experience.
Conclusion
Upgrading your RAM can boost your computer’s speed and performance. It is a simple process anyone can do with a bit of care. Choose the right type and size of RAM for your system. Make sure to follow safety steps while installing it.
More memory helps run programs smoothly and reduces slowdowns. Keep your computer up to date for the best results. Enjoy a faster, more efficient device after the upgrade. Your computer will thank you.