
Have you ever faced the frustrating problem of needing to update your motherboard BIOS but your CPU isn’t working or isn’t installed yet? It might sound impossible, but there’s a way to do it without your CPU.
Updating your motherboard BIOS without a CPU can save you time, money, and hassle—especially if you’re building a new PC or troubleshooting hardware issues. You’ll discover simple, step-by-step methods to get your BIOS updated quickly and safely. Keep reading, because mastering this skill could make all the difference in your PC-building experience.

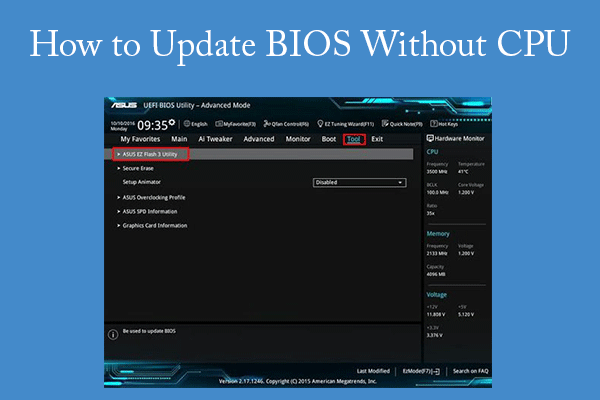
Credit: www.easeus.com
Why Update Bios Without Cpu
Updating your motherboard’s BIOS without a CPU might sound unusual. Yet, it is an important step in many cases. This process allows users to prepare their system for new hardware or fix issues before installing a processor. Understanding why to update BIOS without a CPU helps you make the right choice for your build or repair.
Benefits Of Bios Update
Updating the BIOS improves system stability. It fixes bugs that cause crashes or freezes. New BIOS versions add support for newer CPUs and memory. This means better compatibility with the latest hardware. Sometimes, updates improve system speed and power efficiency. They can also enable new features on your motherboard. These benefits make BIOS updates valuable, even without a CPU installed.
Situations Requiring Cpu-less Update
Some motherboards need a BIOS update before they support new CPUs. Without this update, the system won’t start. This happens often when using the newest processors. Another situation is fixing corrupted BIOS files that prevent booting. You might also update BIOS to fix hardware bugs early. This lets you install the CPU after the update completes. These cases show why updating BIOS without a CPU is sometimes necessary.
Credit: www.partitionwizard.com
Check Motherboard Compatibility
Checking motherboard compatibility is a key step before updating the BIOS without a CPU. It ensures the update process works smoothly and avoids damage. This step saves time and prevents errors during the update.
Identify Motherboard Model
Find the exact model of your motherboard. Look for the model number printed on the board itself. The model is often near the CPU socket or RAM slots. You can also check the box or manual that came with the motherboard. Knowing the model helps you find the right BIOS update files.
Verify Bios Update Support
Visit the motherboard manufacturer’s website and go to the support section. Enter your motherboard model to find BIOS updates. Check if your motherboard supports BIOS updates without a CPU. Some models have a special feature for this process. Download only the BIOS version that matches your model exactly.
Prepare Usb Drive For Bios Update
Preparing a USB drive for a BIOS update is a key step to update your motherboard without a CPU. The USB must be clean and ready to hold the BIOS file. This process is simple but important. It ensures the update runs smoothly and your system stays safe.
Format Usb Drive Correctly
Start by inserting the USB drive into your computer. Open the file explorer and right-click on the USB drive. Choose the format option. Set the file system to FAT32. This system works best with most motherboards. Make sure to uncheck the quick format option for a full clean. Click start and wait for the process to finish. Your USB is now ready for the BIOS file.
Download Bios Update File
Visit the motherboard manufacturer’s official website. Find the support or download section. Search for your exact motherboard model. Download the latest BIOS update file available. The file usually comes in a compressed format like ZIP. Extract the contents to your formatted USB drive. Keep the file at the root level, not inside any folder. This placement helps the motherboard detect the update quickly.
Enable Bios Flashback Feature
Enabling the BIOS Flashback feature allows you to update your motherboard’s BIOS without the CPU installed. This feature is useful when you want to install a new processor that needs a BIOS update first. It saves time and avoids the need for a compatible CPU to start the update process.
Before starting, you must understand how to use the BIOS Flashback feature properly. The process involves connecting power and using a special USB port on your motherboard. This section explains where to find the port and what power supply is needed.
Locate Bios Flashback Port
Find the BIOS Flashback port on the back panel of your motherboard. It is usually labeled clearly and looks like a USB port. Sometimes, it has a small button next to it for starting the BIOS update. Check your motherboard manual to confirm the exact location and label.
Power Supply Requirements
Make sure your power supply is connected to the motherboard. The system should have power even without the CPU installed. Use the main 24-pin and the 8-pin CPU power connectors. The BIOS Flashback process needs stable power to avoid failures.
Perform Bios Flashback Process
Performing a BIOS Flashback allows you to update the motherboard BIOS without a CPU. This process is useful when the CPU is not compatible with the current BIOS version. Many modern motherboards support this feature. It uses a special USB port and button for flashing the BIOS easily.
Follow these steps carefully to complete the BIOS update safely. Make sure to prepare the necessary files and tools before starting.
Copy Bios File To Usb
First, download the latest BIOS file from your motherboard’s official website. Save the file on an empty USB drive formatted as FAT32. Rename the BIOS file if the manufacturer instructs you to use a specific name. Insert the USB drive into the dedicated BIOS Flashback USB port on the motherboard.
Initiate Bios Flashback
Locate the BIOS Flashback button on your motherboard. Press and hold this button for a few seconds until the LED light starts blinking. This indicates the update process has started. Do not remove the USB drive or power off the system during this step. The motherboard will read the BIOS file from the USB and begin flashing.
Wait For Update Completion
The LED light will blink slowly during the update. This may take several minutes. Once the light stops blinking and stays solid or turns off, the update is complete. At this point, you can safely remove the USB drive. The motherboard now has the updated BIOS and is ready for CPU installation.
Verify Bios Update Success
Verifying the success of a BIOS update is crucial after updating your motherboard without a CPU. This step ensures the update completed correctly and your system is ready to use. Skipping this check might lead to system instability or failure to boot.
Below are simple ways to confirm that the BIOS update was successful. These checks help avoid problems and give you peace of mind.
Check Led Indicators
Many motherboards have LED lights that show the BIOS update status. After the update, watch these lights carefully. A steady or specific color light often means the update was successful. Flashing or red lights could signal errors during the process.
Refer to your motherboard manual to understand what each LED color or pattern means. This visual check is quick and easy to do.
Restart System And Access Bios
Once the LEDs confirm the update, restart your system. Enter the BIOS setup by pressing the key shown during boot, like DEL or F2. Inside the BIOS, check the version number to ensure it matches the one you installed.
If the BIOS loads correctly and shows the new version, the update succeeded. If not, you may need to repeat the update process or seek help.
Troubleshooting Common Issues
Updating the motherboard BIOS without a CPU can be tricky. Problems may occur during the process. Knowing how to fix common issues saves time and stress.
This section covers two main problems: Flashback not starting and update failing or hanging. Follow these tips to troubleshoot and complete your BIOS update smoothly.
Flashback Not Starting
Check the USB drive format. It must be FAT32 for the motherboard to read it. Use the correct BIOS file name as specified by your motherboard manual.
Make sure the USB port used is the dedicated BIOS Flashback port. This port is often marked or colored differently. Connect the power supply to the motherboard and keep it on during the process.
Press and hold the Flashback button for the required time, usually three seconds. Do not remove the USB drive or power during the flashing. If the LED does not light or blink, try another USB stick or port.
Update Fails Or Hangs
Do not interrupt the update once it starts. Interruptions can corrupt the BIOS and damage the motherboard. If the update hangs for too long, wait at least 10 minutes before considering a reset.
Check the BIOS file for corruption. Download the file again from the official motherboard website. Use a different USB drive if the problem repeats.
Clear the CMOS by removing the battery or using the jumper to reset the BIOS settings. This may help if the motherboard is stuck in an update loop.

Credit: www.youtube.com
Tips For Safe Bios Updates
Updating your motherboard BIOS without a CPU can be tricky. It needs careful steps to avoid problems. Safe BIOS updates keep your system stable and prevent damage. Follow simple tips to protect your hardware and data during the process.
Small mistakes can cause big issues. Take time to prepare and follow these tips for safe BIOS updates.
Avoid Power Interruptions
Power loss during a BIOS update can harm your motherboard. Use a reliable power source to keep the update steady. Avoid updating during storms or unstable power conditions. A sudden shutdown may corrupt the BIOS and stop your PC from booting.
Use Official Bios Files Only
Download BIOS files only from your motherboard maker’s website. Official files match your model and have been tested for safety. Third-party or altered files can cause serious errors. Always check the version and compatibility before updating.
Frequently Asked Questions
How To Update Motherboard Bios Without A Cpu?
You can use the BIOS Flashback feature available on some motherboards. This allows updating BIOS via USB without installing the CPU. Check your motherboard manual for specific instructions and compatible USB drives before proceeding.
Can Bios Update Fix Cpu Compatibility Issues?
Yes, updating BIOS often resolves CPU compatibility problems. New BIOS versions add support for newer CPUs and fix bugs. Always download the latest BIOS version from the official motherboard website to ensure compatibility.
Is Bios Flashback Safe Without A Cpu Installed?
Yes, BIOS Flashback is designed to be safe without a CPU installed. It uses dedicated hardware on the motherboard to update BIOS. Ensure stable power supply and follow manufacturer guidelines to avoid update failures.
What Tools Are Needed To Update Bios Without Cpu?
You only need a USB flash drive formatted to FAT32 and the BIOS file from the motherboard’s website. Some motherboards require a specific USB port for BIOS Flashback. No extra software or CPU is needed.
Conclusion
Updating your motherboard BIOS without a CPU is possible and safe. Follow the steps carefully to avoid mistakes. Use the correct USB drive and files for your model. Stay patient and double-check each step before proceeding. This method saves time and helps with new CPU support.
Keep your system’s firmware up to date for better performance. Trust the process and take your time. You can do this even with basic computer skills. It’s a useful trick for PC builders and upgraders alike.