
Are you worried your CPU might not be working as it should? Knowing how to test your CPU can save you time, money, and frustration.
Whether you want to check for hidden problems or boost your computer’s performance, this guide will walk you through simple steps you can do right now. By the end, you’ll feel confident in understanding your CPU’s health and making smart decisions for your device.
Keep reading—your CPU’s performance depends on it!
Signs Of Cpu Problems
Recognizing signs of CPU problems helps keep your computer healthy. A faulty CPU can cause many issues. Identifying these signs early saves time and money. Watch for unusual system behavior that points to CPU trouble.
Slow System Response
Your computer takes longer to open programs or files. Simple tasks like typing or clicking feel delayed. The system may lag during normal use. This slow response can signal CPU stress or failure. Check CPU usage to confirm if the processor is the cause.
Frequent Crashes And Freezes
The computer shuts down or restarts without warning. Programs stop working and freeze often. This instability may result from CPU errors. Crashes during startup or heavy tasks are common signs. These problems suggest the CPU is struggling to process data properly.
Overheating And Noise
The computer feels hot even after short use. Fans run loudly and constantly. Excessive heat can damage the CPU over time. Noise from fans indicates the CPU is working too hard. Cooling issues often relate to CPU problems and need quick attention.
Credit: support.punchtechnology.co.uk
Preparing For Cpu Tests
Preparing for CPU tests helps get accurate results. It also protects your important files and system health. Follow simple steps before starting CPU tests. These steps keep your data safe and improve testing reliability.
Backup Important Data
Save your important files to an external drive or cloud. Testing can cause unexpected crashes or data loss. Backups keep your documents, photos, and work safe. This step avoids stress in case of system failure.
Update System Drivers
Check your device drivers and update them to the latest version. Updated drivers improve system stability and performance. This helps the CPU run smoothly during tests. Visit your hardware manufacturer’s website for updates.
Choose The Right Testing Tools
Select CPU testing tools that fit your needs. Some tools test speed, others check stability or temperature. Use trusted and well-reviewed software for best results. Avoid unknown or suspicious tools that may harm your system.
Using Built-in Diagnostics
Using built-in diagnostics is a simple way to check your CPU’s health. These tools come with your computer and do not require extra software. They help find issues like overheating, errors, or slow performance.
Built-in diagnostics are easy to run. They give quick results and guide you on what to do next. This section explains how to use Windows, BIOS/UEFI, and Mac diagnostics for CPU testing.
Windows Memory Diagnostic
Windows Memory Diagnostic mainly tests your computer’s RAM. But it can also show CPU problems indirectly. You start it by typing “Windows Memory Diagnostic” in the search box. Choose “Restart now and check for problems.”
The tool will restart your PC and scan for errors. If it finds issues, note the error codes. These may point to CPU or memory problems. You can then take action based on the results.
Bios/uefi Cpu Tests
BIOS or UEFI firmware often includes CPU tests. You access these by restarting your PC and pressing a key like F2, Del, or Esc. This opens the BIOS/UEFI setup menu.
Look for CPU or hardware diagnostics in the menu. Run the CPU test to check temperature, speed, and errors. The test usually takes a few minutes. It shows results on screen. Write down any warnings or failures.
Mac Hardware Test
Macs have a built-in tool called Apple Diagnostics or Apple Hardware Test. To run it, shut down your Mac. Turn it on and hold the D key until the test screen appears.
The test checks hardware including the CPU. It reports problems with simple codes and messages. Follow the instructions on screen to fix or report the issue. This tool helps keep your Mac running well.

Credit: softwareg.com.au
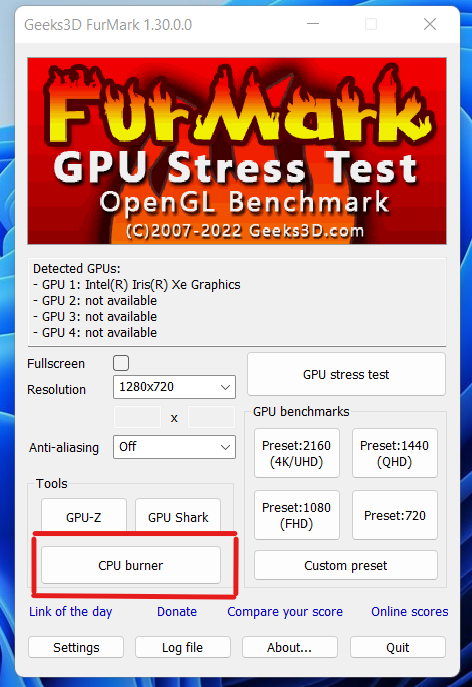
Stress Testing The Cpu
Stress testing the CPU checks its stability under heavy load. It helps find problems like overheating or crashes. This test pushes the processor to work at its limit for a period. It shows how well the CPU handles intense tasks. Stress tests are useful after installing new hardware or overclocking. They ensure the CPU runs smoothly without errors.
Popular Stress Test Software
Several programs can stress test the CPU. Prime95 is popular for its rigorous calculations. AIDA64 offers detailed system diagnostics and stress tests. IntelBurnTest is simple and fast for quick checks. Cinebench tests CPU performance using real-world tasks. Each tool targets different CPU aspects for thorough testing.
Running Stress Tests Safely
Start with monitoring your CPU temperature. Use software like HWMonitor during the test. Keep your computer in a cool, ventilated place. Stop the test if temperatures rise above safe limits. Stress tests can last from a few minutes to hours. Always save your work before starting a test. Avoid running other heavy programs at the same time.
Interpreting Stress Test Results
Look for system stability during the test. Crashes or errors mean the CPU struggles under load. High temperatures above 85°C can cause damage. If the test finishes without issues, the CPU is stable. Low temperatures and no crashes indicate good cooling and setup. Repeat tests for consistent results before trusting the CPU fully.
Monitoring Cpu Temperatures
Monitoring CPU temperatures is important for keeping your computer safe and working well. The CPU can get very hot when it runs many tasks. Too much heat can cause your computer to slow down or even stop working.
Checking the temperature helps you know if the CPU is too hot. This way, you can take steps to cool it down. It also helps to avoid damage to your computer parts. Let’s explore how to understand and watch your CPU temperature.
Recommended Temperature Ranges
CPUs usually work best below 75°C (167°F). Normal use keeps the temperature between 30°C to 50°C (86°F to 122°F). When the CPU is under heavy load, it may reach up to 80°C (176°F). Temperatures above 90°C (194°F) are too high and can harm the CPU. Keeping the CPU temperature low helps it last longer and run faster.
Tools For Temperature Monitoring
Many free tools show your CPU temperature. Programs like HWMonitor and Core Temp are popular choices. These apps display real-time temperature and other details. Some PC makers include software to check temperatures too. BIOS settings also provide CPU temperature info. Use these tools to watch your CPU health anytime.
Preventing Overheating
Good airflow inside your computer case lowers CPU heat. Clean dust from fans and vents regularly. Use a quality CPU cooler or heatsink for better heat removal. Avoid blocking air vents on your laptop or PC. Close unused programs to reduce CPU work and heat. Keeping your CPU cool helps your computer run smoothly and safely.

Credit: recoverit.wondershare.com
Benchmarking Cpu Performance
Benchmarking CPU performance helps you understand how fast your processor runs. It measures the CPU’s speed and efficiency by running tests. These tests give scores that show the CPU’s power. This information helps you compare different CPUs or check if your CPU works well.
Choosing Benchmark Programs
Select benchmark programs that fit your needs. Some tests focus on gaming, others on multitasking or general speed. Use popular programs like Cinebench, Geekbench, or PassMark. These tools provide clear and reliable results. Avoid unknown or outdated programs for better accuracy.
Comparing Benchmark Scores
Look at the scores from your CPU test. Higher scores mean better performance. Compare your results with other CPUs in the same class. This helps you see if your CPU is fast or slow. Use online databases to find scores for many processors. This way, you get a clear performance picture.
Identifying Bottlenecks
Benchmark results can show where your system slows down. A CPU bottleneck means the processor limits overall speed. Check if your CPU score is low compared to other parts like the GPU or RAM. Fixing bottlenecks improves your computer’s speed. Sometimes upgrading the CPU or optimizing settings helps.
Troubleshooting Common Cpu Issues
Troubleshooting common CPU issues helps keep your computer running smoothly. Problems like overheating, driver conflicts, and hardware failure can slow down or stop your CPU. Fixing these issues quickly saves time and avoids bigger damage. This guide explains easy steps to solve typical CPU problems.
Fixing Overheating Problems
Overheating is a frequent CPU issue. It causes your computer to shut down suddenly or run very slow. Clean dust from fans and heat sinks. Check if the fan spins properly. Apply new thermal paste between the CPU and cooler. Make sure your PC case has good airflow. Use software to monitor CPU temperature. Keep it below 80°C to avoid damage.
Resolving Driver Conflicts
Driver conflicts can cause your CPU to behave oddly. Update your motherboard and CPU drivers from the official website. Remove old or unused drivers in Device Manager. Use safe mode to uninstall problematic drivers. Restart your PC after changes. Correct drivers ensure smooth communication between hardware and software.
Replacing Faulty Hardware
Sometimes the CPU or related parts fail and need replacement. Test your RAM and power supply first. Faulty RAM or PSU can mimic CPU problems. If the CPU is damaged, replace it carefully. Check motherboard compatibility before buying a new CPU. Handle parts with care to avoid static damage. After replacement, test your system for stability.
When To Seek Professional Help
Testing your CPU can solve many issues at home. Some problems need expert help. Knowing when to call a professional saves time and avoids damage. This section guides you on spotting signs and choosing the right technician.
Signs Beyond Diy Fixes
Overheating that does not stop after cleaning is a red flag. Strange noises from the fan or motherboard need expert checks. Frequent crashes or blue screens show deep problems. BIOS errors or failure to boot often require special tools. If tests show unusual voltages or temperatures, avoid further DIY. Physical damage like bent pins also calls for help. Complex software errors beyond simple resets need expert skills.
Choosing A Reliable Technician
Pick a technician with good reviews and experience in CPUs. Confirm they use proper testing tools and methods. Ask about warranty or service guarantees on repairs. Choose a service center with clear pricing and no hidden fees. Look for certified technicians who follow safety standards. A good technician explains problems in simple words. Fast and friendly service shows professionalism and care.
Frequently Asked Questions
How Do I Test My Cpu Performance?
Use benchmarking tools like Cinebench or Geekbench. These apps measure CPU speed and efficiency accurately. They provide scores to compare your CPU with others.
What Software Is Best For Cpu Stress Testing?
Prime95 and AIDA64 are popular for stress testing. They push your CPU to its limits to check stability and temperature under load.
How Can I Check Cpu Temperature Safely?
Use monitoring tools like HWMonitor or Core Temp. These apps display real-time CPU temperatures to prevent overheating and ensure safe operation.
Why Is Cpu Testing Important For My Pc?
CPU testing detects hardware issues and prevents crashes. It helps maintain system stability and improves overall computer performance.
Conclusion
Testing a CPU helps ensure your computer runs smoothly. You can spot problems early and avoid bigger issues. Simple tests reveal if the CPU handles tasks well. Keep your system stable by checking the CPU regularly. These steps save time and protect your device.
Stay confident in your computer’s performance with easy CPU tests. Try these methods to keep your PC healthy and fast.