
Are you ready to upgrade or replace your graphics card but unsure how to safely remove your GPU? Taking a GPU out might seem tricky if you haven’t done it before.
But with the right steps, you can do it quickly and without damaging your computer. In this guide, you’ll learn exactly what to do, what tools you need, and the simple tricks to make the process smooth. Keep reading, and you’ll feel confident handling your GPU like a pro.
Credit: docs.oracle.com
Prepare Your Workspace
Clear a flat surface and gather tools like a screwdriver and anti-static wristband. Turn off your computer and unplug all cables before starting. Organize parts carefully to avoid losing screws or damaging components.
Gather Necessary Tools
Start by collecting all tools needed for the task. A screwdriver is usually essential. Most GPUs require a Phillips-head screwdriver.
Also, have a clean cloth or small container for screws. This prevents losing tiny parts. Prepare a flashlight if your workspace is dark.
Ensure Static-free Environment
Static electricity can damage computer parts easily. Work on a hard, non-carpeted surface to reduce static risk.
Use an anti-static wrist strap if possible. Connect it to a grounded metal object. This keeps static electricity away from your GPU.
Touch a metal part of your computer case before handling the GPU. This helps discharge any static buildup on your body.
Power Down And Unplug
Powering down and unplugging your computer is the first and most important step before removing a GPU. This ensures your safety and prevents damage to the hardware. Always handle computer parts with care and avoid rushing through this process.
Taking time to shut down properly and disconnect all power sources protects both you and your device. Follow these clear steps to prepare your computer for GPU removal.
Shut Down The Computer
Press the Start button on your desktop. Select the Shut Down option from the menu. Wait for all lights and fans to stop. Do not open the case while the computer is still running. This avoids electrical shocks and hardware damage.
Disconnect Power Cables
Unplug the main power cable from the wall outlet or power strip. Then, open the computer case carefully. Disconnect any power connectors attached to the GPU. These cables usually come from the power supply unit. Removing power stops electricity flow to the GPU and other components.
Open The Computer Case
Before removing a GPU, open the computer case carefully. This step gives you access to the inside parts. It also helps avoid damage to the hardware. Follow simple steps to open the case safely.
Take time to prepare your workspace. Use a clean, flat surface. Make sure the computer is turned off and unplugged. Ground yourself to stop static electricity.
Locate And Remove Case Screws
Find the screws that hold the case panels in place. Most cases have screws at the back. Use a screwdriver that fits the screws well. Turn screws counterclockwise to loosen them. Keep screws safe for later use.
Handle Case Panels Carefully
Gently slide or lift the case panel away from the computer. Do not force it; panels can be delicate. Hold panels by the edges to avoid fingerprints or damage. Place the panel on a soft surface while working inside the case.
Credit: www.youtube.com
Disconnect Gpu Power Connectors
Disconnecting the GPU power connectors is an important step before removing the graphics card. It ensures the card is not receiving electricity. This step protects both you and your computer parts. Always handle the connectors with care to avoid damage.
Identify Power Cables
Look for cables plugged into the GPU. These cables usually come from the power supply unit. They have 6-pin, 8-pin, or a combination of connectors. Check the connector shape and size. This helps to find the correct cables that power the GPU.
Release Cable Clips Safely
Most power connectors have a small clip holding them in place. Press the clip gently to unlock the cable. Do not pull the cable without pressing the clip. Pulling hard can break the clip or damage the cable. Carefully pull the connector straight out after releasing the clip.
Remove Securing Screws
Removing the securing screws is a key step to take your GPU out safely. These screws hold the graphics card firmly to the case. Without removing them, the card will not come out easily. Handle this step carefully to avoid any damage.
Locate Mounting Screws
Open your PC case to see the GPU area clearly. Look for screws on the metal bracket that holds the GPU. Usually, these screws are near the back of the case. You may find one or two screws depending on your PC model. Use a flashlight if the area is dark.
Unscrew Without Damaging Components
Use a proper screwdriver to loosen the screws. Turn the screwdriver slowly to avoid stripping the screw heads. Keep the screws in a safe place for later use. Avoid touching other parts inside the PC to prevent damage. Take your time and be gentle during this process.
Release The Pcie Slot Clip
Releasing the PCIe slot clip is a key step to remove your GPU safely. This clip holds the graphics card firmly in the motherboard. You must unlock it carefully to avoid damage. The process is simple but requires attention.
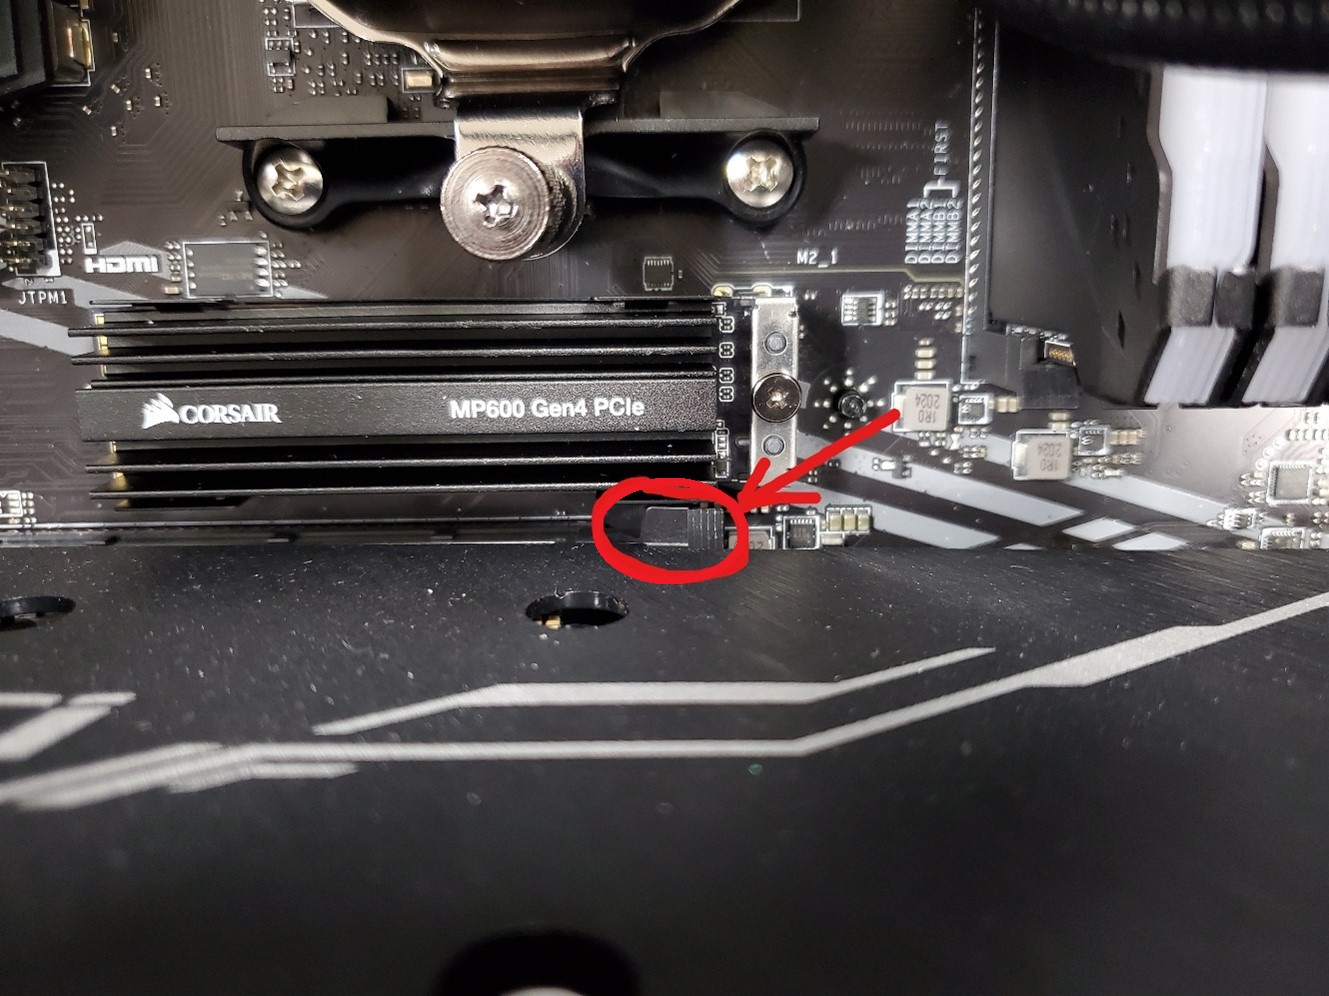
Find The Slot Latch
The slot latch is a small plastic tab at the end of the PCIe slot. It keeps the GPU locked in place. Look closely at the motherboard where your GPU connects. The latch usually points upward or sideways. Knowing its location helps you release the GPU easily.
Gently Unlock The Gpu
Press the latch gently to release the GPU. Avoid using too much force to prevent breaking the clip. You might need to push the tab down or to the side. Hold the card with your other hand. Once the clip is free, the GPU will move slightly. Now, you can pull the GPU out carefully.
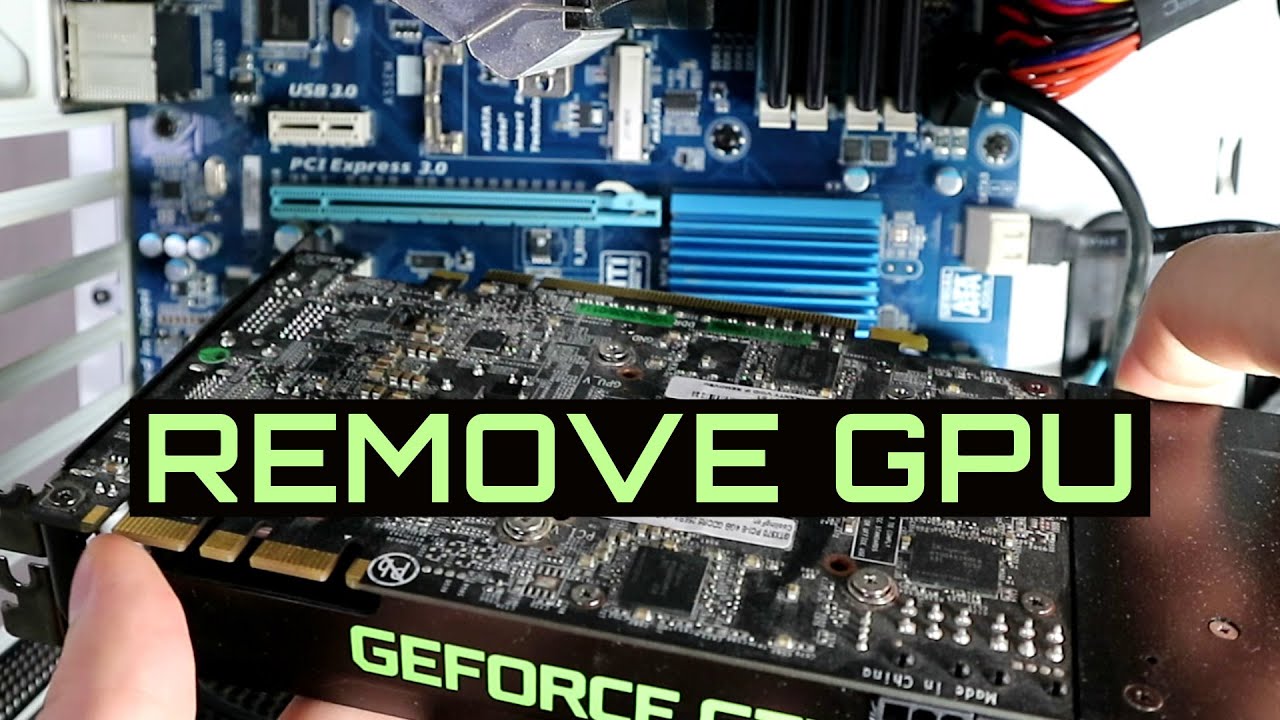
Extract The Gpu
Extracting the GPU is a key step in upgrading or cleaning your computer. This process requires care to avoid damage to the card or motherboard. Follow simple steps to remove the GPU safely and easily.
Grip The Card Firmly
Hold the GPU by its edges. Avoid touching the gold connectors or chips. Use both hands for a steady grip. This prevents dropping or bending the card. Make sure your hands are dry and clean.
Pull Out With Even Pressure
Slowly pull the GPU straight out of the slot. Apply steady, even pressure on both ends. Do not wiggle or twist the card. This helps prevent damage to the slot or the GPU. If the card feels stuck, check for any screws or clips still attached.
Store Or Replace The Gpu
After removing your GPU, you might want to store it safely or install a new one. Proper care keeps your old GPU in good condition. It also prepares your computer for the next GPU upgrade. Follow simple steps to protect your hardware and avoid damage.
Use Anti-static Bags
Place the GPU in an anti-static bag to protect it. These bags stop static electricity from harming the GPU’s circuits. Avoid touching the metal contacts or chips on the card. Keep the GPU in a cool, dry place inside the bag. This prevents dust and moisture buildup that can cause damage.
Prepare For New Installation
Clean the PCIe slot before installing a new GPU. Remove dust and debris with a soft brush or compressed air. Check the new GPU for any visible damage. Align the card carefully with the slot and press down gently. Secure the GPU with screws to keep it stable.
Credit: www.corsair.com
Frequently Asked Questions
How Do I Safely Remove A Gpu From My Pc?
First, shut down and unplug your computer. Then, open the case and disconnect all power cables from the GPU. Unscrew the GPU from the case and release the PCIe slot latch. Gently pull the GPU out straight to avoid damage.
What Tools Do I Need To Take Out A Gpu?
You typically need a Phillips-head screwdriver to remove screws securing the GPU. An anti-static wrist strap is recommended to prevent static damage. No other special tools are usually required.
Can I Remove The Gpu Without Unplugging The Power Supply?
No, always unplug your computer from the power source before removing the GPU. This prevents electric shock and protects your hardware from damage.
How Do I Avoid Damaging My Gpu During Removal?
Handle the GPU by its edges and avoid touching the gold PCIe connector. Release the retention clip on the PCIe slot before pulling out the card. Work slowly and avoid using excessive force.
Conclusion
Removing a GPU can be simple with the right steps. Always power off your computer first. Take your time and be gentle with parts. Keep screws and cables safe during the process. Handling hardware carefully helps avoid damage. Now, you are ready to install or replace your GPU.
Following these tips makes the task less stressful. Stay calm, and you will succeed.