
Setting up your CPU fan might seem tricky at first, but it’s one of the easiest ways to keep your computer running cool and fast. If your CPU overheats, it can slow down or even damage your system.
That’s why getting your fan installed correctly is so important. In this guide, you’ll learn simple steps to set up your CPU fan quickly and safely. By the end, you’ll feel confident that your computer is protected from overheating. Keep reading—you’re just minutes away from boosting your PC’s performance and lifespan.
Choosing The Right Cpu Fan
Choosing the right CPU fan is key for your computer’s health. It keeps your CPU cool and stops it from overheating. A good fan also lowers noise and uses less power. Picking the best fan means knowing your needs and the type of fan that fits your setup.
Types Of Cpu Fans
There are mainly two types of CPU fans: air coolers and liquid coolers. Air coolers use a fan and heat sink to move heat away from the CPU. They are common and easy to install. Liquid coolers use liquid to carry heat away faster. They are quieter and better for high-performance CPUs. Choose based on your budget and cooling needs.
Factors To Consider
Look at noise level first. Some fans are quieter than others. Size matters too. The fan must fit inside your computer case. Check the airflow rating. Higher airflow means better cooling. Power consumption is another factor. Lower power fans save energy and reduce heat inside the case.
Compatibility With Your Cpu
Not all fans work with every CPU. Check the socket type of your CPU. The fan must match this socket to fit properly. Also, check the fan’s mounting system. Some fans come with adapters for different sockets. Make sure the fan size works with your motherboard and case space.
Preparing Your Workspace
Preparing your workspace is the first step to setting up a CPU fan. A neat and organized area helps you work safely and efficiently. It also protects your computer parts from damage. Take time to get everything ready before you start the installation.
Gathering Necessary Tools
Collect all tools you need before opening your computer. Usually, a screwdriver is essential. Some fans come with extra screws or brackets. Have a small container to keep screws safe. Having tools ready saves time and avoids frustration.
Ensuring A Clean Environment
Work in a clean space free from dust and dirt. Dust can harm computer parts and reduce fan performance. Use a soft cloth to wipe your workspace. Avoid carpeted floors to reduce static electricity. Clean surroundings protect your CPU and other components.
Powering Down And Unplugging
Turn off your computer completely before starting. Unplug the power cable from the outlet. Disconnect all other connected devices. This step prevents electric shock and hardware damage. Safety first—never work on a powered device.
Removing The Old Cpu Fan
Removing the old CPU fan is an important first step in setting up a new one. It ensures your computer stays cool and runs smoothly. Doing this carefully prevents damage to your CPU and motherboard.
Take your time and follow each step closely. Proper removal helps prepare the surface for the new fan, improving its performance.
Disconnecting The Power Cable
Locate the fan’s power cable connected to the motherboard. Gently pull the connector straight out to avoid bending pins. Do not tug on the wires themselves. This step cuts power to the fan and allows safe removal.
Unscrewing The Fan
Find the screws or clips holding the fan in place. Use a screwdriver to remove each screw carefully. Keep the screws in a safe place for later use. Slowly lift the fan away from the CPU once all screws are out.
Cleaning The Cpu Surface
Use a soft cloth and rubbing alcohol to clean old thermal paste from the CPU. Remove all residue to create a smooth surface. This step helps the new fan sit properly and cool better. Let the CPU dry completely before installing the new fan.

Credit: www.youtube.com
Applying Thermal Paste
Applying thermal paste is an important step when setting up a CPU fan. It helps improve heat transfer between the CPU and the cooler. This keeps the processor cool and prevents overheating.
Thermal paste fills tiny gaps between the CPU and the fan base. These gaps can trap air, which stops heat from moving efficiently. A thin, even layer of paste allows heat to flow smoothly.
Choosing The Right Thermal Paste
Select a thermal paste that fits your needs. Some pastes are made for high performance, while others suit everyday use. Look for paste with good heat conductivity. Check reviews for trusted brands. Avoid cheap pastes that dry out fast or are hard to spread.
Proper Application Techniques
Start by cleaning the CPU surface with alcohol and a soft cloth. Apply a small pea-sized dot of thermal paste in the center of the CPU. When you attach the fan, the paste will spread evenly. Do not use too much paste. A thin layer is enough to cover the surface.
Avoiding Common Mistakes
Do not apply too much thermal paste. Excess paste can cause overheating. Avoid touching the paste with your fingers. Oils from skin reduce its effectiveness. Do not skip cleaning the CPU before applying paste. Dirty surfaces reduce heat transfer. Tighten the fan evenly to spread the paste properly.
Installing The New Cpu Fan
Installing the new CPU fan is a key step in keeping your computer cool. This process helps prevent overheating and ensures your PC runs smoothly. Follow the steps carefully to avoid damage and get the best cooling effect.
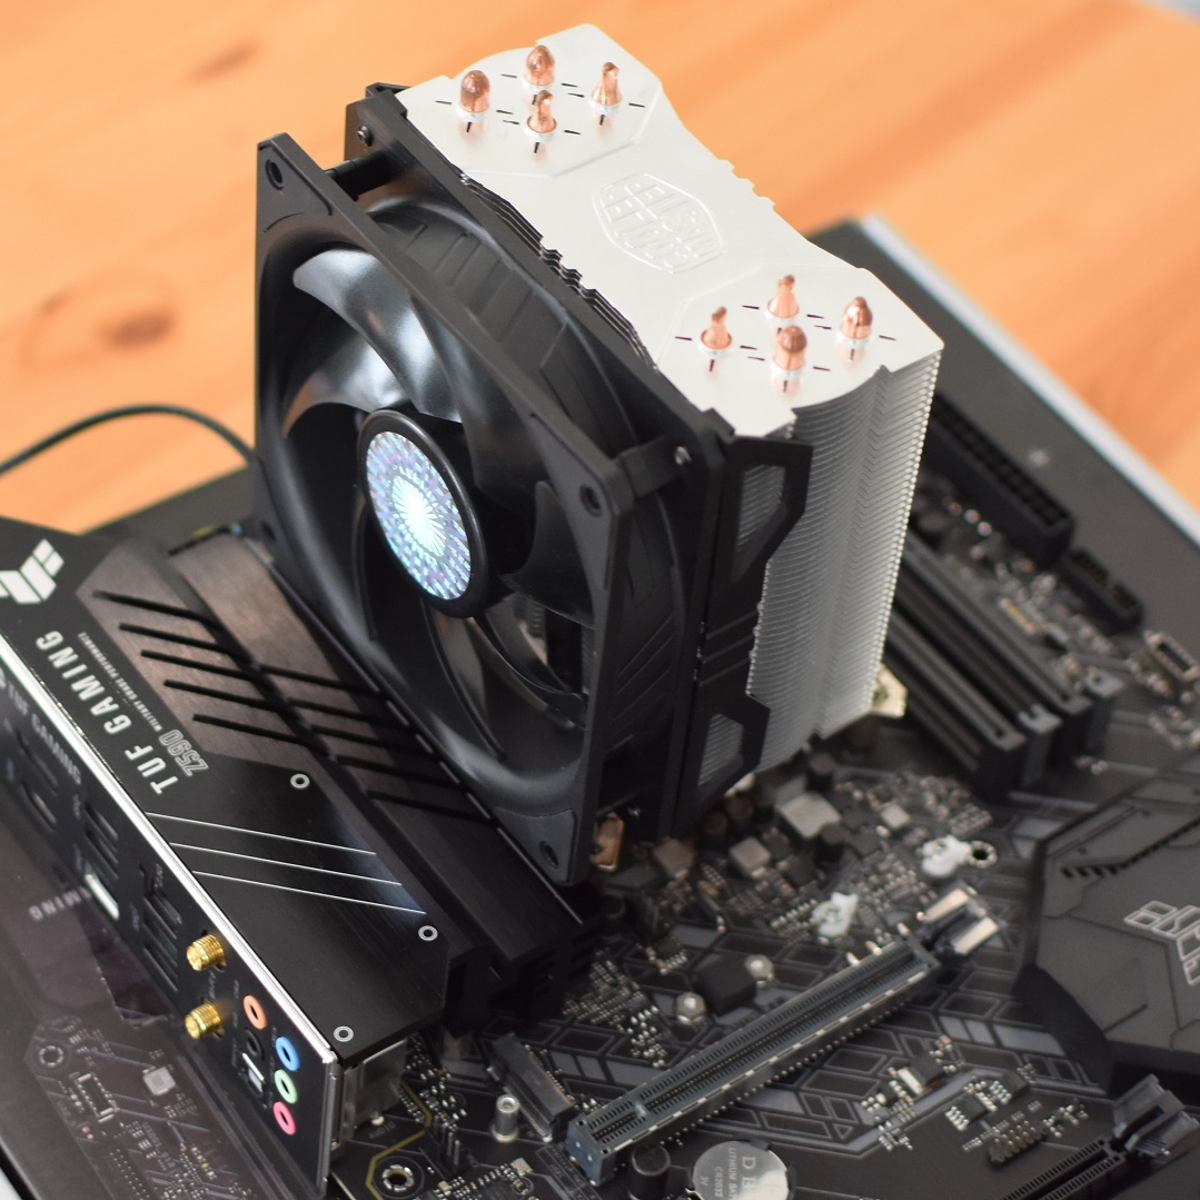
Positioning The Fan Correctly
Place the fan so it blows air directly onto the CPU. The fan usually sits on top of the CPU or on the heatsink. Make sure the fan’s airflow direction matches your case’s airflow setup. Check the arrows on the fan frame for guidance. Proper placement improves cooling performance.
Securing The Fan In Place
Use the screws or clips that came with the fan to fix it firmly. Tighten screws evenly to avoid pressure on the CPU. Do not overtighten, as it can damage the motherboard. The fan should not move or wobble after installation. A stable fan means consistent cooling.
Connecting The Power Cable
Locate the CPU fan header on your motherboard. It is usually labeled “CPU_FAN.” Attach the fan’s power cable to this header gently. Ensure the connector fits snugly to avoid loose connections. A proper connection allows the motherboard to control fan speed.
Testing The Fan Performance
Testing the fan performance is a key step after installing the CPU fan. It ensures the fan works correctly and keeps the CPU cool. This step helps avoid overheating and system crashes. Here is how to check if your CPU fan runs well.
Powering On The System
Start by turning on your computer. Listen closely for the fan sound. A spinning noise means the fan is working. If silent, the fan might not be connected properly. Turn off the system and check the fan cable.
Monitoring Fan Speeds
Use software tools to check the fan speed. Programs like HWMonitor or SpeedFan show fan RPM (rotations per minute). A healthy CPU fan should spin between 1000 and 3000 RPM. Speeds too low or zero indicate a problem.
Checking Temperature Levels
Watch the CPU temperature while the fan runs. Good cooling keeps the CPU under 70°C. If temperatures rise quickly, the fan might not be working well. Adjust the fan settings or recheck installation for better airflow.
Maintaining Optimal Cooling
Maintaining optimal cooling is key to keeping your CPU and computer safe. A well-cooled CPU runs faster and lasts longer. Poor cooling can cause overheating, slowdowns, or damage. Regular care helps prevent these problems. Follow simple steps to keep your CPU fan working well.
Regular Cleaning Tips
Dust buildup blocks airflow and reduces fan speed. Clean your CPU fan every few months. Use a soft brush or compressed air to remove dust. Hold the fan blades still to avoid damage while cleaning. Keep vents and filters clear for better airflow.
Upgrading Fans When Needed
Older fans may lose power and make more noise. Consider upgrading to a quiet, high-performance fan. Check fan size and connector type before buying. New fans often improve cooling and reduce noise. Replace fans that spin slowly or fail to start.
Improving Case Airflow
Good airflow inside the case moves heat away from components. Arrange cables neatly to avoid blocking vents. Add extra case fans if space allows. Place intake fans at the front and exhaust fans at the back. Ensure enough space around your computer for fresh air.
Credit: www.rockpapershotgun.com
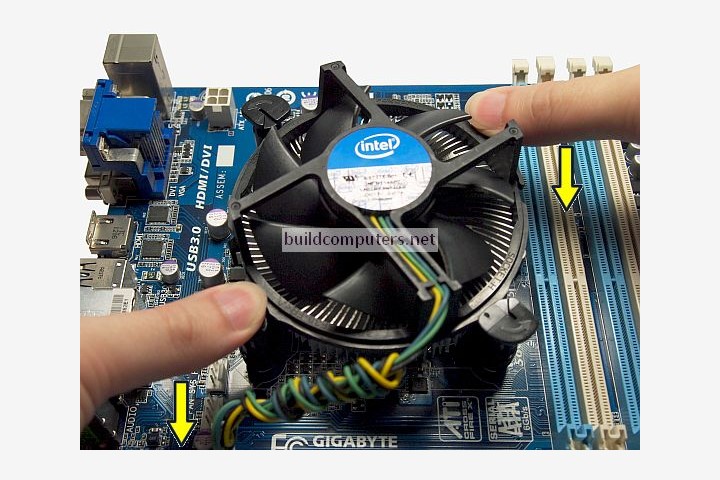
Credit: www.buildcomputers.net
Frequently Asked Questions
How Do I Connect A Cpu Fan To The Motherboard?
Locate the CPU fan header on the motherboard. Align the fan connector pins and gently press it in. Ensure it’s firmly attached for proper power supply.
What Tools Are Needed To Install A Cpu Fan?
Typically, a screwdriver is required to secure the fan. Some models use clips or screws. Always check your fan’s installation guide.
Can I Use Any Cpu Fan For My Processor?
No, CPU fans must be compatible with your CPU socket and size. Check the fan’s specifications before purchasing to ensure a proper fit.
How Do I Know If My Cpu Fan Is Working?
Listen for fan noise or check BIOS hardware monitoring. You can also feel airflow coming from the fan while the PC is on.
Conclusion
Setting up a CPU fan is simpler than it seems. Follow the steps carefully and take your time. A well-installed fan keeps your computer cool and running smooth. Check the fan’s position and connection before closing your case. Regular cleaning helps your fan last longer and work better.
Stay patient and double-check everything for best results. Proper cooling protects your CPU from damage and keeps performance steady. Now, your computer can stay cool during heavy use. Simple steps lead to a big difference in your PC’s health.