
Are you ready to give your PC a powerful boost? Replacing your CPU might sound tricky, but it’s easier than you think—and it can make a huge difference in your computer’s speed and performance.
Whether you want to run faster programs, play games smoother, or simply extend your PC’s life, changing the CPU is a smart move. In this guide, you’ll find simple, step-by-step instructions to help you swap out your old processor safely and confidently.
Keep reading, and you’ll soon have a faster, more reliable computer right at your fingertips.
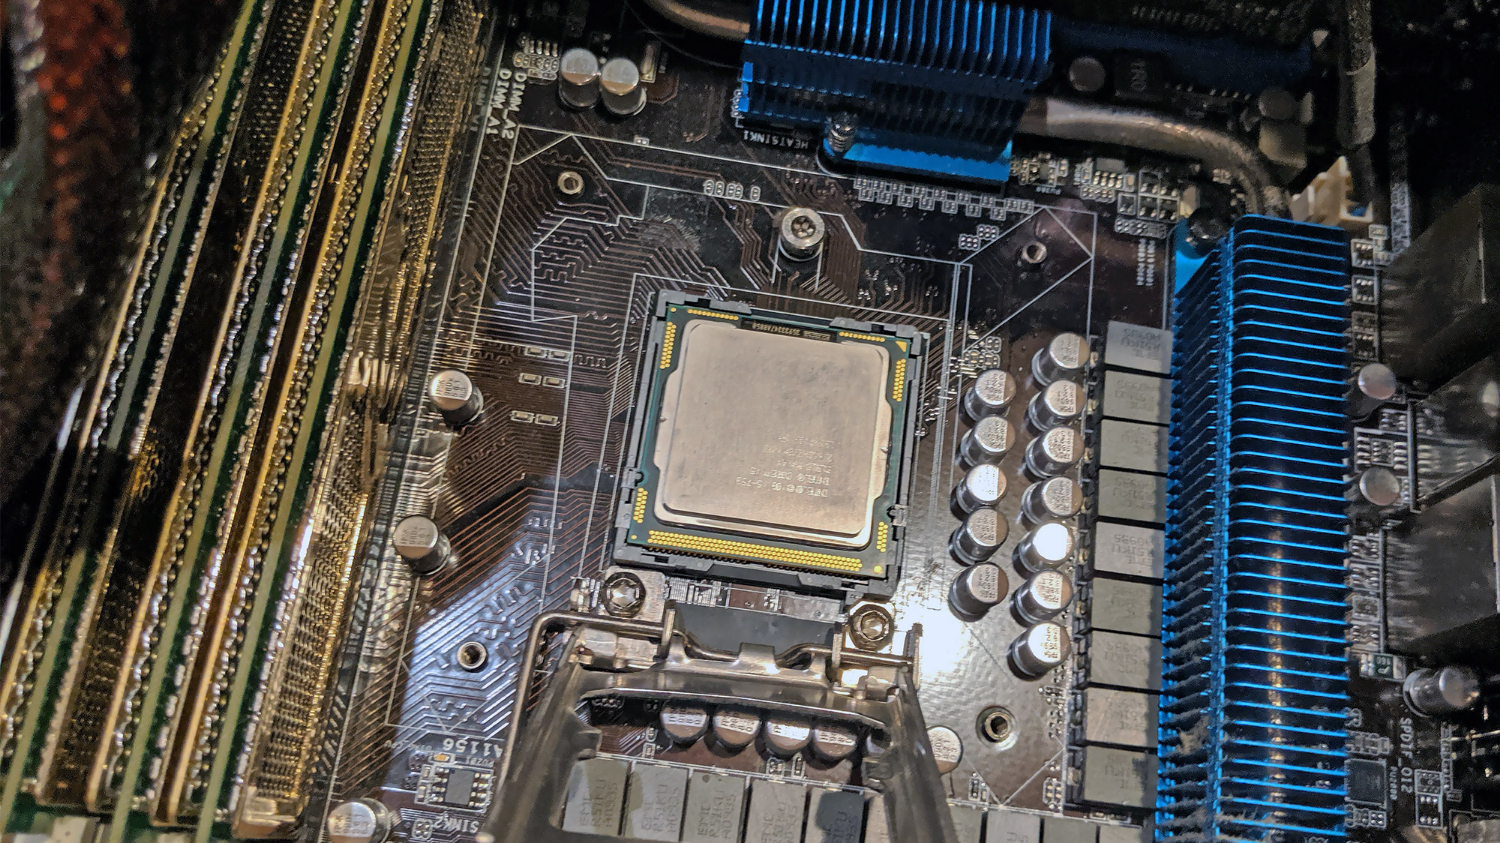
Credit: www.tomsguide.com
Tools And Materials Needed
Replacing a CPU in a PC requires the right tools and materials. Having these ready makes the process smooth and safe. This section covers what you need before starting your CPU replacement.
Essential Tools
A screwdriver set is necessary, especially a Phillips-head screwdriver. You will need it to open the PC case and remove the CPU cooler. An anti-static wrist strap helps prevent damage from static electricity. Thermal paste is important for heat transfer between the CPU and cooler. Clean cloth or isopropyl alcohol wipes remove old thermal paste. Small containers or trays keep screws safe and organized. Patience and steady hands also count as vital tools.
Compatible Cpu Options
Choose a CPU that fits your motherboard socket type. Check your motherboard manual or manufacturer website for compatibility. Match the CPU with your system’s power and cooling capabilities. Consider the number of cores and clock speed you need. Budget and performance balance matter for the best choice. Avoid CPUs that require BIOS updates unless you can update easily. Confirm that your PC case has enough space for the new CPU cooler.
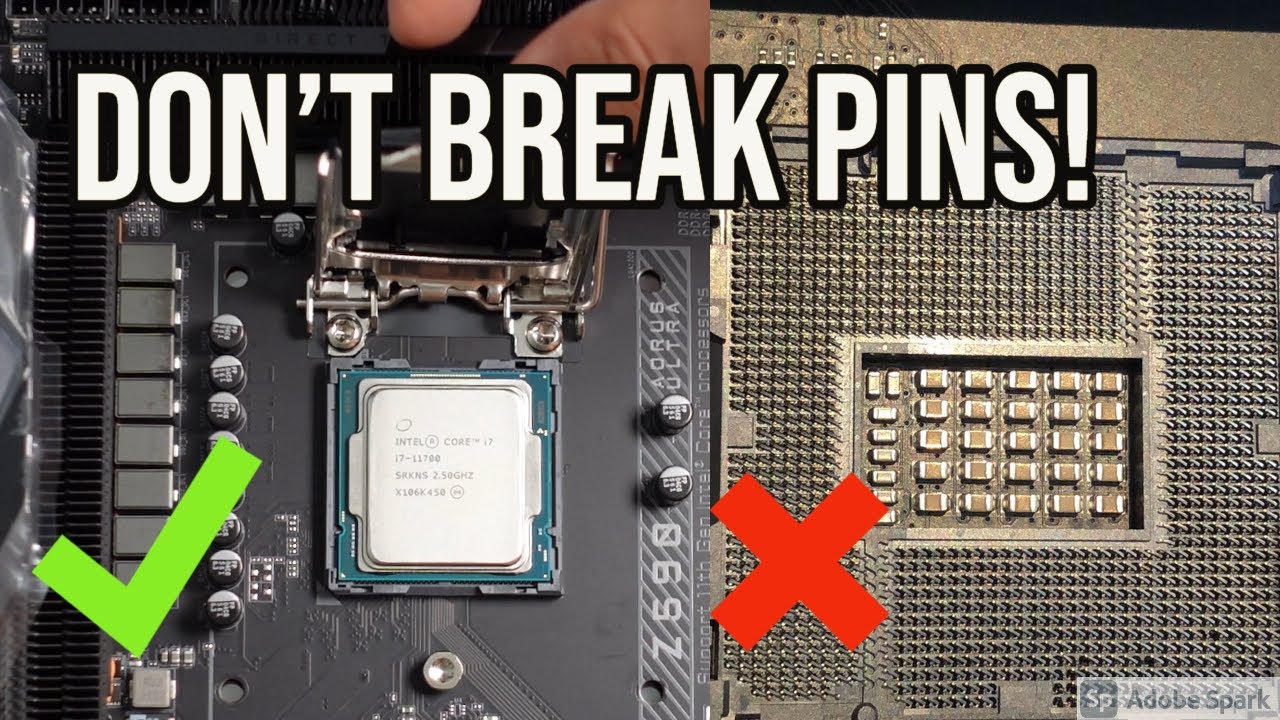
Credit: www.youtube.com
Preparing Your Workspace
Preparing your workspace is the first step to replace a CPU safely and smoothly. A clean and organized area helps avoid mistakes and damage to your PC parts. Clear a large, flat surface to work on. Good lighting is important to see small parts clearly. Keep distractions away to stay focused during the process.
Static Safety Measures
Static electricity can harm your PC components. Touch a metal object before handling parts to discharge static. Use an anti-static wrist strap if available. Avoid working on carpeted floors. Place your PC on a non-conductive surface like a wooden table. Handle the CPU and motherboard by their edges only. Keep static-sensitive parts in anti-static bags until installation.
Organizing Your Tools
Gather all tools before starting the replacement. A small Phillips screwdriver is usually needed. Have thermal paste ready for the new CPU. Use a clean cloth or paper towel to clean old thermal paste. Arrange tools and parts close to your workspace. Keep screws and small parts in a container. This prevents losing them during the process.
Removing The Old Cpu
Removing the old CPU is a key step in replacing it. Do this carefully to avoid damage to your PC parts. Take your time and follow each step closely.
Start by opening your PC case and preparing a clean workspace. Use an anti-static wrist strap if available to protect your components from static electricity.
Accessing The Cpu Socket
Locate the CPU socket on the motherboard. It is usually under the cooling system. Remove any cables or parts blocking access to the socket. Be gentle to avoid breaking anything.
Detaching The Cooling System
The cooling system keeps your CPU cool. It may be a fan or liquid cooler. Unscrew or unclip the cooler carefully. Pull it straight up to avoid damaging the CPU or socket.
Some coolers have thermal paste between the CPU and cooler. If stuck, twist gently to loosen it. Avoid pulling hard to prevent damage.
Unlocking And Removing The Cpu
Find the small lever or latch next to the CPU socket. Lift it to unlock the CPU. The CPU will release slightly from the socket.
Hold the CPU by the edges and lift it straight up. Avoid touching the gold pins or contact points. Place the old CPU on an anti-static surface safely.
Installing The New Cpu
Installing the new CPU is a key step in upgrading your PC. It needs careful handling to avoid damage. Follow clear steps to fit the CPU perfectly.
Proper installation helps your computer run smoothly and stay stable. Take your time during this process.
Aligning The Cpu Correctly
Check the CPU and socket for a small triangle mark. Match these triangles to line up the CPU right. Never force the CPU into the socket. It should fit gently and sit flat.
Look at the pins or pads; they must face down. Double-check the position before moving to the next step.
Securing The Cpu In Socket
Lower the CPU retention arm slowly. This arm holds the CPU firmly in place. Press it down until it locks under the hook.
Make sure the CPU does not move after locking. A secure CPU prevents problems during boot and use.
Applying Thermal Paste
Applying thermal paste is a key step when replacing a CPU in your PC. It helps transfer heat from the CPU to the cooler. Without it, your CPU can overheat and get damaged. Using the right amount and type of paste is important. The goal is to create a thin, even layer that fills all small gaps.
Choosing The Right Thermal Paste
Not all thermal pastes work the same. Some are better at conducting heat. Some last longer without drying out. Pick a paste made for CPUs. Look for one with good reviews and high thermal conductivity. Avoid cheap or old paste. It can dry up quickly and reduce cooling.
Proper Application Techniques
Clean the CPU surface before applying paste. Use a lint-free cloth and rubbing alcohol. Apply a small pea-sized dot in the center of the CPU. When you place the cooler, it spreads the paste evenly. Too much paste can cause overheating. Too little leaves gaps that trap heat. Avoid spreading paste by hand. Let the pressure from the cooler do the work.
Reattaching The Cooling System
After installing the new CPU, reattaching the cooling system is crucial. It keeps the processor cool and prevents overheating. Proper reattachment ensures your PC runs smoothly and lasts longer.
Mounting The Heat Sink
First, clean the old thermal paste from the heat sink and CPU surface. Use isopropyl alcohol and a soft cloth. Apply a small amount of new thermal paste on the CPU. Place the heat sink carefully on top. Secure it firmly using the mounting clips or screws. Avoid moving the heat sink too much to keep the paste even.
Connecting Fans And Power
Next, reconnect the cooling fan to the motherboard. Find the fan header labeled “CPU_FAN.” Plug the fan cable firmly into this socket. Check that the fan wires are clear of other components. Proper connection ensures the fan spins when the PC powers on. This step prevents overheating and keeps your CPU safe.
Testing And Troubleshooting
After replacing your CPU, testing and troubleshooting are essential steps. These steps confirm the new CPU works well. They help identify any problems early. Follow these simple checks to ensure your PC runs smoothly.
Booting The Pc
Turn on your PC after installing the new CPU. Watch the screen for any signs of life. Listen for beeps or fan noise. If the PC boots up and shows the logo, the CPU is likely installed correctly. If it does not start, check all connections again.
Checking Bios Settings
Enter the BIOS setup by pressing the correct key during boot. Look for the CPU information to confirm the new processor is detected. Make sure the BIOS version supports your new CPU. Adjust settings like CPU frequency or voltage only if needed.
Common Issues And Fixes
The PC may fail to boot or show errors after CPU replacement. Check for proper CPU seating and thermal paste application. Ensure the power supply meets the new CPU requirements. Reset the BIOS by removing the CMOS battery if settings cause problems.

Credit: www.instructables.com
Frequently Asked Questions
How Do I Know If My Cpu Needs Replacement?
If your PC shows frequent crashes, slow performance, or overheating, your CPU might need replacement. Also, outdated CPUs struggle with new software. Check compatibility and symptoms before deciding to replace the CPU.
What Tools Are Needed To Replace A Cpu?
You need a screwdriver, thermal paste, and an anti-static wrist strap. These tools help safely remove the old CPU and install the new one without damage.
How To Safely Remove The Old Cpu From The Motherboard?
Power off and unplug your PC first. Release the CPU socket lever carefully. Gently lift the CPU straight out to avoid bending pins or damaging the socket.
Can I Reuse My Old Cpu Cooler When Replacing The Cpu?
Yes, if your old cooler fits the new CPU socket and is in good condition. Clean off old thermal paste and apply new paste before reattaching the cooler.
Conclusion
Replacing a CPU in your PC is simple with the right steps. Take your time and follow each part carefully. Always handle components gently to avoid damage. Double-check your work before turning the PC on. A better CPU can improve your computer’s speed and performance.
Keep your tools and workspace clean and organized. Now, you can confidently upgrade your PC’s heart. Ready for a faster, smoother computing experience?