
Is your computer making strange noises or overheating? Your CPU fan might be the culprit.
Knowing how to replace your CPU fan can save you time, money, and the hassle of a broken PC. In this guide, you’ll learn simple, step-by-step instructions to swap out your old fan and keep your system running cool. Ready to fix your computer and boost its performance?
Let’s dive in and make your CPU fan replacement easy and stress-free.
Signs Of A Faulty Cpu Fan
The CPU fan keeps your computer cool. It stops the processor from getting too hot. A faulty fan can cause many problems. Knowing the signs helps you act early. This section explains common signs of a bad CPU fan.
Overheating Issues
One clear sign is your computer gets hot fast. The CPU temperature rises beyond normal limits. The fan may spin slowly or not at all. This causes poor heat removal. Overheating can slow down your system. It can also cause hardware damage.
Unusual Noises
Listen closely to your computer’s sounds. A failing fan often makes strange noises. Grinding, clicking, or rattling sounds are common. These noises mean the fan blades or motor are damaged. Ignoring these sounds can lead to fan failure. The noise can become louder over time.
System Shutdowns
Your computer may suddenly turn off. This happens to protect the CPU from heat. Frequent shutdowns show the fan is not cooling well. The system may restart after a short break. Such shutdowns risk data loss and damage. Fixing the fan reduces these unexpected stops.
Tools And Materials Needed
Replacing a CPU fan requires some basic tools and the right replacement fan. Having everything ready makes the job easier and faster. This section lists all tools and materials needed for a smooth CPU fan replacement.
Essential Tools
Start with a small Phillips screwdriver. It fits most screws in your computer case. A flathead screwdriver may help to pry open the case gently. Use a pair of tweezers or needle-nose pliers to handle small parts safely.
Have a clean cloth or compressed air to remove dust. A static wrist strap can prevent damage to parts from static electricity. Keep a small container to hold screws and avoid losing them.
Choosing The Right Replacement Fan
Select a fan that matches your CPU socket type. Check the size; common sizes are 80mm, 92mm, or 120mm. The fan must fit your motherboard and case comfortably.
Look for fans with good airflow and low noise levels. Check the fan connector type; it usually has 3 or 4 pins. Ensure the fan speed and power match your CPU cooling needs.
Preparing Your Pc
Preparing your PC is the first step to replace the CPU fan safely. This process helps avoid damage to your computer parts. Taking time now saves trouble later.
Follow these simple steps to get your PC ready. Each step protects your components and ensures smooth work.
Power Down And Unplug
Turn off your computer completely. Do not leave it in sleep or hibernate mode.
Unplug the power cable from the wall socket. This stops any electricity flow to your PC.
Disconnect all other cables like monitor, keyboard, and mouse. This gives you free access to the case.
Grounding Yourself
Static electricity can harm your PC parts. Touch a metal object to discharge static from your body.
Use an anti-static wrist strap if available. Attach it to a grounded metal part of the case.
Work on a non-carpeted floor to reduce static build-up. Avoid wearing clothes that create static.
Opening The Case
Find a clean, flat surface to place your PC. Lay it down gently on its side.
Locate the screws or latches holding the side panel. Use a screwdriver if needed.
Remove the panel carefully and set it aside. Keep screws in a safe place to avoid losing them.

Credit: www.ifixit.com
Removing The Old Cpu Fan
Removing the old CPU fan is the first step in installing a new one. This process requires care to avoid damage to the CPU or motherboard. Follow each step carefully to ensure a smooth removal.
Disconnecting The Fan
Start by turning off the computer and unplugging it from the power source. Open the computer case to access the CPU fan. Locate the fan’s power cable connected to the motherboard. Gently pull the connector straight out to disconnect it. Avoid pulling on the wires to prevent damage.
Detaching The Fan From The Heatsink
Most CPU fans are attached to a heatsink with clips or screws. Check how your fan is fixed. If it uses clips, press or release them carefully. For screws, use a screwdriver to remove them one by one. Lift the fan straight up to avoid bending any pins or parts.
Cleaning The Cpu Surface
After removing the fan, clean the CPU surface gently. Use a soft cloth or cotton swab with isopropyl alcohol. Remove old thermal paste without scratching the CPU. A clean surface helps the new fan and heatsink work better. Let the surface dry completely before installing the new fan.
Installing The New Cpu Fan
Installing the new CPU fan is a key step to keep your computer cool. It helps stop the processor from overheating. This section shows you how to fit the fan properly. Follow each step carefully for the best results.
Applying Thermal Paste
Thermal paste helps heat move from the CPU to the fan. Clean the old paste with a soft cloth. Use a small amount of new thermal paste. Place it in the center of the CPU. Do not spread it. The fan will spread the paste evenly.
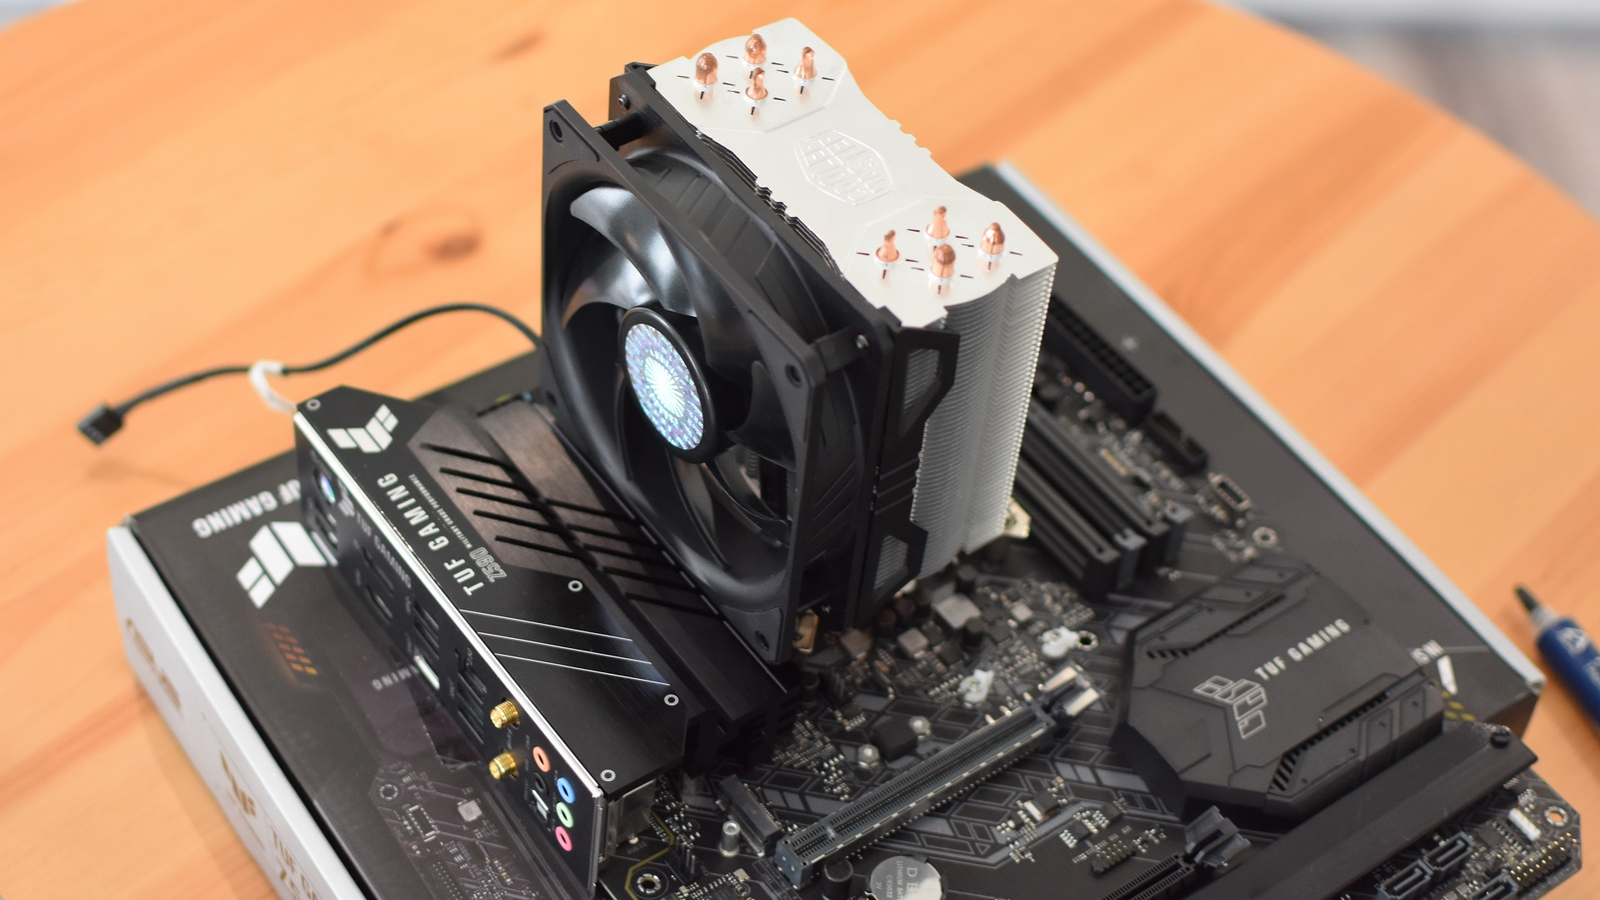
Attaching The Fan To The Heatsink
Align the fan with the heatsink carefully. Make sure the screws match the holes. Press the fan gently on the heatsink. Screw it in place one by one. Tighten the screws evenly to avoid damage. Check the fan sits flat and secure.
Connecting The Fan To The Motherboard
Find the CPU fan header on the motherboard. It usually says “CPU_FAN.” Connect the fan cable to this header. Make sure the connector fits firmly. Avoid forcing it to prevent damage. Double-check the connection before closing the case.
Testing The New Fan
Testing the new CPU fan is a key step after installation. It ensures your PC stays cool and runs well. This process checks if the fan spins correctly and keeps temperatures safe.
Powering On The Pc
Start by turning on your computer. Listen closely for the fan sound. A working fan usually hums or spins quietly. No noise might mean the fan is not connected or faulty.
Monitoring Fan Operation
Look inside the case to see the fan spinning. It should run smoothly without stopping. Watch for any unusual noise or shaking. These signs suggest the fan is not balanced well.
Checking Temperature Levels
Use software to check CPU temperature. The temperature should stay below 70°C during normal use. If it rises quickly, the fan may not cool properly. Cooling is vital to avoid damage to the CPU.
Maintenance Tips For Cpu Fans
Maintaining your CPU fan helps keep your computer cool and working well. A well-kept fan prevents overheating and extends your PC’s life. Simple care steps make a big difference. Follow these tips to keep your CPU fan in top shape.
Regular Cleaning
Dust and dirt build up on the fan blades and inside the case. This blocks airflow and makes the fan work harder. Clean your fan every few months. Use a soft brush or compressed air. Turn off and unplug your computer first. Avoid using water or wet cloths. Clean both the fan and the surrounding area.
Ensuring Proper Airflow
Good airflow stops heat from building inside your PC. Arrange cables neatly to avoid blocking vents. Keep your PC in a cool, open space. Avoid placing it near walls or carpets. Check that all fans, including case fans, run smoothly. Proper airflow helps the CPU fan cool efficiently.
When To Replace Again
Fans wear out over time and lose performance. Listen for loud or unusual noises. Feel for vibrations or slow spinning. These signs mean your fan may fail soon. Replace the fan if it stops working or gets very noisy. Regular checks help catch problems early and protect your computer.

Credit: www.youtube.com
Credit: www.rockpapershotgun.com
Frequently Asked Questions
How Do I Know If My Cpu Fan Needs Replacement?
If your CPU fan is noisy, slow, or not spinning, it likely needs replacement. Overheating and frequent crashes also signal fan failure.
What Tools Are Required To Replace A Cpu Fan?
You need a screwdriver, thermal paste, and an anti-static wrist strap. These tools ensure safe and efficient CPU fan replacement.
Can I Replace A Cpu Fan Without Removing The Motherboard?
It’s possible but not recommended. Removing the motherboard allows better access and reduces the risk of damaging components during fan replacement.
How Do I Safely Remove The Old Cpu Fan?
Power off, unplug your PC, ground yourself, then gently disconnect the fan cable and unscrew the fan from the heatsink carefully.
Conclusion
Replacing a CPU fan can keep your computer cool and safe. Follow each step carefully to avoid damage. Take your time and stay organized throughout the process. A new fan helps your PC run quietly and smoothly. Remember to check connections before closing the case.
Regular maintenance can extend your computer’s life. Simple tools and clear instructions make the job easier. You now have the knowledge to handle this task confidently.