
Are you ready to boost your computer’s performance but unsure how to replace your CPU processor? Swapping out your old processor might sound tricky, but with the right steps, you can do it yourself without stress.
Imagine your computer running faster, handling more tasks, and giving you smoother experiences—all because you took control and upgraded your CPU. In this guide, you’ll find clear, simple instructions that make the process easy to follow. Keep reading, and by the end, you’ll have the confidence to upgrade your processor like a pro.
Tools And Materials Needed
Replacing a CPU processor requires specific tools and materials to work safely and efficiently. Having the right equipment makes the process smooth and helps avoid damage to your computer parts.
Gather all needed items before starting. This preparation saves time and prevents mistakes during the replacement.
Essential Tools
A small Phillips screwdriver is necessary to open the computer case and remove screws. Use a flat-head screwdriver if your case has flat screws.
An anti-static wrist strap keeps static electricity from damaging delicate components. Connect it to a grounded surface before handling the CPU.
Thermal paste is crucial to ensure good heat transfer between the CPU and the cooler. Buy a high-quality thermal compound for best results.
Materials Needed
Clean lint-free cloth or isopropyl alcohol wipes remove old thermal paste from the CPU and cooler. This ensures proper contact when applying new paste.
CPU-compatible cooler or fan is needed to cool the new processor. Check your CPU model for the right cooler specifications.
Replacement CPU must match your motherboard socket type. Verify compatibility before buying the new processor.
Preparing Your Workspace
Preparing your workspace is a key step before replacing a CPU processor. A clean and organized area helps prevent damage and makes the process smoother. It also keeps your tools and parts within easy reach.
Taking time to prepare reduces mistakes and protects sensitive computer parts. This section covers how to set up your workspace properly.
Clear And Clean Surface
Choose a flat, sturdy table or desk. Remove all clutter and dust from the surface. Wipe it with a dry cloth to avoid dirt or static. A clean area keeps small parts visible and safe.
Gather Necessary Tools
Collect all tools before starting. Common tools include a screwdriver, thermal paste, and an anti-static wrist strap. Having everything ready saves time and avoids interruptions.
Control Static Electricity
Static can harm computer parts easily. Use an anti-static wrist strap connected to a metal surface. If no strap is available, touch a grounded metal object frequently. This step protects the CPU and motherboard.
Good Lighting
Ensure your workspace has bright, even lighting. Use a desk lamp if needed. Proper light helps see small screws and delicate parts clearly.
Organize Small Parts
Use small containers or trays to hold screws and other tiny parts. Label containers if possible. This prevents losing pieces and makes reassembly easier.
Powering Down And Unplugging
Before replacing a CPU processor, powering down and unplugging your computer is essential. This step keeps you safe and protects the hardware. It prevents electrical shocks and damage to sensitive parts inside your PC.
Always handle computer components carefully. Even a small static shock can harm the CPU or motherboard. Taking time to power off and unplug ensures a smooth and safe upgrade process.
Shut Down Your Computer Properly
Click the Start menu and select “Shut down.” Wait for the screen to go completely black. This means the computer is fully off. Avoid just pressing the power button as it may cause damage.
Unplug The Power Cable
Remove the power cord from the back of the computer. Do not pull the cord itself; hold the plug firmly. This stops electricity from flowing into your PC while you work inside.
Disconnect All Peripheral Devices
Unplug keyboards, mice, monitors, and other devices connected to your PC. Clearing cables prevents accidental pulls or damage. It also gives you more space to open the case safely.
Opening The Computer Case
Opening the computer case is the first step in replacing a CPU processor. This step gives access to the internal parts of the computer. It is important to do it carefully to avoid damage.
Before opening the case, make sure the computer is turned off. Unplug all cables and power cords. This keeps you safe and protects the computer.
Gather Necessary Tools
You need a screwdriver to open most computer cases. Usually, a Phillips-head screwdriver works best. Have a clean, flat workspace ready. This helps keep screws and parts organized.
Remove Side Panel
Most computer cases have a removable side panel. Find the screws at the back holding the panel in place. Unscrew them carefully and keep them safe. Slide or lift the panel off gently.
Ground Yourself To Avoid Static
Static electricity can harm computer parts. Touch a metal part of the case to discharge static. Use an anti-static wrist strap for extra safety. This step protects the sensitive CPU and other parts.
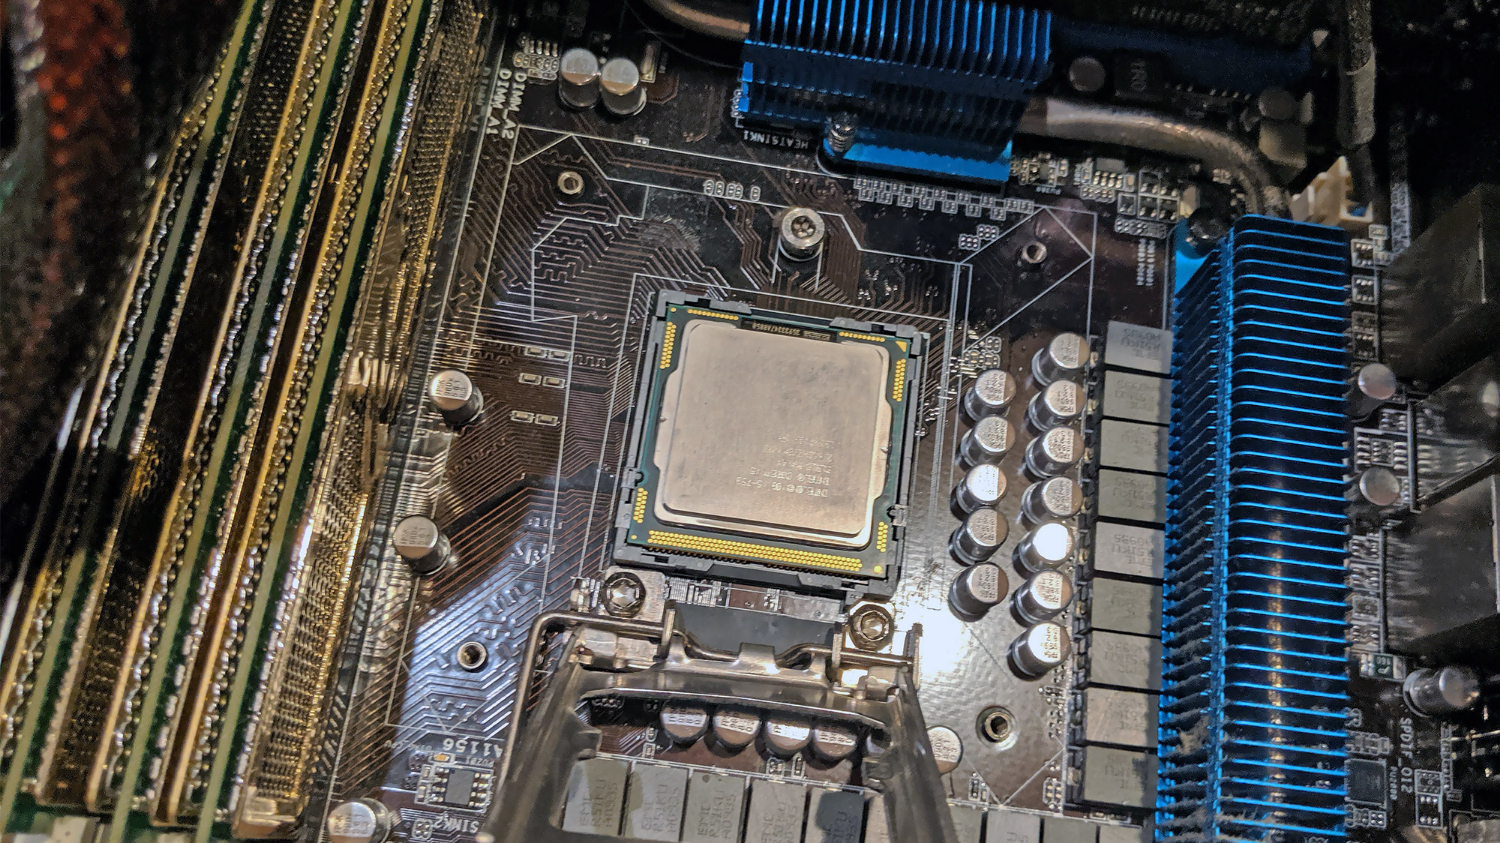
Locating The Cpu Socket
Locating the CPU socket is the first step in replacing a CPU processor. It is the place on the motherboard where the processor fits. Knowing its exact spot helps avoid mistakes during the replacement process.
The CPU socket looks like a square or rectangular area with many small holes or pins. It usually sits near the center of the motherboard. Sometimes it has a lever or a latch to secure the CPU in place.
Identifying The Motherboard Layout
Open the computer case carefully. Look for the largest chip holder on the motherboard. This is often close to the RAM slots and the cooling fan. The CPU socket stands out because of its size and shape.
Spotting The Cpu Socket Lever
Most CPU sockets have a small metal or plastic lever beside them. This lever locks the CPU inside. The lever helps hold the processor firmly during use. Finding this lever confirms the location of the socket.
Recognizing Socket Types And Labels
Motherboards usually have the socket type written near the CPU area. Labels like “LGA 1151” or “AM4” show the socket model. This information can help check processor compatibility before removal.
Removing The Old Cpu
Removing the old CPU is the first step in replacing a processor. It requires care and attention. The CPU is secured tightly on the motherboard. You must release this hold before you can lift out the CPU. Handle the parts gently to avoid damage.
Releasing The Cpu Retention Mechanism
The CPU retention mechanism keeps the processor in place. It usually involves a small lever or latch beside the CPU socket. Gently push or lift the lever to unlock the CPU. Avoid using force to prevent breaking the mechanism. Once unlocked, the CPU will be loose and ready to remove.
Lifting Out The Cpu Carefully
After unlocking the retention mechanism, lift the CPU straight up. Hold the edges to avoid touching the pins or contacts. Do not twist or bend the CPU during removal. Place the old CPU on an anti-static surface. This protects it from damage and static electricity.
Cleaning The Cpu Socket
Cleaning the CPU socket is an important step when replacing a processor. Dust, dirt, or old thermal paste can cause poor contact. This can lead to overheating or the system not starting. A clean socket helps the new CPU work properly and last longer.
Handle the CPU socket with care. It has many tiny pins or pads that can bend or break easily. Use the right tools and gentle techniques to avoid damage. Follow these steps to clean the CPU socket safely.
Work on a clean, flat surface. Use a soft cloth or anti-static mat. Make sure you are grounded to avoid static electricity. Static can damage the CPU and socket. Avoid carpeted or dusty areas.
Removing Dust And Debris
Use a soft brush or compressed air to clear dust. Hold the can upright and spray short bursts. Do not use a vacuum or blow with your mouth. These can cause static or moisture damage. Check for small particles stuck in the socket.
Cleaning With Isopropyl Alcohol
Use 90% or higher isopropyl alcohol to clean residue. Dampen a lint-free cloth or cotton swab lightly. Gently wipe the socket area without bending pins. Do not pour alcohol directly on the socket. Allow the socket to dry fully before inserting the CPU.
Inspecting The Socket
Look closely at the socket after cleaning. Use a magnifying glass if needed. Check for bent or missing pins. If pins are bent, do not force the CPU in. Seek professional help to fix the socket. A damaged socket can cause serious problems.
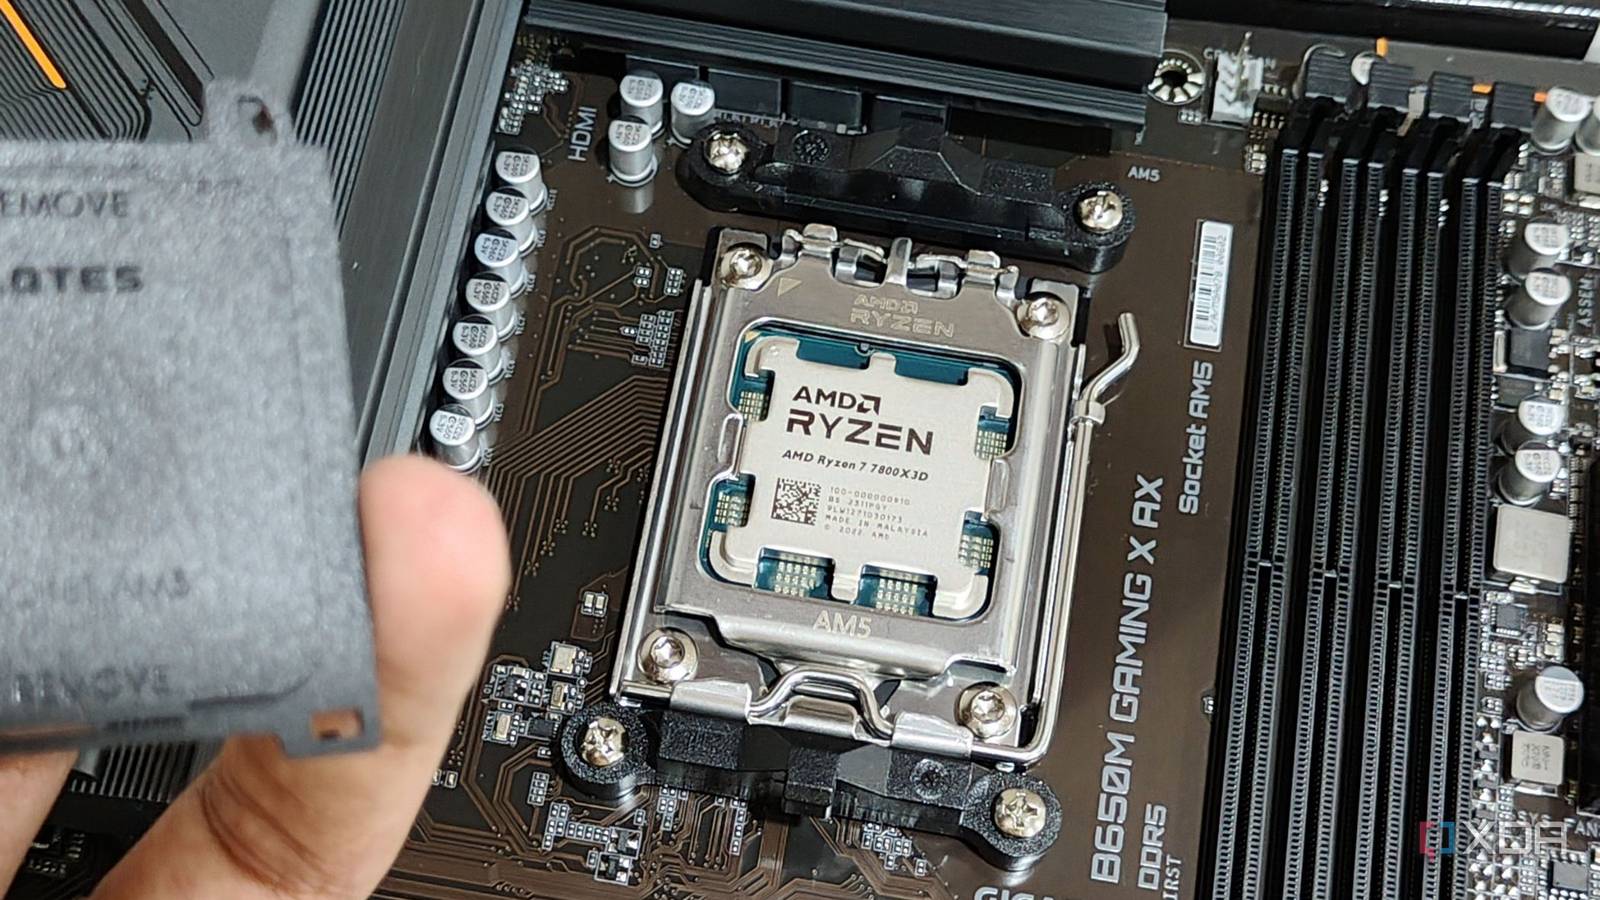
Installing The New Cpu
Installing the new CPU is a careful process. It requires attention to detail and a steady hand. The CPU must fit perfectly into its socket to work well.
Follow the steps closely. This ensures the processor sits correctly and the computer runs smoothly.
Aligning The Cpu Correctly
First, check the CPU and socket for alignment markers. These are small triangles or dots on one corner. Match these marks to place the CPU in the right direction.
Do not force the CPU into the socket. It should drop in with light pressure. If it does not fit easily, double-check the alignment.
Securing The Cpu In Place
After placing the CPU, secure it using the socket lever or locking mechanism. Gently lower the lever to lock the CPU without bending any pins.
Make sure the CPU is firmly seated and locked. This prevents movement and ensures good contact with the motherboard.
Applying Thermal Paste
Applying thermal paste is a key step when replacing a CPU. It helps the heat move from the processor to the cooler. Without it, the CPU might overheat and slow down or get damaged. The right amount and correct application make sure your CPU stays cool and works well.
What Is Thermal Paste?
Thermal paste is a soft, sticky substance. It fills tiny gaps between the CPU and the cooler. These gaps are full of air, which blocks heat. The paste helps heat flow smoothly to the cooler.
How Much Thermal Paste To Use
Use a small pea-sized drop in the center of the CPU. Too much paste can cause problems. Too little will not cover the surface properly. The right amount spreads evenly when the cooler is attached.
Steps To Apply Thermal Paste
First, clean the CPU surface with alcohol and a soft cloth. Make sure it is dry before applying paste. Next, put a small drop in the middle of the CPU. Then, carefully place the cooler on top. Press down gently to spread the paste.
Tips For Best Results
Do not spread the paste by hand. The cooler will spread it evenly. Avoid touching the CPU or cooler surface after applying paste. Check the paste if you remove the cooler. Replace old paste with fresh for better cooling.

Credit: www.youtube.com
Reattaching The Cpu Cooler
Reattaching the CPU cooler is a key step after installing a new processor. It helps keep the CPU cool and prevents overheating. Proper attachment ensures your computer runs smoothly and lasts longer.
Take time to do this carefully. A loose cooler can cause serious problems. Follow the steps below to attach it correctly.
Preparing The Cpu Cooler
Clean the bottom of the cooler with a soft cloth. Remove old thermal paste if present. This helps the new paste stick well. Use isopropyl alcohol for cleaning. Let it dry completely before applying new paste.
Put a small pea-sized dot of thermal paste in the center of the CPU. Too much paste can cause poor heat transfer. Too little paste won’t cover the CPU properly. The paste fills tiny gaps between CPU and cooler.
Positioning The Cooler
Carefully place the cooler on top of the CPU. Align it with the mounting holes on the motherboard. Avoid sliding the cooler once it touches the paste. This keeps the paste layer even and effective.
Securing The Cooler In Place
Fasten the cooler using screws or clips. Tighten them evenly in a diagonal pattern. Do not over-tighten as it may damage the CPU or motherboard. Check that the cooler sits flat and stable.
Connecting The Cooler Fan
Plug the cooler’s fan cable into the CPU fan header on the motherboard. This powers the fan and allows speed control. Make sure the cable is secure and tidy to avoid obstruction.
Closing The Computer Case
Closing the computer case is the final step after replacing the CPU processor. It protects internal parts and keeps dust out. A securely closed case also helps maintain proper airflow.
Take time to close the case carefully. Avoid forcing parts or leaving gaps. This ensures your computer runs safely and quietly.
Aligning The Case Panels
Start by placing the side panel near the case frame. Match the edges and screw holes. Check for cables that may block the panel. Slowly slide the panel into place. It should fit smoothly without pressure.
Securing The Screws
Use the screws removed earlier to lock the panel. Tighten screws evenly on all sides. Do not overtighten to avoid damage. A snug fit keeps the case firm and stable.
Checking Ports And Buttons
Confirm all ports and buttons line up correctly. Front panel connectors like USB and power should be free. Misalignment can cause damage or poor connection. Adjust the panel slightly if needed before final tightening.
Final Inspection
Look over the case for any gaps or loose parts. Ensure no cables are pinched or exposed. Close the case with care to avoid scratches. Your computer is now ready to power on safely.
Credit: www.tomsguide.com
Powering On And Testing
Powering on and testing your computer after replacing the CPU is an important step. It confirms the new processor works correctly. This step helps spot any issues early. Follow a few key actions to ensure a smooth start.
Checking Hardware Connections
First, check all hardware connections. Make sure the CPU cooler is firmly attached. Confirm the power cable to the motherboard is secure. Loose connections can stop the system from booting.
Starting The Computer
Press the power button to start the PC. Watch for any signs of power, like lights or fan movement. Listen for beep sounds from the motherboard. Beep codes can signal if something is wrong.
Entering Bios Setup
Access the BIOS to verify the new CPU is detected. Restart the computer and press the BIOS key shown on screen. Look for the processor model and speed in BIOS. This confirms the system recognizes the new CPU.
Running Initial Tests
Run simple tests to check system stability. Open the operating system and check if it loads properly. Use basic software or tools to monitor CPU temperature. This ensures the processor is not overheating.
Troubleshooting Common Issues
If the PC does not start, recheck connections. Ensure the CPU is correctly seated in the socket. Check for any bent pins or missing thermal paste. Fix these problems before trying again.
Credit: www.xda-developers.com
Frequently Asked Questions
What Tools Do I Need To Replace A Cpu Processor?
You need a screwdriver, thermal paste, and an anti-static wrist strap. These tools ensure safe and proper CPU replacement. Avoid static damage by grounding yourself with the wrist strap.
How Do I Remove The Old Cpu Safely?
First, power off and unplug your PC. Release the CPU socket lever gently and lift the old CPU straight out. Avoid bending any pins or touching the socket.
How Much Thermal Paste Should I Apply On The New Cpu?
Apply a small pea-sized amount of thermal paste in the center of the CPU. This ensures proper heat transfer without excess paste spilling over the sides.
Can I Replace A Cpu Without Removing The Motherboard?
Yes, but it depends on your PC case and motherboard layout. Removing the motherboard often makes CPU replacement easier and safer.
Conclusion
Replacing a CPU processor can seem hard, but it is doable. Take your time and follow each step carefully. Double-check connections and handle parts gently. Your computer will work better with the new CPU. Enjoy faster speed and smoother performance.
Keep your workspace clean and organized for safety. Practice makes perfect, so don’t rush. Now you know how to replace a CPU processor yourself. Give it a try and see the difference!