
Are you looking to remove the RAM from your CPU but don’t know where to start? You’re in the right place.
Taking out RAM might sound tricky, but it’s easier than you think. With the right steps, you can do it safely and quickly without damaging your computer. Keep reading, and you’ll learn exactly how to remove your RAM like a pro—even if you’ve never opened a computer before.
Let’s get started!
Preparing Your Workspace
Preparing your workspace is the first step to safely remove RAM from your CPU. A clean and organized area helps avoid mistakes and damage. Small details matter. Take time to set up everything properly. This makes the whole process smoother and safer.
Gathering Necessary Tools
Start by collecting the right tools. You will need a screwdriver, usually a Phillips-head. Have a soft cloth or anti-static mat to place your computer on. Keep a small container ready to hold screws. Having tools close saves time and stress.
Ensuring Static Safety
Static electricity can harm your computer parts. Touch a grounded metal object before handling RAM. Use an anti-static wrist strap if available. Avoid working on carpet or in dry rooms. These steps protect your computer from static shocks.
Powering Down And Unplugging
Turn off your computer completely. Do not just put it to sleep. Unplug the power cable from the wall. Remove any other connected devices like mouse or keyboard. This prevents electric shock and protects your PC parts.

Credit: www.youtube.com
Opening The Computer Case
Opening the computer case is the first step to remove RAM from your CPU. It lets you see inside the computer and access the memory slots. This task requires care and some basic tools. Follow simple steps to avoid damage and keep your parts safe.
Locating Screws And Panels
Most computer cases have screws at the back. These screws hold the side panel in place. Look for small, round screws near the edges. Sometimes, cases use thumbscrews that you can turn by hand. Check if any plastic clips or latches secure the panel. Knowing where these are helps to open the case smoothly.
Removing The Side Panel
Turn off the computer and unplug all cables. Place the case on a flat surface. Use a screwdriver to remove the screws carefully. Hold the panel firmly and slide it back or lift it off. Keep the screws in a safe place to avoid losing them. After removing the panel, you can see the RAM sticks inside easily.
Locating The Ram Modules
Locating the RAM modules inside a CPU is the first step in removing them safely. These small sticks hold important memory for your computer. Finding them correctly helps avoid damage. The RAM slots are usually easy to spot once you open the computer case.
Knowing where the RAM sits makes removal faster and safer. It also helps to understand the types of RAM. Different RAM types may look similar but have unique features. This knowledge ensures you handle the right parts carefully.
Identifying Ram Slots
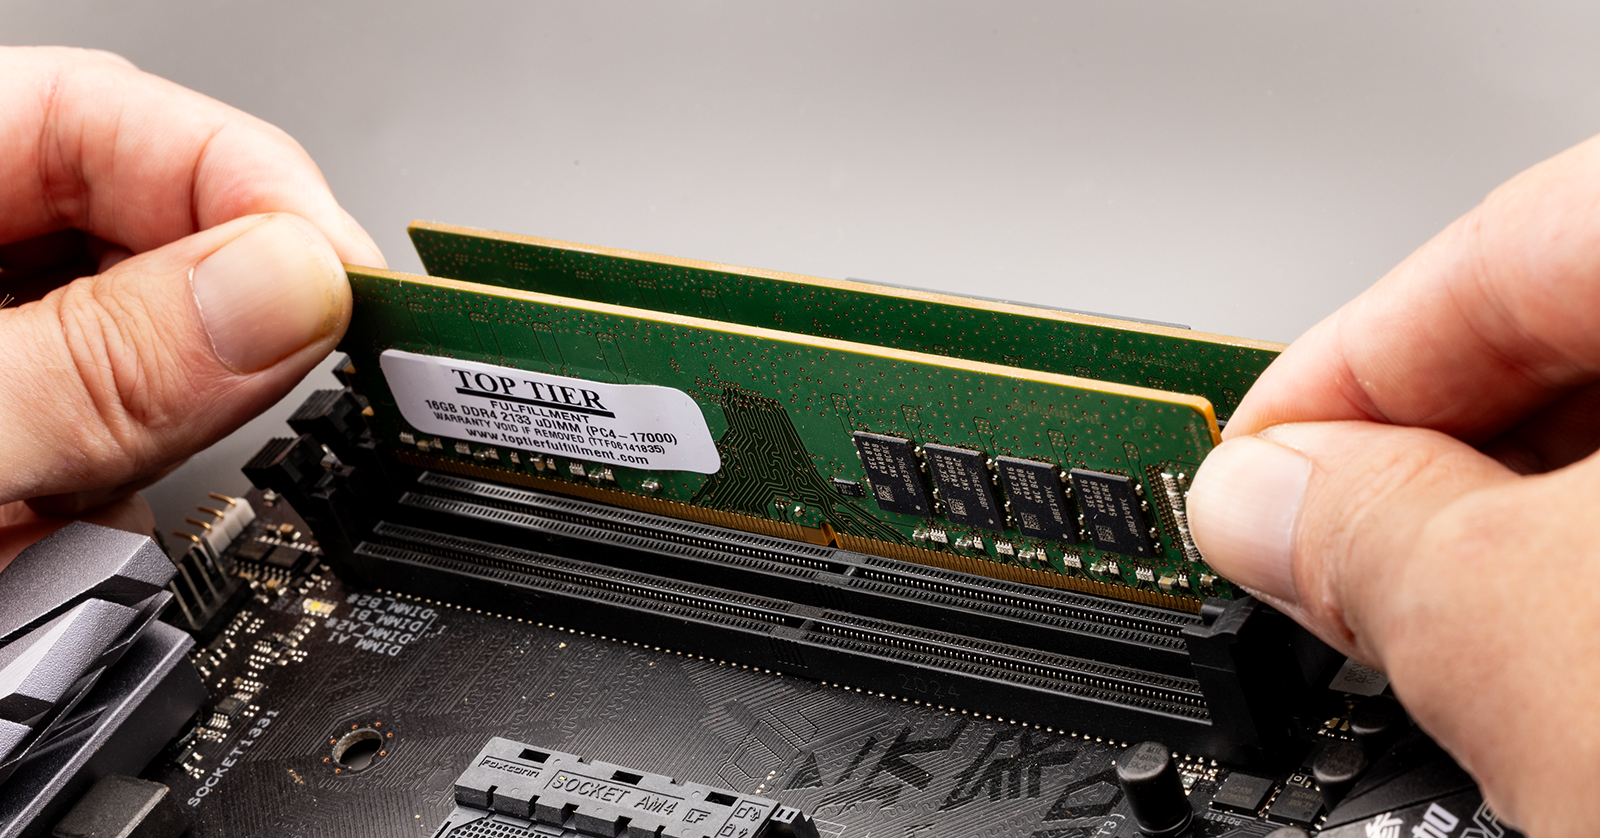
RAM slots are long, thin connectors on the motherboard. They are often placed near the CPU. Most motherboards have two or more slots in a row. The slots have clips on both ends to hold the RAM sticks firmly.
These clips snap into place when RAM is inserted. To remove RAM, you must gently press these clips outward. The RAM module will then pop up slightly for easy removal. Take care not to force the clips to avoid breaking them.
Recognizing Different Ram Types
RAM types vary by shape and pin count. DDR3, DDR4, and DDR5 are common types today. Each has a different notch position to prevent wrong installation. DDR4 RAM has a single notch slightly off-center.
Older types like DDR3 have the notch in a different spot. Check the RAM label or motherboard manual to identify the type. This step helps you avoid mixing incompatible RAM modules. Matching the right type is crucial for computer performance.
Removing The Ram Modules
Removing the RAM modules is a simple but careful process. It helps to upgrade or fix your computer’s memory. Each RAM stick sits tightly in its slot on the motherboard. You need to free it gently to avoid damage.
Follow these steps to remove the RAM safely. Take your time and handle the parts with care.
Releasing The Clips
First, look for small clips on both ends of the RAM slot. These clips hold the RAM firmly in place. Press them outward carefully. You will hear a soft click sound.
The RAM module will pop up slightly. This means the clips are released. Do not force the clips or the RAM.
Gently Extracting The Ram
Hold the RAM by its edges, not the gold connectors. Pull it straight up slowly and evenly. Avoid bending or twisting the module. It should come out easily.
Place the RAM on an anti-static surface or bag. Keep it safe from dust and static electricity.
Handling And Storing Ram
Handling and storing RAM properly keeps it safe and working well. RAM is sensitive to static and physical damage. Careful handling prevents issues during removal or installation. Proper storage helps avoid moisture and dust buildup. Follow simple steps to protect your RAM modules.
Avoiding Damage
Touch RAM only by its edges. Avoid touching gold connectors or chips. Static electricity can harm RAM. Ground yourself before handling RAM. Use an anti-static wrist strap if possible. Do not bend or apply pressure to the RAM. Handle modules gently and slowly. Keep RAM away from liquids and dirt.
Proper Storage Tips
Store RAM in anti-static bags or original packaging. Keep modules in a dry, cool place. Avoid direct sunlight or heat sources. Use padded containers to prevent bending or impact. Label storage containers for easy identification. Store RAM away from magnets or electronic devices. Check stored RAM periodically for dust or damage.
Reassembling The Computer
After removing or replacing the RAM in your CPU, reassembling the computer is the next step. This process is simple but important to protect your hardware. Taking care during reassembly ensures your computer works well and stays safe from dust and damage.
Replacing The Side Panel
Start by aligning the side panel with the case edges. Gently slide or place the panel back onto the computer. Make sure it fits tightly without forcing it. A well-fitted panel keeps the inside parts secure and clean.
Securing Screws
Find the screws you removed earlier. Use a screwdriver to fasten them back into place. Tighten each screw evenly, but do not over-tighten. Properly secured screws keep the panel steady and prevent it from moving.
Testing After Removal
After removing RAM from your CPU, testing the system is important. This step ensures the computer works without problems. It helps find any issues caused by the removal. Testing also confirms if the RAM removal was successful and safe for your device.
Powering On The System
First, connect the power cable and turn on your computer. Watch for any lights or sounds from the device. Listen for beeps, which can signal hardware problems. If the system starts normally, it means the CPU powers on correctly without the RAM.
Checking For Errors
Look at the screen for error messages or warnings. Some computers show codes or alerts if RAM is missing. If you see a blank screen or repeated beeps, the system detects a problem. Use these signs to understand if the RAM removal caused an issue.
Credit: loveeconomychurch.org

Credit: www.youtube.com
Frequently Asked Questions
How Do I Safely Remove Ram From My Cpu?
First, power off and unplug your computer. Open the case, locate the RAM sticks, and gently release the clips. Carefully pull the RAM modules straight out, avoiding any force or bending to prevent damage.
What Tools Are Needed To Remove Ram From A Cpu?
Generally, no special tools are required. A screwdriver may be needed to open the case. Handle RAM with clean hands or anti-static gloves to avoid static damage.
Can Removing Ram Damage My Computer?
If done carefully, removing RAM won’t damage your computer. Always power off and ground yourself to prevent static discharge. Avoid using excessive force when releasing or pulling out the RAM.
How To Identify Ram Slots Inside The Cpu?
RAM slots are long, thin slots near the CPU socket on the motherboard. They have clips on both ends securing the RAM sticks. Each slot usually has a label like DIMM1 or DDR4.
Conclusion
Removing RAM from a CPU is simple with careful steps. Always turn off your computer and unplug it first. Open the case gently and find the RAM sticks. Press the clips on both sides to release the RAM. Pull the RAM out straight and slowly.
Handle the RAM by the edges to avoid damage. Put the case back and power on your computer. Now, you can upgrade or clean your computer easily. Taking care during this process helps your PC stay safe. Practice these steps to feel confident next time.