
Are you ready to build your own PC but unsure how to put your CPU on the motherboard? It might seem tricky at first, but with the right steps, you can do it safely and easily.
Your CPU is the heart of your computer, and placing it correctly is crucial for everything to run smoothly. In this guide, you’ll discover simple tips and clear instructions that anyone can follow—even if you’re a beginner. Keep reading, and you’ll gain the confidence to install your CPU like a pro.
Credit: www.tomshardware.com
Preparing Your Workspace
Preparing your workspace is the first step to safely install your CPU on the motherboard. A clean and organized area helps avoid mistakes and keeps your components safe. Taking time to set up properly saves frustration and protects your hardware from damage.
Gathering Necessary Tools
Collect all tools before starting. You will need a small screwdriver, usually a Phillips head. Have the CPU, motherboard, and thermal paste ready. Keep these items close to avoid searching during installation. A clean cloth or paper towel helps to clean surfaces if needed.
Ensuring Static-free Environment
Static electricity can damage computer parts. Work on a non-carpeted surface to reduce static. Use an anti-static wrist strap if available. Touch a metal object to discharge any static from your body. Avoid working in dry rooms where static builds up easily.
Identifying Cpu And Motherboard Components
Identifying the CPU and motherboard components is the first step in installing a CPU. Understanding these parts helps avoid mistakes during installation. It makes the process smooth and safe for your hardware. This section explains how to find and recognize key components on both the CPU and the motherboard.
Locating The Cpu Socket
The CPU socket is where the processor fits on the motherboard. It looks like a square or rectangular slot with many small holes or pins. Usually, it sits near the center of the motherboard. It often has a lever or latch to secure the CPU in place. The socket type must match the CPU model for compatibility.
Recognizing Cpu Pins And Notches
The CPU has tiny metal pins or contact points on its underside. These pins connect with the motherboard socket. The CPU also has small notches or cutouts along its edges. These notches help align the CPU correctly. They prevent improper installation that could damage the pins or socket. Always handle the CPU carefully, holding it by the edges.
Opening The Cpu Socket
Opening the CPU socket is the first step to install your processor. It needs care and attention. This part holds the CPU firmly in place. A wrong move can damage the delicate pins or the socket itself. Follow simple steps to open it safely.
Releasing The Socket Lever
Find the small metal lever on the side of the CPU socket. It locks the CPU in place. Gently push the lever down and away from the socket. This action releases the tension that holds the cover tight. Lift the lever slowly upwards until it stands upright. Avoid using force to prevent bending the lever or socket.
Handling The Socket Cover
Once the lever is lifted, the socket cover will be loose. Carefully lift the cover straight up. Do not twist or tilt it. The cover protects the socket pins from damage and dust. Place the cover somewhere safe to avoid loss or breakage. Keep your fingers clear of the socket pins inside. The pins are fragile and can bend easily.
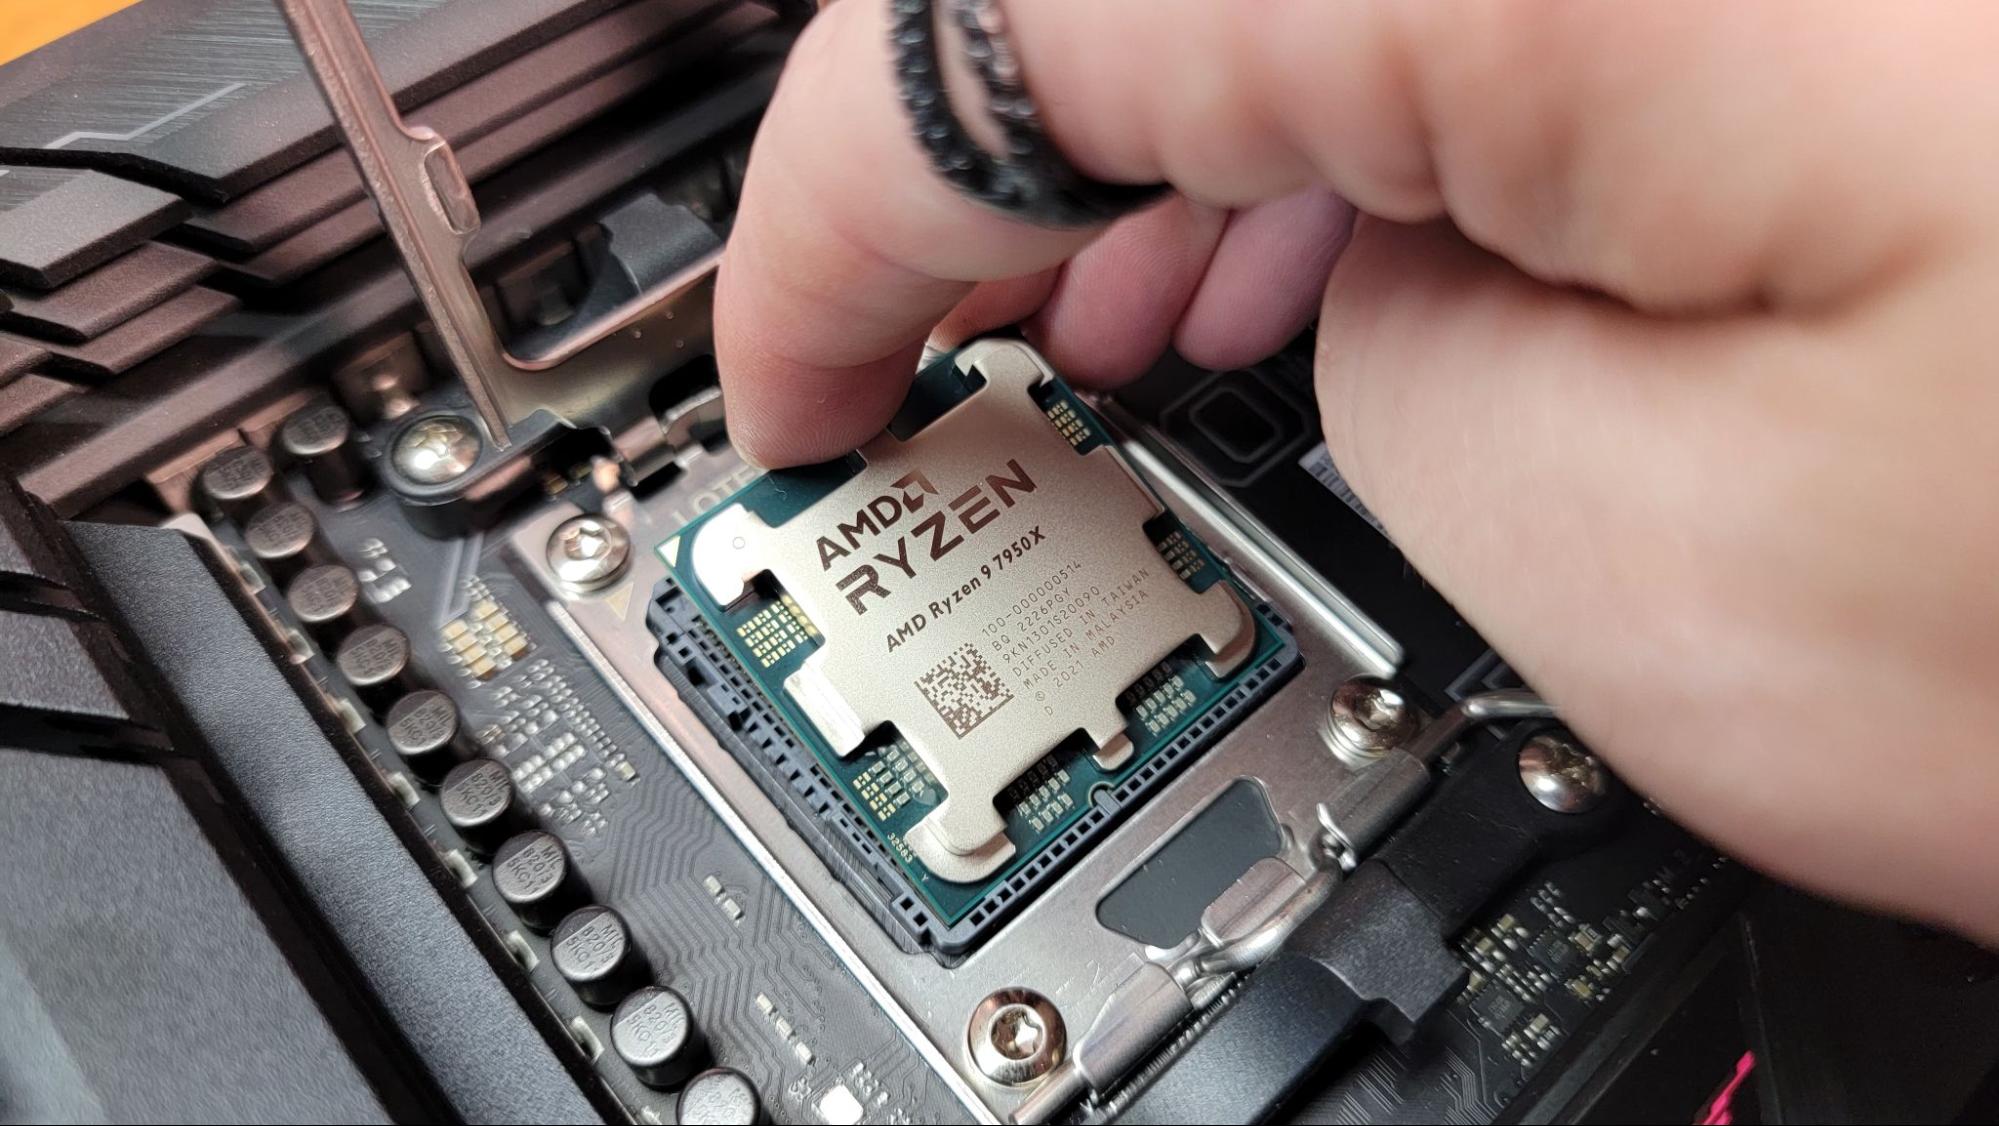
Placing The Cpu On The Motherboard
Placing the CPU on the motherboard is a key step in building a computer. It needs care and attention to avoid damage. The CPU fits into the socket on the motherboard. This step sets the stage for good performance and stability. Follow simple instructions to place the CPU correctly.
Aligning Cpu Correctly
Look for the small triangle on one corner of the CPU. Match this triangle with the triangle on the motherboard socket. This ensures the CPU fits the right way. Check the pins or pads on the CPU and socket carefully. Do not force the CPU in place. Proper alignment prevents damage and ensures good contact.
Seating The Cpu Gently
Once aligned, lower the CPU gently into the socket. It should drop in without pressure. Avoid pushing or sliding the CPU sideways. Press down the locking lever or cover to secure the CPU. Make sure it is firmly seated but not forced. A gentle touch keeps the CPU and motherboard safe.
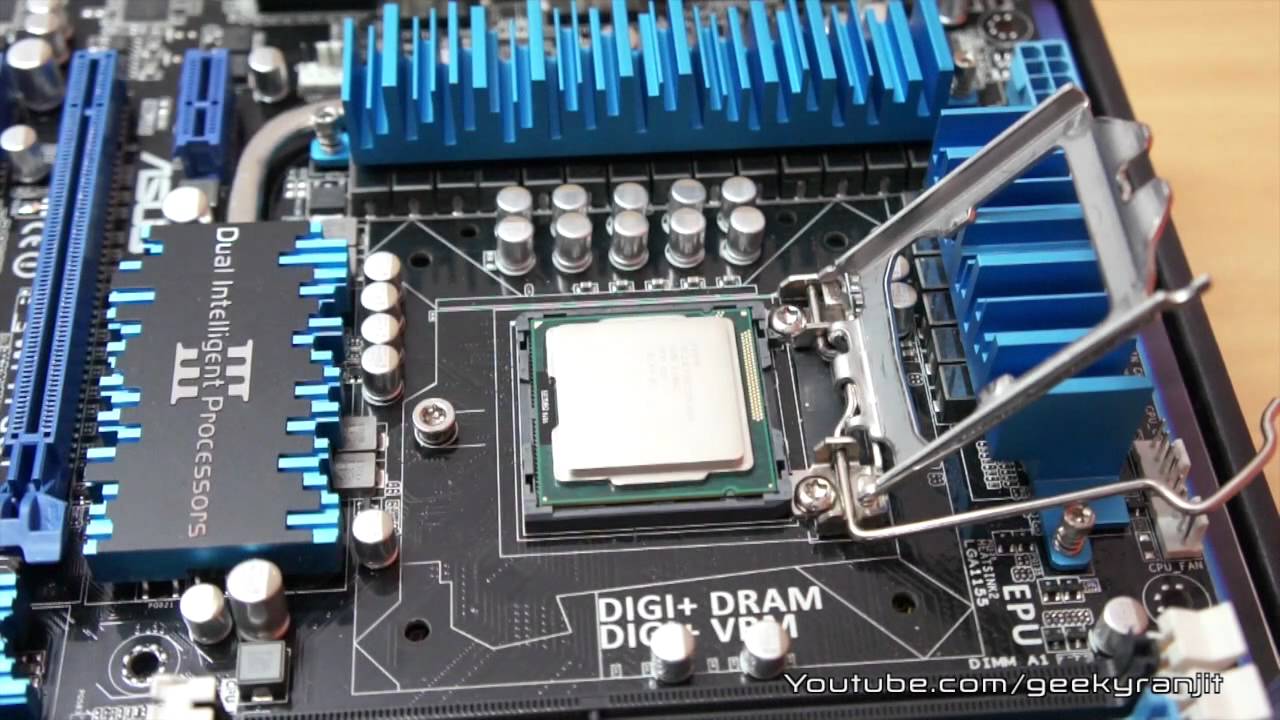
Securing The Cpu
Securing the CPU on the motherboard is a key step in building or upgrading a computer. It makes sure the processor stays in place and works well. Properly securing the CPU prevents damage and keeps your system stable.
Follow each step carefully. The right technique protects both the CPU and motherboard pins.
Closing The Socket Lever
After placing the CPU in the socket, you must lock it. The socket lever holds the CPU firmly. Gently push the lever down towards the socket. It should click into place with little force. Do not use too much pressure. If it does not close easily, check the CPU alignment again. The lever locks the CPU and stops it from moving.
Checking Cpu Stability
Once the lever is closed, test if the CPU is secure. Lightly touch the CPU with your finger. It should not wiggle or lift. If it moves, open the lever and reseat the CPU. A stable CPU ensures good contact with the motherboard pins. This contact is essential for the computer to work correctly.
Applying Thermal Paste
Applying thermal paste is a key step in installing a CPU on a motherboard. Thermal paste helps transfer heat from the CPU to the cooler. This keeps the CPU cool and prevents overheating. Using the right paste and applying it correctly matters a lot.
Choosing The Right Thermal Paste
Not all thermal pastes are the same. Some conduct heat better than others. Look for pastes made with high-quality materials like silver or ceramic. These types spread heat well and last longer. Avoid cheap pastes that dry out fast or do not spread evenly. A good thermal paste ensures your CPU runs smoothly.
Applying Paste Evenly
Apply a small amount of thermal paste on the center of the CPU. A pea-sized dot is enough. When you attach the cooler, it will spread the paste evenly. Avoid spreading it with your finger or tools. Too much paste can cause problems by trapping air. Too little paste will not cool the CPU well. Proper application improves heat transfer and CPU performance.
Installing The Cpu Cooler
Installing the CPU cooler is a key step after placing the CPU on the motherboard. It helps keep the processor cool and prevents overheating. Proper installation ensures your computer runs smoothly and lasts longer.
This part requires careful handling to avoid damage. Follow the steps closely to position the cooler correctly and connect its fan to the motherboard.
Positioning The Cooler
First, check the CPU cooler’s base and the CPU surface. Both should be clean and free of dust. Align the cooler so its mounting points match the holes around the CPU socket.
Place the cooler gently on top of the CPU. Avoid shifting it once in place to keep the thermal paste intact. Secure the cooler with screws or clips, tightening them evenly.
Connecting Cooler Fan To Motherboard
Locate the CPU fan header on the motherboard. It is usually near the CPU socket and labeled “CPU_FAN”.
Plug the cooler fan cable into this header carefully. The connector fits only one way. Make sure it clicks into place for a secure connection.
This connection allows the motherboard to control the fan speed and monitor its status. Proper connection helps maintain safe CPU temperatures during use.
Credit: www.youtube.com
Final Checks
Final checks are important before powering on your computer. They ensure everything is set up correctly. This step helps avoid damage and saves time troubleshooting later.
Take your time to review the CPU and cooler installation. Confirm all connections are secure. After that, prepare your system for the first boot carefully.
Verifying Cpu And Cooler Installation
Check the CPU is seated flat in the socket. Pins or contacts must line up perfectly.
Make sure the CPU locking arm is fully closed. It keeps the processor in place.
Inspect the cooler base for good contact with the CPU surface. It should not wobble.
Confirm the thermal paste is applied evenly. Too much or too little affects cooling.
Secure the cooler firmly using the correct screws or clips. Loose coolers cause overheating.
Connect the cooler fan cable to the motherboard header. This powers the fan.
Preparing For First Boot
Double-check all power cables are plugged into the motherboard.
Ensure RAM modules are fully inserted in their slots.
Verify no loose screws or objects are inside the case.
Attach the monitor cable to the graphics output.
Connect keyboard and mouse to USB ports.
Close the case panel carefully to avoid disturbing components.
Turn on the power supply switch before pressing the power button.

Credit: www.hackster.io
Frequently Asked Questions
How Do I Align The Cpu Correctly On The Motherboard?
Align the CPU by matching the triangle marker on the CPU with the motherboard socket. This ensures correct orientation and prevents damage during installation.
What Precautions Should I Take Before Placing The Cpu?
Handle the CPU by its edges to avoid static damage. Ground yourself and avoid touching the pins or contacts for safety and functionality.
How To Secure The Cpu On The Motherboard Socket?
Once aligned, gently place the CPU into the socket without forcing. Lower the retention arm or latch to lock the CPU firmly in place.
Do I Need Thermal Paste When Installing The Cpu?
Yes, apply a small amount of thermal paste on the CPU surface. It improves heat transfer between the CPU and the cooler for optimal performance.
Conclusion
Placing a CPU on a motherboard is simple with care and patience. Align the CPU correctly and handle it gently to avoid damage. Secure it firmly in the socket without forcing it. Remember to apply thermal paste before attaching the cooler.
Double-check all connections before turning on your computer. This process helps your PC run smoothly and last longer. Follow these steps, and your build will be successful. Take your time and enjoy the experience of building your own PC.