
Are you ready to unlock the full power of your CPU and boost your PC’s performance? Overclocking your CPU through the Asus BIOS can give you that extra speed you’ve been looking for.
But it might sound complicated or risky if you’re new to it. Don’t worry—this guide will walk you through each step in a clear and simple way. By the end, you’ll know exactly how to safely overclock your CPU and make your system run faster than ever.
Keep reading to discover the secrets that can turn your PC into a high-speed powerhouse!
Preparing For Overclocking
Preparing for overclocking is an important step before changing your CPU settings. It helps avoid problems and keeps your system safe. Take time to check everything carefully. This helps make the process smoother and safer.
Check Hardware Compatibility
Not all CPUs and motherboards support overclocking. Check your Asus motherboard model first. Verify if your CPU can handle higher speeds. Also, make sure your cooling system is strong enough. Overclocking raises heat, so good cooling is a must.
Update Asus Bios
Updating the BIOS improves stability and adds new features. Visit the Asus website to find the latest BIOS version for your motherboard. Follow the instructions to update it carefully. A fresh BIOS helps avoid bugs during overclocking.
Backup Current Bios Settings
Save your current BIOS settings before overclocking. This lets you restore the original setup if needed. Most Asus BIOS versions have a save or export option. Keep the backup on a USB drive or write it down. This step protects your system from unwanted changes.
Credit: www.reddit.com
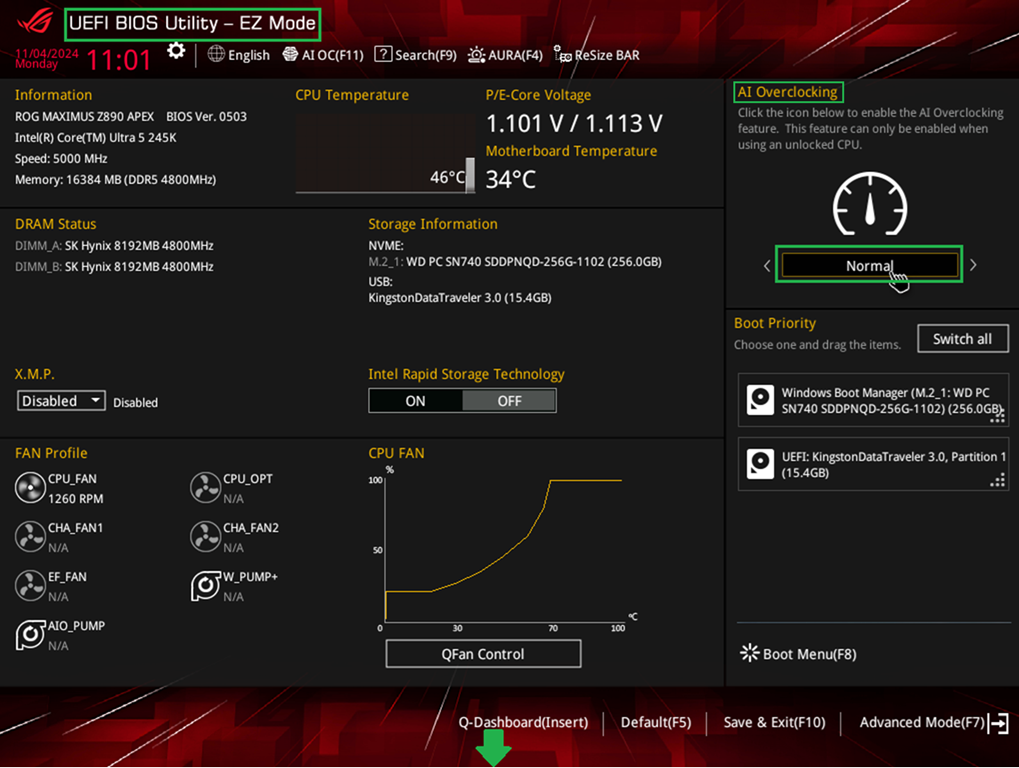
Accessing Asus Bios
Accessing the Asus BIOS is the first step to overclock your CPU safely. The BIOS is a built-in program that controls your computer’s hardware settings. You can change CPU speed, voltage, and other settings here. Knowing how to enter and navigate the Asus BIOS helps you make these changes with ease.
Entering Bios Setup
Turn off your computer completely. Press the power button to turn it on. Quickly press the Delete key several times. This action opens the BIOS setup screen. Some Asus models use the F2 key instead. Watch the screen closely for instructions during startup. Entering BIOS must be done fast before the operating system loads.
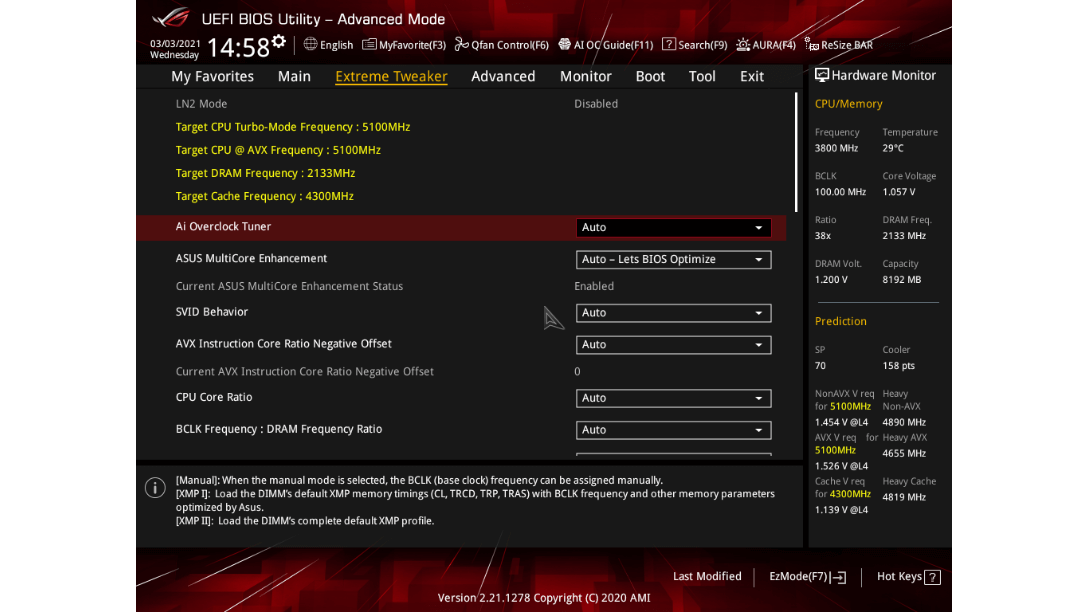
Navigating The Bios Interface
The Asus BIOS uses a simple menu system. Use your keyboard’s arrow keys to move through options. The Enter key selects a menu item. Press Esc to go back to the previous screen. Look for the Ai Tweaker or Overclocking section to adjust CPU settings. Changes do not save until you choose “Save & Exit.” Take your time to understand the layout before making changes.
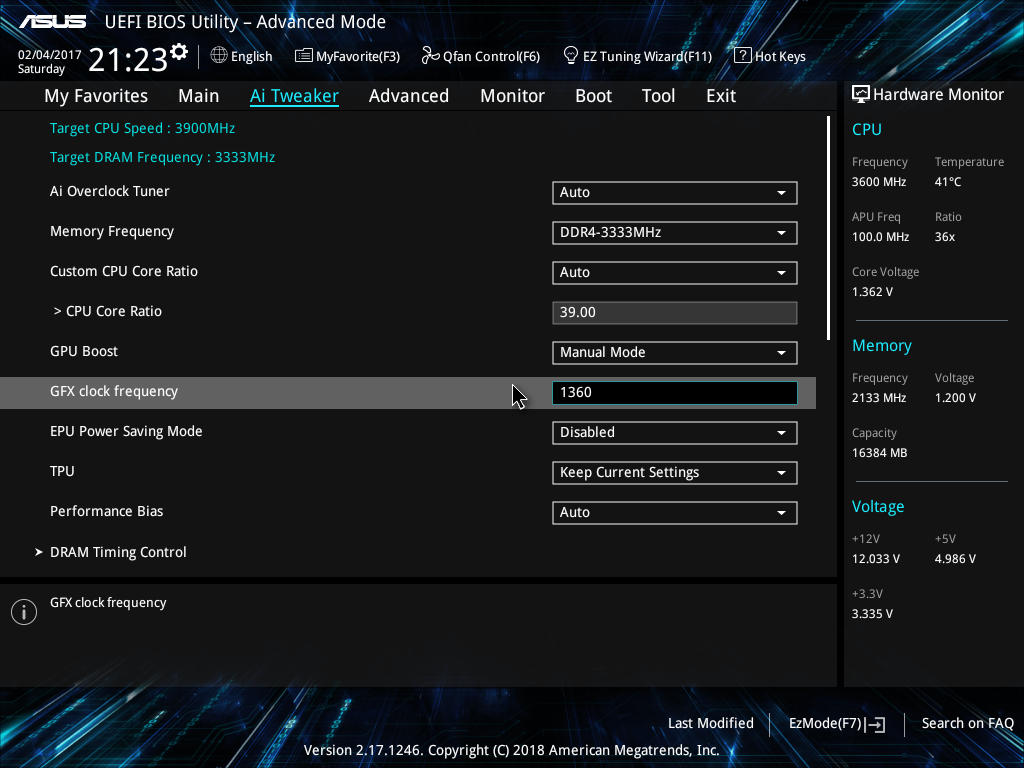
Core Overclocking Settings
Core Overclocking Settings in the ASUS BIOS allow you to increase your CPU’s speed. This can improve your computer’s performance for tasks like gaming or video editing. Overclocking changes how fast the CPU runs by adjusting key settings. These settings control the CPU multiplier and the base clock. Both are important to find the right balance between speed and stability.
Adjusting Cpu Multiplier
The CPU multiplier sets the processor’s speed by multiplying the base clock. Increasing the multiplier raises the CPU frequency. This is a simple way to overclock because it only changes one value. In the ASUS BIOS, find the CPU multiplier option under the AI Tweaker or Overclocking tab. Change the multiplier step by step and test the system after each change. Watch the CPU temperature closely to avoid overheating. Keep the CPU voltage stable to prevent crashes.
Modifying Base Clock (bclk)
The base clock is the foundation of the CPU speed. Changing the BCLK affects the CPU and other parts like RAM and PCIe. This can make the system unstable if pushed too far. In ASUS BIOS, locate the BCLK setting near the multiplier option. Increase the BCLK in small steps, checking system stability after each change. Use stress tests and monitor temperatures during this process. Adjusting the BCLK allows finer control but needs careful tuning.
Voltage And Power Controls
Voltage and power controls are key parts of overclocking your CPU in the Asus BIOS. They help balance performance and stability. Too little voltage can cause crashes. Too much voltage can harm the CPU over time. Adjusting these settings carefully makes your overclock safer and more effective.
Power controls manage how much energy your CPU can use. This affects heat and speed. Setting these controls right keeps your system stable under load. It also helps prevent overheating and sudden shutdowns. Understanding voltage and power settings is a must for a smooth overclock.
Setting Cpu Core Voltage
CPU core voltage is the power given to your processor. Increasing this voltage can help the CPU run faster. But it also raises the temperature. Start by raising the voltage in small steps. Watch the system’s stability and temperature after each change. Avoid using too high voltage to protect your CPU’s life.
Use the Asus BIOS to manually set the CPU core voltage. Find the “CPU Voltage” or “Vcore” option. Change from “Auto” to “Manual” or “Offset” mode. Manual mode sets a fixed voltage. Offset mode adds or subtracts voltage from the default. Choose based on your needs and testing results.
Managing Power Limits And Load Line Calibration
Power limits control how much power your CPU can draw. Increasing these limits allows higher performance but can raise heat. Look for “Power Limit 1” and “Power Limit 2” in the BIOS. Raise them slightly above default for better stability at high clocks.
Load Line Calibration (LLC) helps keep voltage steady under load. Without LLC, voltage can drop when the CPU is busy. This may cause crashes or slowdowns. Set LLC to a medium or high level in the BIOS. This keeps voltage stable and improves overclock reliability.
Memory Overclocking
Memory overclocking can boost your PC’s speed by improving RAM performance. It allows your system to handle tasks faster and smoother. Asus BIOS provides options to tweak memory settings safely.
Start by understanding your RAM’s limits and the motherboard’s capabilities. Small changes can make a big difference in overall speed. Always save your current settings before making adjustments.
Tweaking Ram Frequency
RAM frequency is how fast your memory runs. Higher frequency means better performance. In Asus BIOS, find the DRAM Frequency setting under the AI Tweaker or Extreme Tweaker tab. Choose a frequency higher than the default but within your RAM’s rated speed.
Test stability after each increase. Restart the PC and run stress tests. If the system crashes, lower the frequency or try a smaller step up.
Adjusting Timings And Voltage
RAM timings control how quickly memory responds to commands. Lower timings improve speed but may cause instability. Asus BIOS lets you adjust primary timings like CAS Latency, tRCD, tRP, and tRAS.
Increase RAM voltage slightly to support higher frequencies and tighter timings. Do not exceed the recommended voltage for your RAM modules. Check your RAM’s specifications for safe voltage ranges.
Make changes slowly and test each step. Stability is key to a successful memory overclock.
Credit: www.asus.com
Stability Testing
Stability testing is a crucial step after overclocking your CPU in the Asus BIOS. It ensures your system runs smoothly without crashes or errors. Testing helps find the best balance between speed and reliability. It protects your hardware from damage caused by unstable settings.
Stress Testing Tools
Stress testing tools put heavy load on your CPU to check its stability. Popular tools include Prime95, AIDA64, and IntelBurnTest. Run these programs for several hours. Watch for crashes, freezes, or errors. These signs mean your overclock settings are too high or unstable. Lower the clock speed or increase voltage slightly if needed.
Monitoring Temperatures And Voltages
Keep a close eye on CPU temperatures and voltages during testing. Use software like HWMonitor, Core Temp, or Asus AI Suite. Temperatures should stay below 85°C to avoid overheating. Voltages must not exceed safe limits specified by your CPU model. High temperatures or voltages can shorten your CPU lifespan or cause crashes. Adjust your cooling or voltage settings as needed.
Troubleshooting Common Issues
Troubleshooting is key to a smooth overclocking experience in Asus BIOS. Many users face issues like crashes or freezes. These problems often come from unstable settings or hardware limits.
Fixing these issues quickly helps protect your CPU and saves time. This guide covers common problems and simple fixes. Follow these steps to keep your system running well.
Dealing With System Instability
System instability can show as random crashes or blue screens. It happens when the CPU runs beyond safe limits. Lower the CPU frequency or increase the voltage slightly. Make changes in small steps to avoid damage.
Check your cooling system. Overclocking raises CPU temperature. Poor cooling causes instability. Use quality fans or a better cooler if needed. Monitor temperatures using BIOS or software tools.
Resetting Bios To Defaults
Resetting BIOS helps fix problems caused by wrong settings. It restores the original factory settings. To reset, enter BIOS and find the option called “Load Defaults” or “Reset to Default.”
After resetting, save changes and restart your PC. This step clears any harmful overclock settings. It is a safe way to recover from crashes or boot failures.
Optimizing For Daily Use
Optimizing your CPU overclock in the Asus BIOS for daily use means finding the right balance. You want better speed without making your computer too hot or unstable. This process helps your PC run smoothly for everyday tasks and light gaming. It also keeps your hardware safe from damage due to high temperatures or power use.
Careful adjustment ensures your system stays reliable and efficient. Small changes can improve performance without causing problems. Saving your settings lets you test different configurations easily. This way, you can pick the best setup for your daily needs.
Balancing Performance And Temperature
Start by raising your CPU clock speed step by step. Check your system’s temperature after each change. Keep an eye on the CPU temperature using software tools or BIOS readings. Aim to keep temperatures below 80°C for safe daily use.
Adjust the CPU voltage carefully. Higher voltage can improve stability but causes more heat. Find the lowest voltage that keeps your system stable at the desired speed. This balance helps avoid overheating and extends your CPU life.
Use the BIOS fan control settings to improve cooling. Set fans to increase speed as the CPU gets hotter. Good airflow inside your case also helps keep temperatures down. Keep your system clean to avoid dust buildup that blocks cooling.
Saving And Applying Profiles
After finding a stable overclock, save the settings as a profile in the BIOS. This lets you switch between overclocked and normal modes quickly. You can create multiple profiles for different tasks, like gaming or work.
Profiles make testing easier. If something goes wrong, you can load a safe profile to start again. Regularly update and save profiles after tweaks. This keeps your system ready for daily use without repeated setup.
Use the BIOS menu to save profiles on your motherboard. Name each profile clearly to remember its purpose. This simple step improves your experience with overclocking and daily PC use.
Credit: www.asus.com
Frequently Asked Questions
What Is The Best Way To Overclock Cpu In Asus Bios?
To overclock CPU in Asus BIOS, enter BIOS, locate CPU settings, increase CPU multiplier, adjust voltage cautiously, and save changes. Always monitor temperatures to avoid overheating and ensure system stability during the process.
How Do I Access Asus Bios For Cpu Overclocking?
Restart your PC and press the ‘Delete’ or ‘F2’ key repeatedly during boot to enter Asus BIOS. Access the AI Tweaker or Extreme Tweaker tab to find CPU overclocking options.
What Cpu Voltage Is Safe For Asus Bios Overclocking?
Safe CPU voltage depends on your CPU model but generally stays below 1. 4V. Increasing voltage too high risks overheating and hardware damage. Always increase voltage in small steps and monitor temperatures closely.
Can Asus Bios Overclocking Improve Gaming Performance?
Yes, Asus BIOS overclocking can boost CPU speed, improving gaming frame rates and responsiveness. However, ensure stable overclocking and proper cooling to prevent crashes and maintain performance gains.
Conclusion
Overclocking your CPU in Asus BIOS can boost performance well. Take small steps and test your system carefully each time. Watch your temperatures to keep your computer safe. Save your settings once you find a stable speed. This process needs patience and attention to detail.
Enjoy faster speeds without risking damage to your PC. Keep learning and adjusting as you go along. Your Asus motherboard gives you the tools; use them wisely.