
If you want your CPU to run cooler and faster, installing liquid cooling is one of the best upgrades you can make. But the idea of setting up liquid cooling can feel overwhelming if you’ve never done it before.
Don’t worry—this guide will walk you through every step in a simple and clear way. By the end, you’ll know exactly how to install liquid cooling on your CPU, helping your computer stay quiet and perform at its best. Ready to take your PC to the next level?
Let’s dive in.
Preparing Your Workspace
Preparing your workspace is the first step in installing liquid cooling on your CPU. A clean and organized area makes the process easier and safer. It helps avoid mistakes and protects your computer parts. Take time to set up before starting the installation.
Gathering Necessary Tools
Collect all tools before you begin. You will need a screwdriver, thermal paste, and cleaning materials. A lint-free cloth or alcohol wipes help clean the CPU surface. Keep your liquid cooling kit close to avoid delays. Having everything ready saves time and reduces stress.
Ensuring Static-free Environment
Static electricity can damage computer parts. Work on a non-carpeted floor if possible. Use an anti-static wrist strap to ground yourself. Touch a metal part of your case to release static charge. Avoid wearing clothes that generate static, like wool. A static-free workspace protects your CPU and other parts.
Choosing The Right Liquid Cooler
Choosing the right liquid cooler is key for a smooth CPU cooling setup. It affects your computer’s temperature and noise levels. Picking the wrong cooler can cause poor performance or fit issues. Focus on the type of cooler and its fit with your CPU and case. These points help you make the best choice.
Types Of Liquid Cooling Systems
There are two main types of liquid cooling systems: All-in-One (AIO) and custom loops. AIO coolers come pre-assembled and are easier to install. They include a pump, radiator, and tubes in one package. Custom loops let you pick each part separately. They offer better cooling but need more work and knowledge.
AIO coolers suit most users for quick setup. Custom loops fit enthusiasts wanting top performance. Both types use liquid to move heat away from the CPU. Choose based on your skill level and cooling needs.
Compatibility With Your Cpu And Case
Check if the liquid cooler fits your CPU socket type. Different CPUs need specific mounting brackets. Ensure the cooler supports your CPU model. Also, measure your PC case space for radiator size. Radiators come in sizes like 120mm, 240mm, or 360mm.
Small cases might not hold large radiators. Confirm fan placement and clearance before buying. Compatibility ensures easy installation and proper cooling. Avoid surprises by verifying these details early.
Removing Existing Cooling Solutions
Removing the old cooling system is an important step before installing a liquid cooler. It helps prepare your CPU for better cooling and avoids damage. Take your time and follow each step carefully. This ensures a smooth and safe transition to liquid cooling.
Powering Down And Unplugging Pc
Turn off your computer completely. Do not leave it in sleep or hibernate mode. Unplug the power cable from the outlet. Disconnect all other connected devices like keyboard, mouse, and monitors. This prevents any electrical accidents during the process. Safety first.
Detaching Old Cooler And Cleaning Cpu
Locate the old cooler attached to your CPU. Loosen the screws or clips holding it in place. Gently remove the cooler, avoiding any sudden movements. Old thermal paste may stick the cooler to the CPU. Clean the CPU surface with isopropyl alcohol and a soft cloth. Remove all old paste residue for a clean, smooth surface. This helps the new liquid cooler work efficiently.

Credit: www.rigidhvac.com
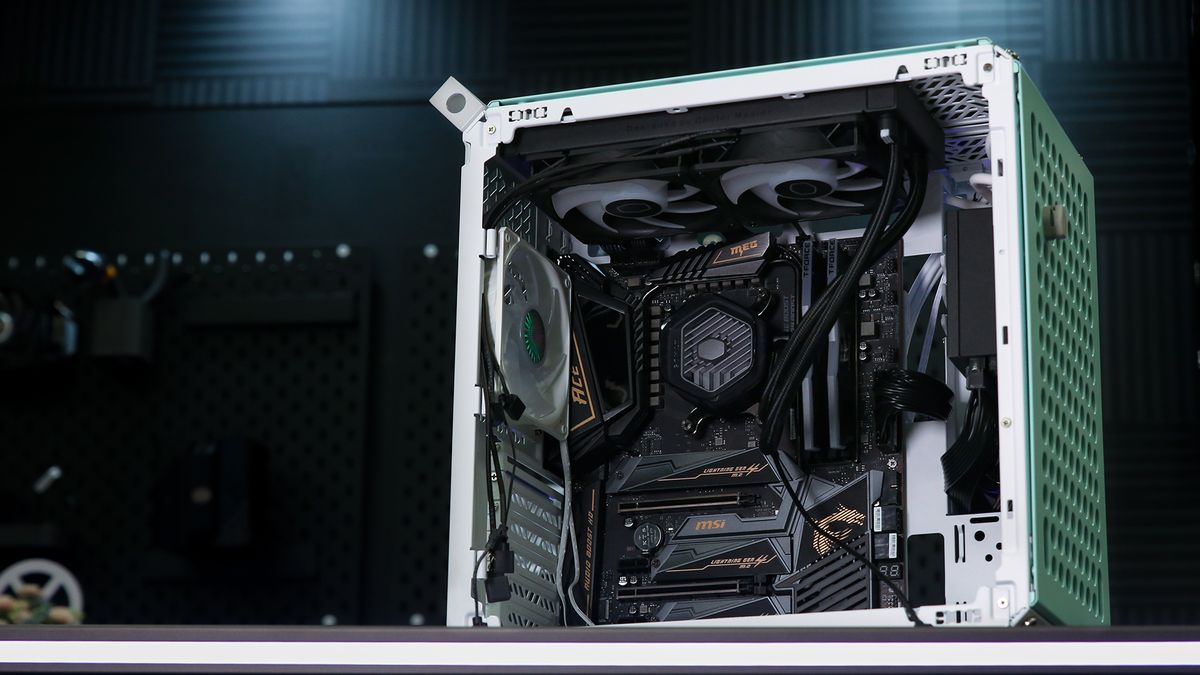
Installing The Radiator And Fans
Installing the radiator and fans is a key step in setting up liquid cooling for your CPU. This part helps keep your CPU cool and ensures your system runs smoothly. Proper placement and fan setup improve cooling efficiency and reduce noise.
Selecting Radiator Placement
Choose a spot inside your case that fits the radiator size. Common places include the top, front, or rear of the case. Make sure there is enough space for airflow and the radiator’s thickness. Avoid blocking other components or cables. A well-placed radiator helps cool air flow through your system.
Mounting Fans For Optimal Airflow
Attach fans on the radiator to push or pull air. Fans can be mounted on one side or both sides of the radiator. Position fans to direct cool air into the radiator or exhaust hot air out. Secure fans tightly to reduce vibration and noise. Good airflow improves heat removal and keeps your CPU cooler.
Mounting The Water Block
Mounting the water block is a key step in installing liquid cooling on your CPU. This part ensures the cooling system makes good contact with the processor. Proper mounting helps transfer heat away from the CPU efficiently. Follow these steps carefully to avoid damage and get the best cooling performance.
Applying Thermal Paste
Thermal paste fills tiny gaps between the CPU and water block. These gaps trap air, which reduces cooling efficiency. Apply a small pea-sized amount of thermal paste in the center of the CPU. Spread it evenly using a plastic card or let the pressure from the block spread it. Avoid using too much paste as it can cause spills and reduce cooling.
Securing The Water Block To Cpu
Place the water block gently on the CPU. Align it with the mounting holes on the motherboard. Use the screws or mounting brackets provided with your cooler. Tighten screws evenly in a diagonal pattern to ensure balanced pressure. Do not overtighten; this can damage the CPU or motherboard. Check that the block is firm but not forced. Proper securing ensures good contact and stable cooling.
Credit: www.coolermaster.com
Connecting Tubing And Power
Connecting tubing and power is a key step in installing liquid cooling on your CPU. Proper connection ensures efficient cooling and system stability. Careful handling of tubes and power cables prevents damage and keeps your PC running smoothly.
Routing Tubes Without Kinks
Route the tubes carefully to avoid sharp bends or kinks. Kinks block coolant flow and reduce cooling performance. Use gentle curves and avoid tight spots near other components. Leave enough slack so tubes don’t stretch or pull. Check tubes for smooth flow before finalizing placement.
Plugging In Pump And Fan Connectors
Connect the pump power cable to the CPU_FAN or dedicated AIO_PUMP header. This powers the pump and controls its speed. Attach fan connectors to the motherboard headers labeled SYS_FAN or CPU_FAN. Secure connections prevent power loss and noise. Confirm all plugs fit snugly without forcing them.
Testing And Monitoring System
Testing and monitoring the liquid cooling system is essential after installation. It ensures the system runs smoothly and prevents damage. Careful checks help catch issues early. Proper monitoring keeps your CPU safe and cool.
Booting Up And Checking For Leaks
Start your computer and watch the liquid cooling system closely. Look for any signs of liquid leaks around the tubes and connections. Leaks can cause serious damage to your hardware. Listen for unusual noises from the pump or fans. If you hear strange sounds, turn off the system immediately. Check that the pump is running and liquid is flowing. A quick leak test can save you costly repairs later.
Monitoring Temperatures And Performance
Use software tools to track your CPU temperatures in real-time. Keep an eye on the temperature during idle and heavy use. Temperatures should stay within safe limits. Watch for sudden spikes or overheating signs. Liquid cooling should lower your CPU temperature significantly. Monitor fan speeds and pump performance as well. Consistent temperature control means your system runs efficiently and lasts longer.
Maintenance Tips For Liquid Cooling
Maintaining a liquid cooling system keeps your CPU running cool and safe. Regular care helps avoid leaks and clogs. It also extends the life of your cooling setup. Simple checks and routine cleaning can prevent many common problems. Follow these maintenance tips to keep your system in top shape.
Regular Cleaning And Inspection
Dust and dirt can build up on fans and radiators. This reduces cooling performance. Clean these parts gently with a soft brush or cloth. Check tubes for cracks or leaks. Tighten any loose fittings carefully. Look for discoloration in the coolant, which can signal contamination. Inspect the pump for any strange noises or vibrations.
Refilling And Replacing Coolant
Coolant loses effectiveness over time. It can also grow algae or other particles. Drain and refill the coolant every six to twelve months. Use the coolant recommended by your system’s manufacturer. Avoid mixing different types of coolants. Flush the system thoroughly before adding new liquid. This keeps your cooling working smoothly and safely.

Credit: www.youtube.com
Frequently Asked Questions
What Tools Do I Need To Install Liquid Cooling On Cpu?
You need a screwdriver, thermal paste, and cleaning materials. Some kits include all essentials. Ensure compatibility with your CPU socket.
How Do I Apply Thermal Paste For Liquid Cooling?
Clean the CPU surface first. Apply a small pea-sized amount of thermal paste. The liquid cooler’s pressure will spread it evenly.
Can Liquid Cooling Improve Cpu Performance Significantly?
Yes, liquid cooling lowers CPU temperatures effectively. This allows higher clock speeds and better stability under heavy loads.
Is Liquid Cooling Installation Safe For Beginners?
With careful reading and patience, beginners can install liquid cooling safely. Follow instructions step-by-step to avoid damage.
Conclusion
Installing liquid cooling on your CPU helps keep it cool and running well. It may seem hard at first, but step-by-step instructions make it simple. Take your time and follow each part carefully for the best results. A good cooling system can lower temperatures and improve your computer’s performance.
Remember to check for leaks and secure all parts tightly. Enjoy a quieter and cooler PC after the installation. Liquid cooling is a smart choice for better CPU health.