
Looking to boost your PC’s performance and keep it cool under pressure? Installing an aftermarket CPU cooler can make a huge difference.
But if you’ve never done it before, the process might seem tricky or even intimidating. Don’t worry—you’re in the right place. In this guide, you’ll find clear, simple steps to install your new CPU cooler quickly and safely. By the end, you’ll know exactly how to upgrade your cooling system and give your computer the power it deserves.
Ready to get started? Let’s dive in!

Credit: www.wikihow.com
Choosing The Right Cooler
Choosing the right CPU cooler is important for your computer’s performance and lifespan. A good cooler keeps the CPU at a safe temperature. This prevents overheating and helps the CPU run smoothly. Picking the right cooler means knowing about types, compatibility, and your computer case size.
Types Of Cpu Coolers
There are two main types of CPU coolers: air coolers and liquid coolers. Air coolers use fans and heat sinks to cool the CPU. They are simple, reliable, and usually cheaper. Liquid coolers use liquid to transfer heat away from the CPU. They are often quieter and cool better but cost more. Choose the type that suits your needs and budget.
Compatibility With Your Cpu
Not all coolers fit every CPU. Each cooler supports specific CPU sockets. Check your CPU socket type before buying a cooler. Also, consider the CPU’s power and heat output. Higher power CPUs need stronger cooling. Make sure the cooler can handle your CPU’s heat.
Considering Case Size And Airflow
Your computer case size affects cooler choice. Large coolers may not fit in small cases. Measure the space inside your case carefully. Good airflow inside the case helps cool the CPU better. Choose a cooler that works well with your case’s airflow design. Avoid coolers that block air vents or fans.

Credit: www.wikihow.com
Preparing Your Workspace
Preparing your workspace is the first step to install an aftermarket CPU cooler. A clean and organized area helps you work safely and efficiently. It also protects your computer parts from damage. Take time to set up a space that is comfortable and free from distractions.
Gathering Necessary Tools
Collect all the tools you will need before starting. Common tools include a screwdriver, thermal paste, and cleaning materials. Having everything at hand saves time and prevents interruptions. Check the cooler’s manual for any specific tools required.
Ensuring Static-free Environment
Static electricity can harm your computer parts. Work on a non-carpeted surface to reduce static. Use an anti-static wrist strap if possible. Touch a metal object to discharge static before handling components. Keep your workspace dry and free from dust.
Powering Down And Unplugging Pc
Turn off your computer completely before starting. Unplug the power cable from the socket. Disconnect all other cables like monitor, keyboard, and mouse. This prevents electrical shocks and damage to parts. Double-check that the PC is fully powered down.
Removing The Old Cooler
Removing the old CPU cooler is the first step to install a new one. This process needs care to avoid damage to your CPU or motherboard. Take your time and follow each step carefully. Prepare a clean workspace and gather necessary tools before starting.
Detaching Fan And Heatsink
Start by unplugging the fan cable from the motherboard. This cable usually connects near the CPU socket. Next, loosen the screws or release the clips holding the heatsink. Some coolers twist or pull straight up. Gently remove the fan and heatsink together. Avoid pulling too hard to prevent damage.
Cleaning Off Old Thermal Paste
Old thermal paste must be cleaned before installing the new cooler. Use a soft cloth or paper towel with isopropyl alcohol. Gently wipe the CPU surface until it is clear and shiny. Also, clean the base of the heatsink if you plan to reuse it. Proper cleaning ensures good contact for the new paste.
Applying Thermal Paste
Applying thermal paste is a key step in installing an aftermarket CPU cooler. It helps fill tiny gaps between the CPU and cooler. This improves heat transfer and keeps the CPU cool. Using the right paste and applying it correctly ensures better performance.
Choosing The Right Thermal Paste
Choose thermal paste that matches your needs. Some pastes are better for high temperatures. Others last longer without drying out. Look for a paste with good conductivity and low resistance. Avoid cheap options that can damage the CPU. Popular choices include ceramic or metal-based pastes.
Proper Application Techniques
Clean the CPU surface before applying paste. Use a lint-free cloth and alcohol for cleaning. Apply a small pea-sized amount in the center of the CPU. The paste will spread when the cooler is mounted. Avoid using too much paste; it can cause overheating. Secure the cooler evenly to spread the paste well.
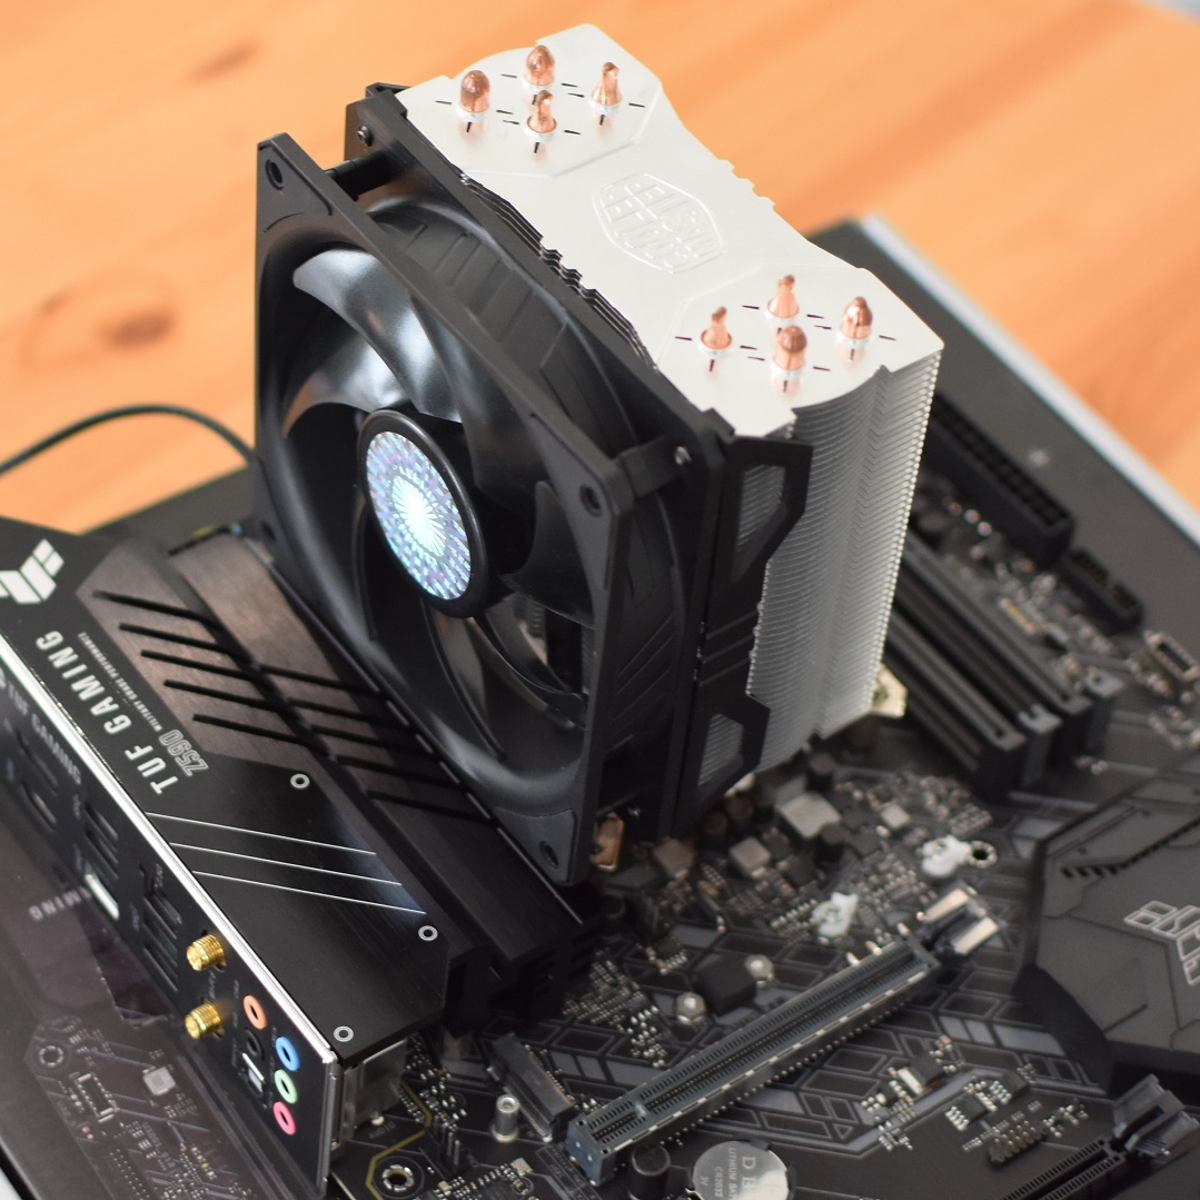
Installing The New Cooler
Installing the new CPU cooler is a key step in improving your computer’s performance. It helps keep the processor cool and prevents overheating. This part of the process requires care and attention to detail. Follow each step to ensure a proper fit and stable operation.
Mounting The Heatsink
Start by placing the heatsink on the CPU surface. Align it carefully with the mounting holes on the motherboard. Press down gently but firmly to ensure contact with the CPU. Secure the heatsink using the provided screws or clips. Tighten them evenly to avoid damaging the processor. Avoid over-tightening as it can cause harm.
Securing The Fan
Attach the fan to the heatsink frame. Use the clips or screws that come with the cooler. Make sure the fan blades can spin freely without hitting any wires. Position the fan to blow air towards the rear or top exhaust of the case. This helps remove hot air efficiently. Check that the fan is steady and won’t move.
Connecting Power Cables
Find the CPU fan header on the motherboard. It is usually labeled “CPU_FAN”. Plug the fan’s power cable into this header. Ensure the connector fits snugly and locks in place. This connection allows the motherboard to control fan speed. Avoid forcing the cable as it can bend the pins. Double-check the connection before closing the case.
Credit: www.rockpapershotgun.com
Final Checks And Testing
After installing your aftermarket CPU cooler, final checks and testing ensure everything works well. This step helps avoid damage and keeps your system stable. Take time to verify the installation, monitor temperatures, and fix any common problems before using your PC fully.
Verifying Cooler Installation
Check that the cooler sits firmly on the CPU. Make sure the mounting brackets are tight but not too tight. The thermal paste should spread evenly between the CPU and cooler. Confirm the fan or pump cable connects to the right motherboard header. Look for any loose wires or parts before closing your case.
Monitoring Cpu Temperatures
Turn on your PC and open a temperature monitoring app. Watch the CPU temperature while idle and under load. Normal idle temps usually range from 30 to 40°C. Under load, temps can reach 60 to 80°C depending on your CPU. If temperatures are too high, the cooler might not be working correctly.
Troubleshooting Common Issues
If the CPU gets too hot, first re-check the cooler’s mounting. Clean and reapply thermal paste if needed. Ensure fans spin properly and cables are connected. Listen for unusual noises or vibrations. Reset BIOS settings if the system has trouble booting. These steps fix most cooling problems quickly.
Frequently Asked Questions
How Do I Prepare My Pc For Installing A New Cpu Cooler?
First, power off and unplug your PC. Remove the old cooler carefully. Clean off old thermal paste from the CPU using isopropyl alcohol. Ensure your workspace is static-free. This prep ensures a smooth installation and optimal cooling performance.
What Tools Are Needed To Install An Aftermarket Cpu Cooler?
You typically need a screwdriver, thermal paste, and cleaning materials. Some coolers include mounting hardware and instructions. Having these ready saves time and avoids installation errors. Check your cooler’s manual for any specific tools required.
How Do I Apply Thermal Paste Correctly On The Cpu?
Apply a small pea-sized dot of thermal paste in the CPU center. The cooler pressure will spread it evenly. Too much paste can cause overheating. Proper application ensures efficient heat transfer between CPU and cooler.
Can I Install An Aftermarket Cooler On Any Cpu Socket?
No, aftermarket coolers must be compatible with your CPU socket type. Check the cooler specifications before purchase. Using the wrong cooler can cause installation problems or damage. Compatibility ensures secure mounting and effective cooling.
Conclusion
Installing an aftermarket CPU cooler can improve your computer’s performance. Follow each step carefully for a safe setup. Take your time and handle parts gently. Check that the cooler fits your CPU and case. Make sure all connections are secure before powering on.
A good cooler helps keep your system cool and quiet. Enjoy better temperatures and longer hardware life. Stay patient, and your PC will thank you.