
Are you experiencing lag, glitches, or unexpected crashes on your PC? The culprit might be Hardware Accelerated GPU Scheduling.
While this feature is designed to improve your system’s performance, it can sometimes cause more harm than good. If you want to take control and see if disabling it makes your computer run smoother, you’re in the right place. This guide will show you exactly how to turn off Hardware Accelerated GPU Scheduling quickly and safely, so you can get back to using your device without frustration.
Keep reading to discover the simple steps that can make a big difference for your PC’s performance.
What Is Hardware Accelerated Gpu Scheduling
Hardware Accelerated GPU Scheduling is a feature in Windows 10 and 11. It helps your computer manage graphics tasks better. This feature lets the GPU take control of its own memory management. This can reduce the delay between your computer and the graphics card.
The goal is to improve the performance of games and apps. It also aims to make your system run smoother. This feature works by reducing the work the CPU must do. The GPU handles its own scheduling instead.
How Hardware Accelerated Gpu Scheduling Works
The GPU gets direct control over its memory. It schedules tasks without waiting for the CPU. This lowers latency and improves frame rates. The CPU has less work, so it can focus on other tasks.
Benefits Of Hardware Accelerated Gpu Scheduling
This feature can make games and videos run more smoothly. It helps reduce stutters and lag. It also lowers input delay, making controls feel more responsive. Some users notice better battery life on laptops too.
When To Disable Hardware Accelerated Gpu Scheduling
Not all systems work well with this feature. Some users may see crashes or glitches in certain apps. Older graphics cards might not support it fully. Disabling can fix some display or performance issues.
Credit: www.tenforums.com
Benefits And Drawbacks
Hardware Accelerated GPU Scheduling can change how your computer handles graphics tasks. It can improve performance but may also cause issues for some users. Understanding the benefits and drawbacks helps you decide whether to disable it.
Benefits Of Hardware Accelerated Gpu Scheduling
This feature reduces the load on your CPU by letting the GPU manage its own memory. It can lower latency in games and video playback. Many users notice smoother frame rates during gaming sessions. It also helps improve power efficiency on some systems. Overall, it aims to create a faster and more responsive experience.
Drawbacks Of Hardware Accelerated Gpu Scheduling
Some users experience stability problems after enabling this feature. It can cause crashes or screen flickering on certain hardware setups. Older graphics cards might not support it well. Performance gains are not guaranteed for every system. Disabling it can solve these issues if they occur.
Check Windows Version Compatibility
Before disabling Hardware Accelerated GPU Scheduling, check your Windows version. This feature works only on certain versions of Windows 10 and Windows 11. Using an unsupported version can cause problems or make the option unavailable.
Checking compatibility ensures you do not waste time on steps that won’t work. It also helps you avoid system errors or crashes that may happen if you force the setting on an older system.
Check Your Windows Version
Press the Windows key and type winver. Press Enter to open the About Windows window. Look for your version number. Hardware Accelerated GPU Scheduling requires Windows 10 version 2004 or higher, or Windows 11.
Update Windows If Needed
Open Settings and go to Update & Security. Click Check for updates. Download and install any available updates. This step ensures your system supports the GPU scheduling feature.
Confirm System Compatibility
Not all hardware supports this feature. Check your GPU manufacturer’s website for compatibility details. Make sure your graphics drivers are up to date for smooth operation.
Disable Via Windows Settings
Disabling Hardware Accelerated GPU Scheduling through Windows Settings is straightforward. This method helps improve system stability if GPU scheduling causes issues. It involves a few simple steps within the Display settings. Follow the instructions below to turn off this feature on your Windows PC.
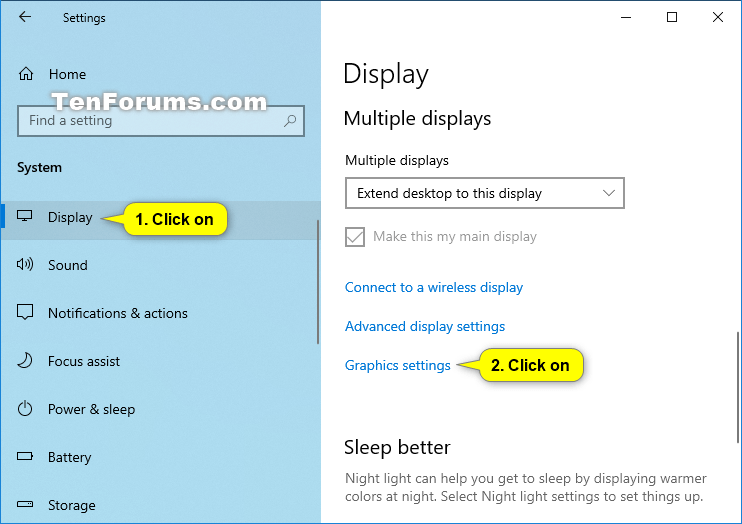
Access Display Settings
Right-click on the desktop to open a context menu. Select “Display settings” from the list. This opens the main display configuration window. Scroll down to find advanced display options. Click on “Graphics settings” to continue. You will see options related to GPU and performance here.
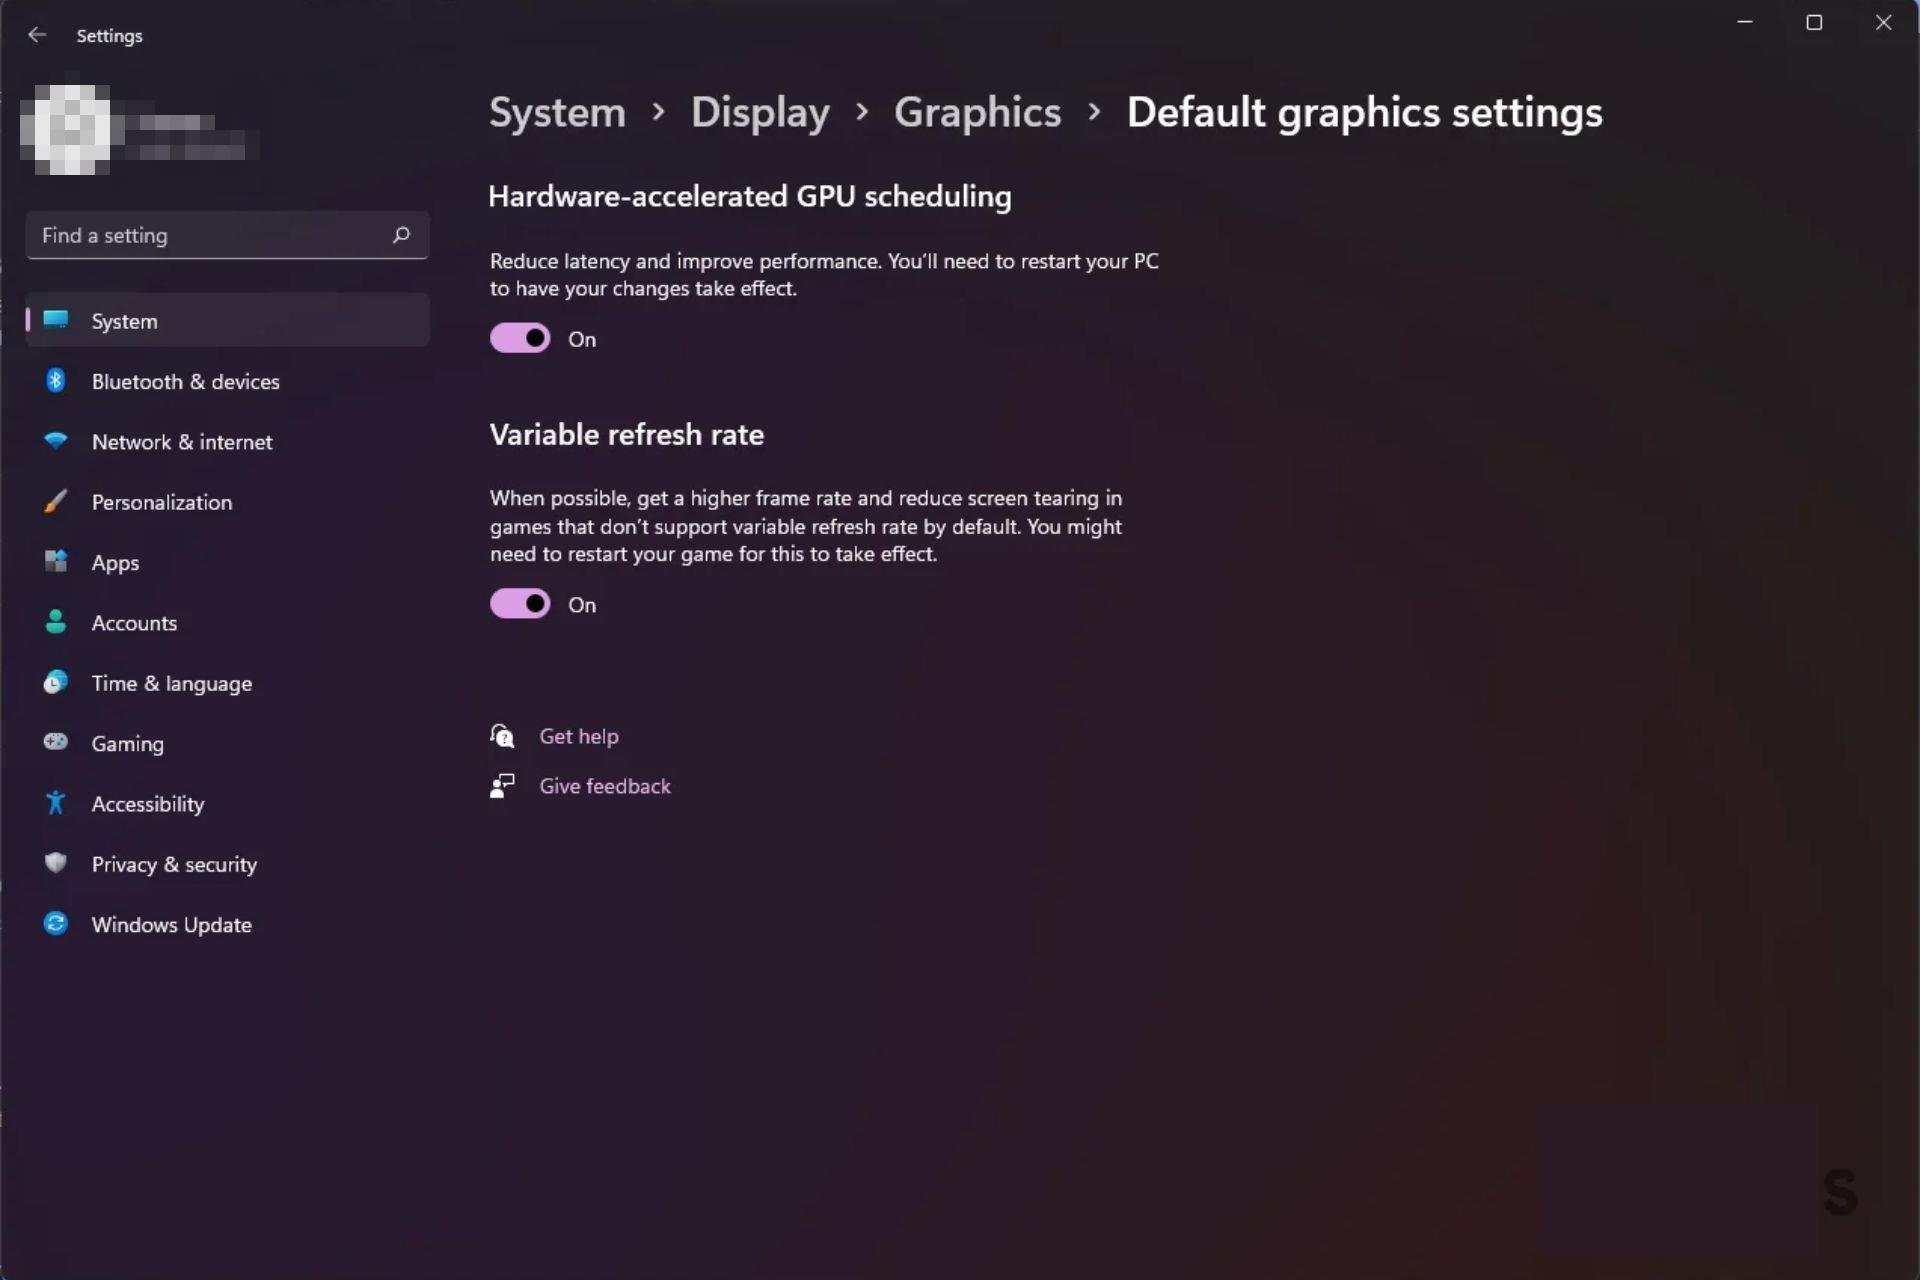
Turn Off Gpu Scheduling
In the Graphics settings, locate “Hardware-accelerated GPU scheduling.” You will see a toggle switch next to it. Click the switch to turn off GPU scheduling. After disabling, restart your computer. This ensures the change takes effect properly. Your system will now use the standard GPU scheduling method.
Disable Using Registry Editor
Disabling Hardware Accelerated GPU Scheduling can improve system stability in some cases. The Registry Editor offers a direct way to turn off this feature. This method is useful for users who want more control over their graphics settings.
Editing the registry requires care. A small mistake can affect your system. Follow these steps carefully to disable GPU scheduling safely.
Open Registry Editor Safely
Press the Windows key + R to open the Run dialog box. Type regedit and press Enter. This opens the Registry Editor.
Windows might ask for permission. Click Yes to continue. Always back up your registry before making changes. To do this, click File > Export and save the file.
Modify Gpu Scheduling Key
Navigate to the following path:
Look for the value named HwSchMode. If it does not exist, create a new DWORD (32-bit) Value. Name it HwSchMode.
Double-click HwSchMode and set its value to 2. This disables Hardware Accelerated GPU Scheduling.
Restart For Changes
Close the Registry Editor. Restart your computer to apply the changes. After reboot, Hardware Accelerated GPU Scheduling will be off.
Credit: windowsreport.com
Disable Through Graphics Card Control Panel
Disabling Hardware Accelerated GPU Scheduling can be done easily through your graphics card control panel. This method lets you manage settings directly from the software designed for your GPU.
Each graphics card brand has its own control panel with specific steps to turn off this feature. Below are simple guides for NVIDIA, AMD, and Intel graphics cards. Follow the steps for your device.
Nvidia Control Panel Steps
- Right-click on the desktop and select “NVIDIA Control Panel.”
- Go to “Manage 3D settings” in the left menu.
- Find “Hardware Accelerated GPU Scheduling” under the Global Settings tab.
- Set it to “Off.”
- Click “Apply” to save changes.
- Restart your computer for the changes to take effect.
Amd Radeon Settings Steps
- Right-click on the desktop and open “AMD Radeon Settings.”
- Click on the “Graphics” tab.
- Look for “Hardware Accelerated GPU Scheduling.”
- Switch it to “Off.”
- Confirm and apply the changes.
- Restart the system to finalize the settings.
Intel Graphics Command Center Steps
- Open the Intel Graphics Command Center from the Start menu.
- Navigate to the “System” or “Display” section.
- Locate the Hardware Accelerated GPU Scheduling option.
- Toggle it off.
- Save the changes.
- Restart your PC to enable the new configuration.
Troubleshooting Common Issues
Troubleshooting common issues with Hardware Accelerated GPU Scheduling can save time and frustration. Some users find the option missing or face performance drops after enabling it. These problems are fixable with simple steps.
Fixing Missing Options
Sometimes, the Hardware Accelerated GPU Scheduling option does not appear in settings. This often happens because the graphics driver is outdated. Updating your GPU driver usually resolves this issue. Visit your GPU manufacturer’s website to download the latest driver.
Also, ensure your Windows version supports this feature. Hardware Accelerated GPU Scheduling requires Windows 10 version 2004 or later. Check your system updates and install the latest Windows update if needed.
Resolving Performance Drops
Some users notice slower performance after enabling Hardware Accelerated GPU Scheduling. This can occur due to incompatibility with certain applications or games. Try disabling the feature to see if performance improves.
Another solution is to update your graphics driver and Windows. Updated software often fixes bugs that cause slowdowns. If problems continue, consider rolling back to an earlier driver version that worked well.
Verify If Gpu Scheduling Is Disabled
Check your system settings to see if GPU Scheduling is turned off. This step ensures Hardware Accelerated GPU Scheduling is disabled properly. It helps avoid performance issues during use.
Open Windows Settings
Start by opening the Windows Settings on your PC. Click the Start menu, then select the gear icon. This opens the Settings window where many system options are found.
Navigate To System Display Settings
In the Settings window, click on “System.” Then choose “Display” from the left side menu. This area controls screen and graphics settings.
Access Graphics Settings
Scroll down in the Display settings until you see “Graphics settings.” Click on it to open options for GPU management and scheduling.
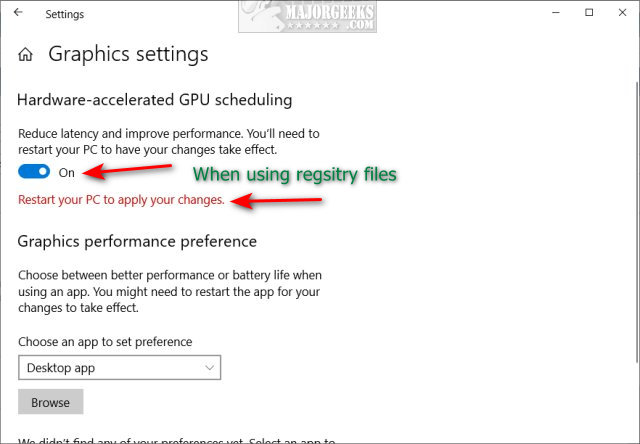
Check Hardware-accelerated Gpu Scheduling Status
Look for the “Hardware-accelerated GPU scheduling” toggle. If it is off, GPU scheduling is disabled. If on, click to turn it off.
Confirm Changes And Restart
After disabling GPU scheduling, restart your PC. This ensures changes take effect properly. Once restarted, repeat these steps to verify the setting remains off.
Credit: m.majorgeeks.com
Frequently Asked Questions
What Is Hardware Accelerated Gpu Scheduling?
Hardware Accelerated GPU Scheduling allows the GPU to manage its memory directly. It can improve performance and reduce latency in some cases. However, it may cause issues on certain systems, prompting users to disable it for better stability.
How To Disable Hardware Accelerated Gpu Scheduling?
To disable it, open Windows Settings, go to System > Display > Graphics Settings. Find the toggle for Hardware-accelerated GPU scheduling and turn it off. Restart your computer to apply the changes.
Does Disabling Gpu Scheduling Affect Gaming Performance?
Disabling it might reduce performance in some games but improve stability in others. It depends on your hardware and drivers. Test both settings to see which works best for your system.
Can Disabling Gpu Scheduling Fix Display Issues?
Yes, turning off Hardware Accelerated GPU Scheduling can resolve screen flickering or lag. It often helps if you experience glitches after a driver update or Windows upgrade.
Conclusion
Disabling Hardware Accelerated GPU Scheduling can help fix some computer issues. It may improve performance or reduce glitches in certain games and apps. The steps are simple and quick to follow. Always restart your PC after changing the settings. Keep an eye on how your system works afterward.
This way, you know if turning off this feature helps. Try it yourself and see the difference it makes.