
If you want your CPU to run cooler and last longer, knowing how to clean old thermal paste is essential. Over time, thermal paste can dry out or get messy, causing your computer to overheat.
But don’t worry—cleaning it off is easier than you might think. You’ll learn simple, step-by-step methods to remove thermal paste safely and prepare your CPU for fresh application. Keep reading, and you’ll save money, improve performance, and avoid common mistakes that many people make.
Your CPU will thank you!

Credit: www.youtube.com
Why Clean Thermal Paste
Cleaning thermal paste from a CPU is a key step in keeping your computer cool. Old or dirty paste can cause your processor to overheat. This leads to slower performance and possible damage. Knowing why to clean thermal paste helps maintain your PC’s health and speed.
Importance Of Thermal Paste
Thermal paste fills tiny gaps between the CPU and heatsink. This helps heat transfer from the CPU to the cooler. Good thermal paste keeps the CPU temperature low. Without it, heat builds up and slows down your computer. Fresh paste ensures efficient cooling and protects your CPU.
Signs Of Old Or Damaged Paste
Check for high CPU temperatures even during light tasks. Your computer may shut down suddenly or run louder. These can be signs of old thermal paste. Dry, cracked, or hardened paste loses its ability to transfer heat. Cleaning and replacing paste fixes these issues and improves cooling.
Tools Needed
Cleaning thermal paste from a CPU requires the right tools. Having the proper materials makes the task easier and safer. This section lists the essential tools needed for a clean and effective job.
Cleaning Materials
Start with isopropyl alcohol, at least 70% pure. It helps dissolve old thermal paste quickly. Use lint-free cloths or coffee filters to avoid leaving fibers. Cotton swabs work well for tight spots. A plastic card or a soft scraper can remove thick paste gently. Avoid metal tools that can scratch the CPU surface.
Safety Precautions
Always work in a static-free environment. Wear an anti-static wrist strap to protect the CPU. Avoid touching CPU pins or contacts with bare hands. Keep liquids away from other computer parts. Work slowly to prevent damage. Dispose of used materials properly to keep your workspace clean.
Preparing The Cpu
Preparing the CPU is the first step to clean thermal paste properly. This step ensures safe handling of delicate parts. It also helps avoid damage to the CPU or motherboard. Take your time and follow each step carefully.
Before cleaning, the CPU cooler must be removed. The cooler holds the thermal paste and keeps the CPU cool. Removing it correctly makes the cleaning process easier and safer.
Removing The Cooler
Turn off your computer and unplug it from power. Wait for the CPU to cool down completely. Avoid touching the cooler fan blades to prevent damage. Unscrew or unclip the cooler carefully. Gently lift it off the CPU. Avoid twisting or pulling too hard. Place the cooler on a clean surface.
Handling The Cpu Safely
Ground yourself to avoid static electricity. Hold the CPU by its edges only. Avoid touching the pins or contacts underneath. Use a soft cloth or an anti-static mat. Work in a clean and dust-free area. Keep tools and liquids away from the CPU. Handle the CPU gently to prevent bending or breaking.
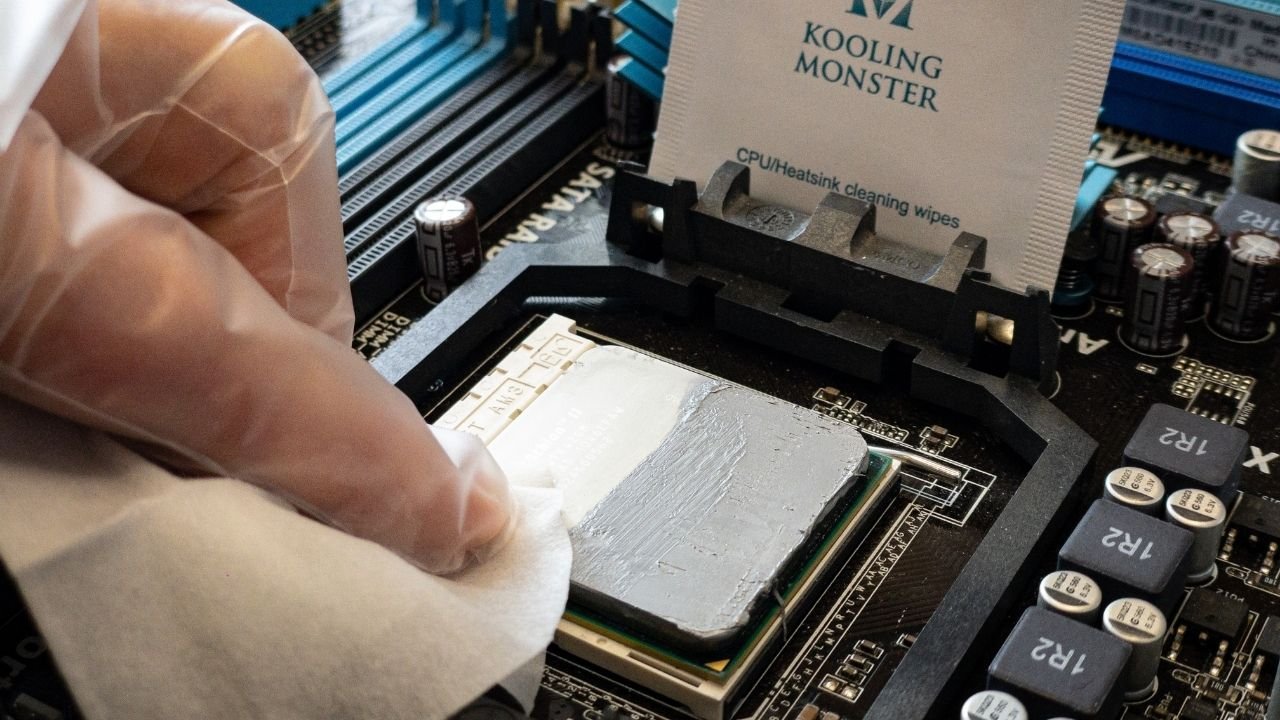
Removing Old Thermal Paste
Removing old thermal paste is a crucial step before applying new paste on your CPU. Old paste can dry out and lose its ability to conduct heat effectively. Cleaning it off ensures better contact between the CPU and cooler. This improves cooling performance and prevents overheating.
Take care during the removal process. Damaging the CPU surface can cause problems later. Use the right tools and materials for safe cleaning.
Using Isopropyl Alcohol
Isopropyl alcohol is the best cleaner for old thermal paste. Choose alcohol with at least 90% purity. It evaporates quickly and leaves no residue.
Dampen a soft cloth or cotton swab with the alcohol. Avoid soaking it to prevent liquid from seeping into the CPU socket. Gently apply the alcohol to the paste area. Let it sit for a few seconds to loosen the old paste.
Gentle Wiping Techniques
Use gentle, circular motions to wipe off the paste. Press lightly to avoid scratching the CPU surface. Change cloth or swab sides often to avoid spreading paste.
Repeat the process if needed. Continue until the CPU surface looks clean and free of residue. Avoid using sharp tools or excessive force. Finish by letting the CPU dry completely before applying new paste.
Cleaning The Cooler Base
Cleaning the cooler base is a key step in maintaining your CPU’s performance. The base must be free of old thermal paste to ensure proper heat transfer. Dirt or residue can cause overheating and reduce your computer’s lifespan.
Take your time cleaning the cooler base carefully. Use the right materials to avoid damage. A clean, smooth surface helps the new thermal paste spread evenly.
Removing Residue
Start by wiping off large chunks of old thermal paste with a soft cloth. Use isopropyl alcohol (70% or higher) to dissolve leftover paste. Apply the alcohol to a lint-free cloth or cotton swab. Gently rub the cooler base in small circles. Avoid pressing too hard to prevent scratches. Repeat until the base looks clean and free of residue.
Ensuring A Smooth Surface
After removing residue, check the cooler base for rough spots. Use a microfiber cloth with a little alcohol to polish the surface. This step removes tiny particles and oils. The base should feel smooth to the touch. A smooth surface helps the new thermal paste create a good seal. Avoid using abrasive materials that can damage the base.

Credit: www.wepc.com
Applying New Thermal Paste
Applying new thermal paste is a key step in maintaining your CPU’s cooling efficiency. It helps fill tiny gaps between the CPU and cooler. This ensures better heat transfer and prevents overheating. Applying the right amount and using proper methods are crucial for the best results.
Choosing The Right Amount
Use a small pea-sized drop of thermal paste. Too much paste can cause spills and reduce cooling. Too little will not cover the surface well. The goal is to cover the CPU evenly without excess. A thin, even layer works best for heat transfer.
Application Methods
Place the paste directly on the center of the CPU. When you attach the cooler, it spreads the paste evenly. Some prefer spreading the paste manually with a plastic card. Others use dots or lines based on CPU size. Avoid air bubbles by applying paste carefully and evenly.
Reassembling The Cpu
After cleaning the old thermal paste from your CPU, the next step is to reassemble it carefully. This process ensures your CPU runs smoothly without overheating. Take your time to avoid mistakes that can damage your hardware. Follow each step with care.
Placing The Cooler Back
Start by applying new thermal paste on the CPU surface. Use a small amount in the center. Then, place the cooler gently over the CPU. Align it correctly with the mounting points. Do not slide the cooler once it touches the paste. Press it down evenly to spread the paste well.
Securing Components Properly
Next, secure the cooler with screws or clips. Tighten them in a diagonal pattern. This helps apply pressure evenly. Do not overtighten to avoid damaging the CPU. Check that all cables are connected. Ensure the fan power cable is plugged in firmly.
Testing And Monitoring
Testing and monitoring your CPU after cleaning thermal paste is key. This step confirms the paste spreads well and works as expected. It also helps catch any problems early before damage occurs.
Checking Temperature Levels
Use software like HWMonitor or Core Temp to check CPU temperatures. Run the computer under normal use and watch the temperature. Ideal CPU temps after cleaning should stay below 70°C under load. Higher temps suggest the paste may be uneven or insufficient. Check temps during idle and heavy tasks to see clear differences.
Troubleshooting Common Issues
If temperatures stay high, reseat the cooler and reapply paste. Make sure you use the right amount—too much or too little can cause problems. Check that the cooler is mounted tightly and evenly. Inspect the CPU surface and cooler base for dirt or old paste. Repeat cleaning if needed. Monitor temps again to confirm improvements.
Credit: koolingmonster.com
Frequently Asked Questions
How Do I Safely Remove Thermal Paste From Cpu?
Use isopropyl alcohol and a lint-free cloth or coffee filter. Gently wipe the paste until the surface is clean. Avoid harsh chemicals or abrasive materials that can damage the CPU or socket.
What Materials Are Best For Cleaning Thermal Paste?
Isopropyl alcohol (90%+ purity) and microfiber cloths or coffee filters work best. These materials dissolve paste effectively without leaving residue or causing damage.
When Should I Clean Thermal Paste Off My Cpu?
Clean thermal paste when replacing or upgrading your CPU cooler. Also clean if you notice overheating or poor thermal performance to ensure proper heat transfer.
Can I Reuse Old Thermal Paste After Cleaning?
No, always apply fresh thermal paste after cleaning. Old paste loses effectiveness and can cause poor heat conduction, leading to higher CPU temperatures.
Conclusion
Cleaning thermal paste on your CPU keeps it cool and working well. Use gentle materials like isopropyl alcohol and a soft cloth. Take your time and be careful not to damage parts. A clean CPU helps your computer run smoothly and last longer.
Regular maintenance avoids overheating and slowdowns. Remember, patience and care make the process easy. Try it yourself for better computer performance.