
Are you worried that your CPU fan is too loud or not cooling your computer well enough? Knowing how to change your CPU fan speed can make a huge difference.
It helps keep your computer running smoothly and quietly, saving you from overheating or annoying noise. You’ll learn simple, clear steps to adjust your CPU fan speed the right way—no technical jargon, just easy instructions you can follow. Keep reading, and take control of your computer’s cooling like a pro!
Credit: www.breezeresidency.com
Why Adjust Cpu Fan Speed
Adjusting your CPU fan speed helps control your computer’s temperature. It balances cooling and noise levels. Setting the right speed keeps your CPU safe and your system quiet. It also improves your computer’s performance and lifespan. Understanding why to change fan speed helps you keep your PC running smoothly.
Benefits Of Custom Fan Speeds
Custom fan speeds reduce noise during light tasks. Your PC stays quieter when not working hard. Higher speeds increase cooling when the CPU is busy. This prevents overheating and protects hardware. Custom settings can save energy and extend fan life. You get better control over cooling and sound.
Signs Your Fan Speed Needs Changing
Your PC gets hot or shuts down suddenly. Fans run loudly all the time. You hear strange noises from the fan. The computer feels slower or freezes often. These signs show your fan speed may be wrong. Changing the speed can fix these problems quickly.
Methods To Change Cpu Fan Speed
Controlling your CPU fan speed helps manage your computer’s temperature and noise. Different methods exist to change the fan speed. Some are built into your system, while others use extra tools. Choose a method that fits your needs and skill level.
Using Bios Or Uefi Settings
BIOS or UEFI is your computer’s basic setup menu. You can access it by pressing a key during startup, like Delete or F2. Inside, look for the “Hardware Monitor” or “Fan Control” section.
Here, you can set fan speed profiles or adjust fan curves. This controls how fast the fan spins at certain temperatures. Changes save after you exit BIOS. This method is safe and works without extra software.
Third-party Software Options
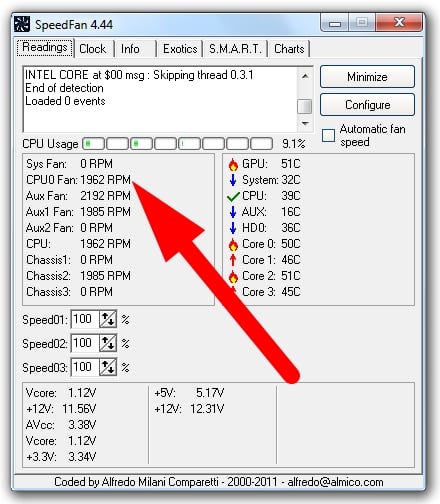
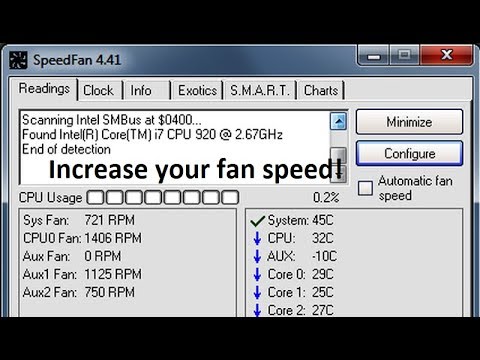
Several programs let you control CPU fan speed inside Windows. Popular tools include SpeedFan, HWMonitor, and MSI Afterburner. These apps show your fan speed and temperature in real-time.
You can set custom fan speeds or profiles based on temperature. This method is user-friendly and does not need restarting your PC. Some software only works with certain motherboard brands. Check compatibility before downloading.
Manual Fan Controllers
Manual fan controllers are physical devices you connect to your fan. They have dials or sliders to adjust speed directly. This lets you change speed quickly without software or BIOS.
Controllers fit inside your PC case or on the front panel. They work with most fans and give precise control. This option is good for users who want hands-on adjustment. Installation requires opening your PC and some wiring.
Step-by-step Fan Speed Adjustment
Adjusting your CPU fan speed helps keep your computer cool and quiet. This step-by-step guide shows how to change fan speed safely. Follow each step carefully to avoid issues. You can customize fan speed to match your needs.
Accessing The Bios Or Uefi
Restart your computer and press the setup key during boot. Common keys include Delete, F2, or Esc. This opens the BIOS or UEFI settings. Look for a message on the screen that tells you the correct key. If unsure, check your motherboard manual.
Navigating Fan Control Settings
Inside BIOS or UEFI, find the hardware or monitoring section. Look for “Fan Control” or “Hardware Monitor.” This area shows current fan speeds and temperatures. Use arrow keys to select fan settings. Some systems have a dedicated tab for fan control.
Setting Custom Fan Curves
Create a fan curve to set fan speed at different temperatures. Increase fan speed as CPU temperature rises. This keeps your CPU cool without making noise all the time. Use simple points to adjust how fast the fan spins at set temperatures.
Applying Changes Safely
Save your changes before exiting BIOS or UEFI. Choose “Save and Exit” or press the designated key. Your computer will reboot with new fan settings. Monitor your system to ensure it stays cool and quiet. Adjust again if needed for better balance.
Credit: www.youtube.com
Tips For Optimal Cooling
Keeping your CPU cool is important for its health and your computer’s speed. Adjusting the CPU fan speed helps control temperature and noise. Use these tips for better cooling and smooth performance.
Balancing Noise And Performance
Faster fan speeds cool the CPU well but create more noise. Slower speeds are quieter but may cause overheating. Find a balance by adjusting fan speed in small steps. Test different speeds to see what works best for your system.
Monitoring Cpu Temperature
Check your CPU temperature regularly. Use simple tools like HWMonitor or SpeedFan. Keep the temperature below 70°C for safe operation. If it rises too high, increase the fan speed to cool the CPU quickly.
Regular Maintenance And Cleaning
Dust blocks airflow and makes fans work harder. Clean your computer case and fan every few months. Use a soft brush or compressed air to remove dust. This keeps the fan running smoothly and improves cooling.
Troubleshooting Fan Speed Issues
Troubleshooting CPU fan speed issues can be tricky. Fans should respond quickly to speed changes for proper cooling. When they don’t, your computer might overheat or run loudly. Identifying the cause helps fix the problem fast. Here are common issues to check and how to solve them.
Fan Not Responding To Changes
Sometimes the fan speed does not change after adjustment. This may happen if the fan is faulty or the BIOS settings are incorrect. Check the BIOS fan control options first. Ensure the fan is connected properly to the motherboard. Try resetting BIOS to default settings. If the fan still does not respond, it might need replacement.
Unusual Noises Or Vibrations
Loud noises or vibrations often mean the fan is dirty or damaged. Dust buildup can block the blades and slow the fan down. Use compressed air to clean dust from the fan. Check if the fan blades spin freely by hand. If the fan wobbles or makes grinding sounds, it might be worn out. Replace the fan to avoid hardware damage.
Software Conflicts
Fan speed control software can cause conflicts. Running multiple fan control apps might confuse the system. Uninstall extra software and keep only one fan controller. Update all related drivers and software to the latest version. Sometimes, system updates reset fan settings. Check software settings after updates to ensure proper fan speed control.

Credit: softwareg.com.au
Frequently Asked Questions
How Can I Change Cpu Fan Speed In Bios?
To change CPU fan speed in BIOS, restart your PC and enter BIOS settings. Navigate to the “Hardware Monitor” or “Fan Control” section. Adjust fan speed settings manually or enable automatic control options. Save changes and exit BIOS to apply new fan speed settings.
What Software Helps Control Cpu Fan Speed?
Software like SpeedFan, MSI Afterburner, or ASUS AI Suite allows you to control CPU fan speed. These tools provide easy-to-use interfaces for monitoring and adjusting fan speeds. Always download software from official sources to ensure safety and compatibility with your hardware.
Why Should I Adjust My Cpu Fan Speed?
Adjusting CPU fan speed helps balance cooling performance and noise levels. Lower speeds reduce noise but may increase temperatures. Higher speeds improve cooling but create more noise. Proper fan speed management extends CPU lifespan and maintains optimal system performance.
Can I Change Cpu Fan Speed On Windows?
Yes, you can change CPU fan speed on Windows using third-party software like SpeedFan. Windows itself doesn’t offer built-in fan control. Ensure your motherboard supports software fan control for successful speed adjustments.
Conclusion
Changing your CPU fan speed helps control your computer’s temperature. It keeps your system cool and quiet. You can adjust the speed using BIOS or special software. Always check your fan’s limits before making changes. Small tweaks can improve your PC’s performance and lifespan.
Stay patient and follow each step carefully. This way, you protect your hardware and avoid problems. Now you know how to manage your CPU fan speed safely. Keep your computer running smoothly every day.