
Are you curious about the graphics power inside your Windows 11 computer? Knowing how to find your GPU can help you understand your system’s capabilities, improve gaming, or troubleshoot display issues.
In this guide, you’ll learn simple and quick steps to discover your GPU without any hassle. By the end, you’ll have the confidence to check your graphics card anytime you want. Keep reading to unlock this useful skill!
Check Gpu Via Task Manager
Checking your GPU on Windows 11 is simple using the Task Manager. This tool gives a quick view of your system’s hardware. You can see the graphics card without installing extra software. Follow these steps to find your GPU easily.
Open Task Manager
Press Ctrl + Shift + Esc on your keyboard. This opens the Task Manager immediately. You can also right-click the Start button and select Task Manager from the menu. The Task Manager window will appear on your screen.
Navigate To Performance Tab
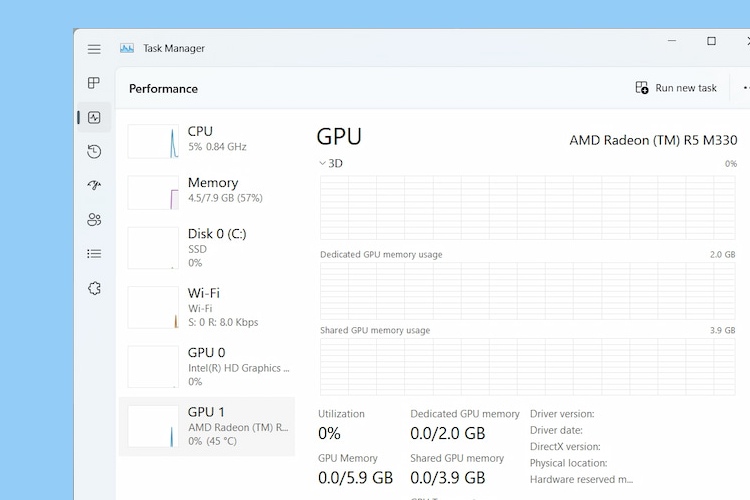
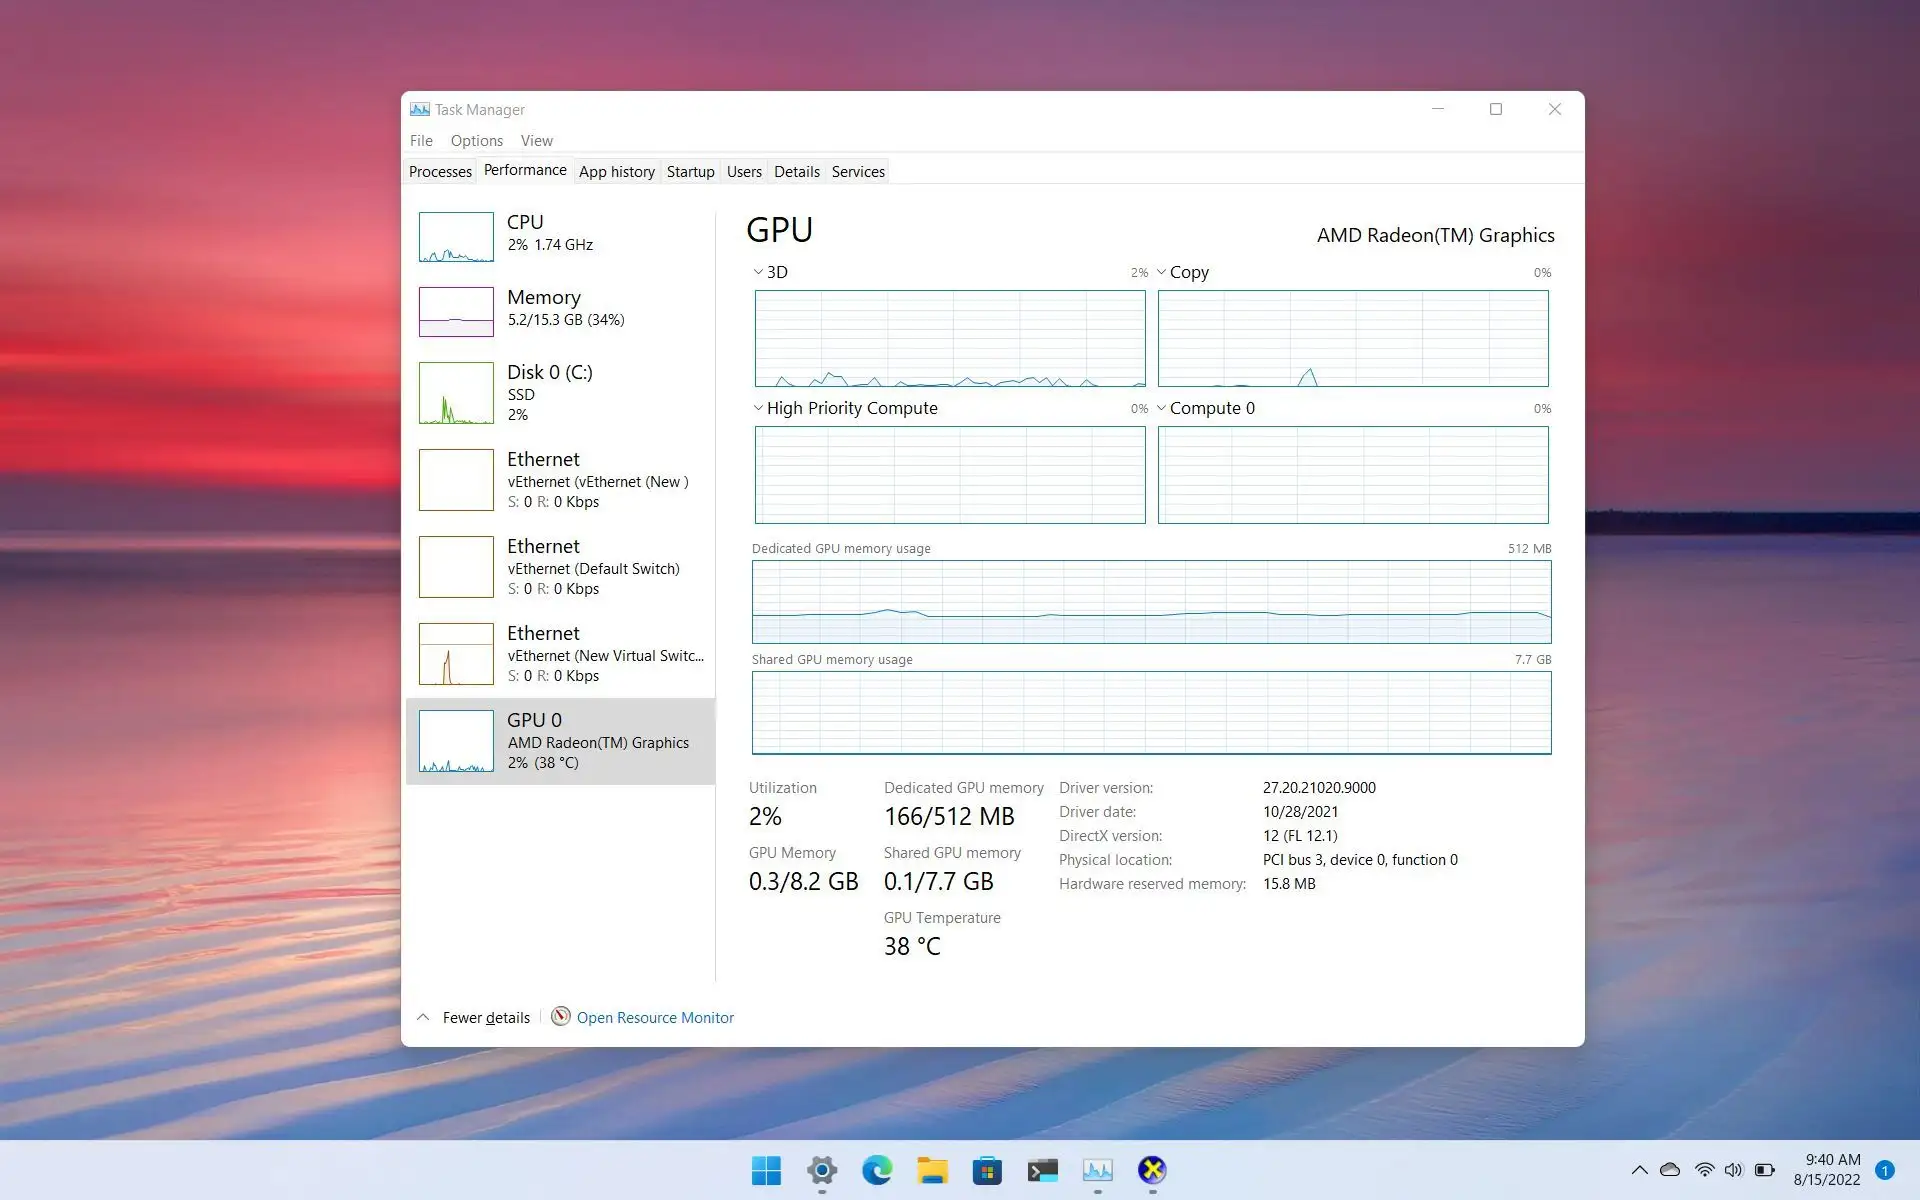
At the top of Task Manager, click the Performance tab. This tab shows the status of your CPU, memory, disk, and GPU. Scroll down on the left side until you find GPU. Click it to see detailed information.
Identify Your Graphics Card
The GPU section lists the name of your graphics card at the top right. You will see details like GPU usage, memory, and driver version. This helps confirm which graphics card your system uses. It works for both integrated and dedicated GPUs.

Credit: www.esseg.eu
Use Device Manager To Find Gpu
Finding your GPU on Windows 11 is simple with Device Manager. This built-in tool shows all hardware components. It helps to identify the graphics card installed on your PC. Follow these steps to find your GPU quickly.
Access Device Manager
Press the Windows key and type “Device Manager.” Select the app from the search results. The Device Manager window will open, showing a list of hardware categories.
Expand Display Adapters
Look for the “Display adapters” section in the list. Click the small arrow next to it to expand. This reveals the graphics cards detected by Windows 11.
View Graphics Card Details
Right-click the listed GPU and select “Properties.” In the new window, check the “Details” tab. This shows information like the device name and manufacturer. It confirms the exact GPU model on your system.
Find Gpu Using Directx Diagnostic Tool
The DirectX Diagnostic Tool helps you find your GPU details quickly. It is a built-in Windows utility that shows important information about your graphics hardware. This tool works well on Windows 11 for checking your video card and driver version.
Using this tool does not require extra software or technical skills. It displays clear and reliable data about your graphics processing unit. Follow the steps below to access your GPU information easily.
Open Dxdiag
Press the Windows key and R at the same time to open the Run box. Type dxdiag in the box and press Enter. This action opens the DirectX Diagnostic Tool window. Wait a few seconds for the tool to load all system information.
Locate Display Tab
In the DirectX Diagnostic Tool window, look for the tabs at the top. Click on the tab labeled “Display.” This tab contains all the graphics-related information. It shows details about your GPU and its driver.
Check Gpu Information
Under the “Device” section on the Display tab, find the “Name” field. It shows the exact model of your GPU. The “Manufacturer” field tells you the company that made the GPU. You can also see the total memory available and the current driver version here.
Credit: www.totalplumbingfl.com
Check Gpu With Settings App
Checking your GPU using the Settings app on Windows 11 is quick and simple. This method helps you find basic details about your graphics card without extra software. It is useful for beginners and those who want a fast way to see GPU info.
The Settings app shows your GPU type and some performance details. Follow the steps below to view your graphics card information easily.
Open System Settings
First, click the Start button at the bottom left of your screen. Then, select the Settings gear icon. You can also press Windows key + I to open Settings directly. This opens the main menu where you control your system options.
Go To Display Section
Inside Settings, click on “System” on the left menu. Next, choose the “Display” tab. This section controls all your screen-related settings. Scroll down to find more options about your display and graphics.
View Graphics Settings
Scroll down in the Display section and click “Graphics” or “Graphics settings.” Here, Windows shows the GPU used for different apps. You will see the name of your graphics card listed. This area also allows you to set preferences for performance or power saving.
Use Third-party Software
Using third-party software is a simple way to find your GPU on Windows 11. These tools give detailed information about your graphics card. They show specs that Windows settings might not display. Many apps are free and easy to use.
Popular Gpu Detection Tools
Several apps help identify your GPU quickly. GPU-Z is very popular for detailed graphics info. Speccy shows full system details, including GPU. HWMonitor monitors your hardware health and GPU stats. These tools work well on Windows 11.
How To Use Gpu-z
Download GPU-Z from its official website. Open the app after installation. The main screen shows your GPU name and model. It also lists memory size and driver version. You can see GPU temperature and clock speeds too. This info helps understand your graphics card better.
Benefits Of Third-party Apps
Third-party apps provide more data than default Windows tools. They display real-time GPU performance details. These apps help check if your GPU works correctly. They assist in troubleshooting graphics issues. Many offer export options to save reports. Easy to use even for beginners.
Credit: www.drfabregues.com
Tips To Identify Integrated Vs Dedicated Gpu
Knowing the difference between integrated and dedicated GPUs helps you understand your computer better. This knowledge guides you in choosing the right settings for your tasks. Here are simple tips to identify and use each type of GPU on Windows 11.
Differences In Performance
Integrated GPUs share memory with the CPU. They are less powerful but use less energy. Dedicated GPUs have their own memory and are stronger. They handle heavy tasks like gaming and video editing better. Performance varies greatly between the two types.
How To Spot Each Type
Open Task Manager and go to the Performance tab. Look for GPU information listed as GPU 0, GPU 1, and so on. Integrated GPUs usually have the name of the CPU brand, like Intel UHD. Dedicated GPUs show names like NVIDIA or AMD. This makes it easy to tell them apart.
When To Use Which Gpu
Use the integrated GPU for everyday tasks like browsing or office work. It saves battery and runs cooler. Switch to the dedicated GPU for games, 3D work, or video editing. This gives better speed and quality. Windows 11 often switches automatically, but you can set preferences manually.
Frequently Asked Questions
How Do I Check My Gpu On Windows 11?
Open Task Manager by pressing Ctrl + Shift + Esc. Click the Performance tab. Select GPU to view your graphics card details.
Can I Find Gpu Info Using Windows Settings?
Yes, go to Settings > System > Display. Scroll down and click Advanced display. Your GPU name appears under Display adapter properties.
How To Identify Gpu Model With Directx Diagnostic Tool?
Press Win + R, type dxdiag, and hit Enter. Navigate to the Display tab to see your GPU name and manufacturer.
Is Device Manager Useful For Finding Gpu Details?
Yes, open Device Manager, expand Display adapters. Your GPU model and manufacturer will be listed there clearly.
Conclusion
Finding your GPU on Windows 11 is simple and quick. Use the Device Manager or Task Manager to see your graphics card. Knowing your GPU helps with software and game choices. Keep your drivers updated for the best performance. Now, you can easily check which GPU your system uses.
This small step improves your computer experience. Try it today and stay informed about your hardware.