
Are you ready to boost your computer’s performance but don’t know where to start? Upgrading your motherboard and CPU can seem tricky, but it doesn’t have to be.
Imagine your computer running faster, handling more tasks, and giving you a smoother experience every time you use it. In this guide, you’ll discover simple, clear steps to upgrade these key parts yourself. By the end, you’ll have the confidence to make your PC work better than ever.
Keep reading—your next-level computer is just a few clicks away.
Choosing The Right Motherboard
Choosing the right motherboard is a key step in upgrading your CPU and overall computer system. The motherboard connects all parts and affects performance. Picking the right one ensures your new CPU works properly and your system runs smoothly. This section covers important points to consider when selecting a motherboard.
Compatibility With Cpu
The motherboard must support your new CPU’s brand and model. Check the CPU socket type on the motherboard. It must match the CPU’s socket exactly. Also, verify the chipset supports your CPU generation. Using incompatible parts can cause system failure or poor performance.
Form Factor Considerations
Motherboards come in different sizes called form factors. Common types include ATX, Micro-ATX, and Mini-ITX. Choose a form factor that fits your computer case. Smaller boards fit compact cases but may have fewer ports. Larger boards offer more expansion options but need bigger cases.
Essential Features To Look For
Look for features that fit your needs. Check the number of RAM slots and maximum memory support. Ensure enough PCIe slots for graphics cards or other devices. Look for USB ports, SATA connectors, and M.2 slots for storage. Good power delivery helps stable CPU performance.
Selecting A Compatible Cpu
Selecting a compatible CPU is a key step in upgrading your motherboard and CPU. The CPU must fit your motherboard’s socket. It also needs to match your performance needs and budget. Choosing the right CPU ensures your system runs smoothly and lasts longer. This section explains how to pick the best CPU for your upgrade.
Socket Types Explained
The CPU socket is a connector on the motherboard. It holds the CPU in place and connects it to the system. Common socket types include Intel’s LGA and AMD’s AM4. Each socket supports specific CPU models. Check your motherboard’s socket type before buying a CPU. Using the wrong socket means the CPU won’t fit or work.
Performance Vs. Budget
CPUs vary in speed, cores, and price. Faster CPUs handle more tasks at once. They improve gaming, video editing, and multitasking. But high-performance CPUs cost more. Decide how much you want to spend. Choose a CPU that meets your needs without overspending. Balance speed and price for the best value.
Future-proofing Your Build
Think about how long you want your PC to last. Newer CPUs support the latest features and software. They offer better performance over time. Buying a slightly better CPU now can save money later. It keeps your system able to run new programs. Choose a CPU that fits both today’s and tomorrow’s needs.
Preparing Your Workspace
Preparing your workspace is the first step in upgrading your motherboard and CPU. A clean, organized area helps prevent damage and mistakes. It also makes the process faster and less stressful.
Before you start, set up a space with good lighting and enough room to work comfortably. Clear away clutter and distractions. This will keep your focus on the task and protect your components.
Gathering Tools And Materials
Collect all tools and parts before you begin. Common tools include a screwdriver set, thermal paste, and an anti-static wristband. Have your new motherboard and CPU ready. Keep small parts like screws in a container to avoid losing them.
Anti-static Precautions
Static electricity can harm sensitive computer parts. Use an anti-static wristband to ground yourself. Work on a non-carpeted surface to reduce static. Avoid touching metal contacts on the CPU and motherboard directly. Handle components by their edges only.
Backing Up Important Data
Save your important files before starting the upgrade. Use an external drive or cloud storage for backup. This protects your data if something goes wrong during the process. Double-check that all critical files are copied safely.
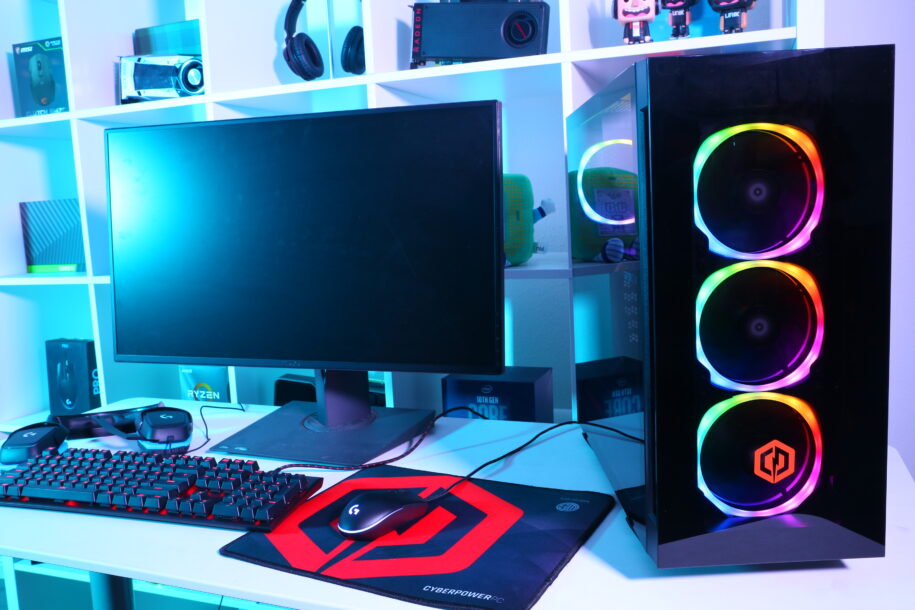
Credit: www.cyberpowerpc.com
Removing The Old Motherboard And Cpu
Removing the old motherboard and CPU is a key step in upgrading your computer. This process requires care and attention. You must prepare your workspace well. Take your time to avoid damaging any parts.
Follow each step carefully. This guide will make the removal clear and safe. With the old parts out, you can fit the new ones easily.
Powering Down And Unplugging
Turn off your computer completely. Press the power button until it shuts down. Unplug the power cable from the wall socket. Disconnect all other cables from the case. This prevents any electric shock or damage.
Disconnecting Components
Open the computer case gently. Locate all the cables connected to the motherboard. Remove cables for storage drives, fans, and front panel buttons. Take out the RAM sticks carefully. Keep all screws and small parts in a safe place.
Unscrewing And Extracting Hardware
Find the screws holding the motherboard to the case. Use the correct screwdriver to avoid slipping. Remove each screw and place them aside. Lift the motherboard slowly to avoid pulling cables. Gently unlock the CPU socket and remove the CPU. Handle the CPU by the edges to avoid damage.
Installing The New Motherboard
Installing the new motherboard is a key step in upgrading your computer. This process sets the base for all other parts. It needs care and patience to avoid damage. Follow clear steps to fit the motherboard correctly and safely.
Aligning And Securing The Board
Start by placing the motherboard inside the case. Match the holes on the board with the standoffs in the case. These standoffs keep the board from touching the metal case. Use screws to fix the board tightly. Do not overtighten screws to avoid damage.
Connecting Power And Data Cables
Next, connect the power cables from the power supply to the motherboard. Plug in the 24-pin main power cable and the CPU power cable. Then, connect the data cables for storage devices like SSDs or HDDs. Make sure cables fit well into their slots. Loose cables can cause problems later.
Installing Expansion Cards
Install any expansion cards such as the graphics card or sound card. Align the card with the slot on the motherboard. Push it down gently but firmly until it clicks in place. Secure the card with screws to the case. Check that all cards are fully seated and stable.

Credit: www.youtube.com
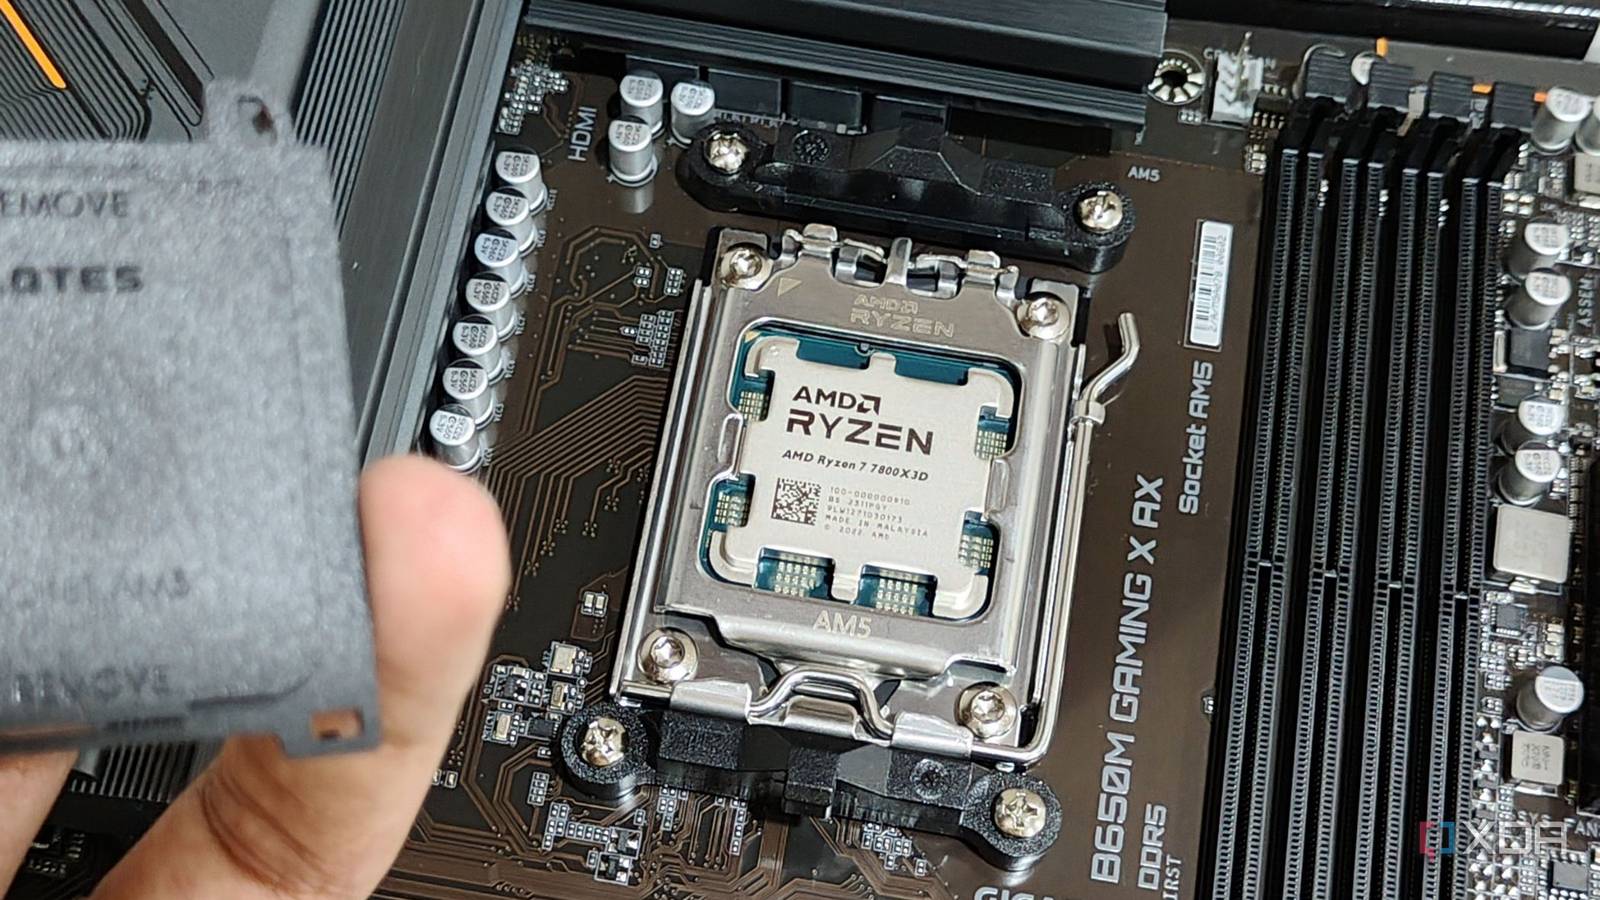
Mounting The New Cpu
Mounting the new CPU is a critical step in upgrading your motherboard and processor. This process requires care and precision to ensure your computer runs smoothly. Proper installation helps avoid damage to the CPU and motherboard. Follow these simple steps for a safe and effective mounting.
Handling The Cpu Safely
Hold the CPU by the edges. Avoid touching the pins or the surface. Oils and dirt from your fingers can cause damage. Use an anti-static wrist strap if available. This prevents static electricity from harming the CPU. Place the CPU on a clean, static-free surface before installation.
Placing And Locking The Cpu
Locate the CPU socket on the motherboard. Open the socket lever carefully. Align the CPU with the socket by matching the triangle marks. Do not force the CPU into place. Gently lower the CPU into the socket. Secure the CPU by closing the socket lever. It should lock firmly without using excessive force.
Applying Thermal Paste
Thermal paste helps transfer heat from the CPU to the cooler. Apply a small, pea-sized amount in the center of the CPU. Spread it evenly if needed, but one small dot is usually enough. Avoid applying too much paste; it can reduce cooling efficiency. Attach the CPU cooler immediately after applying the paste.
Attaching The Cpu Cooler
Attaching the CPU cooler is a key step in upgrading your motherboard and CPU. The cooler keeps your processor from overheating. Without it, your system may shut down or get damaged. Proper installation ensures your PC runs smoothly and lasts longer.
Choosing The Right Cooler
Select a cooler that fits your CPU socket type. Check your motherboard manual for compatibility. Air coolers and liquid coolers are common options. Air coolers are easy to install and maintain. Liquid coolers offer better cooling but need more care. Pick one that matches your budget and needs.
Mounting And Securing
Place the cooler gently on the CPU. Align it carefully with the mounting holes. Apply thermal paste if your cooler doesn’t have pre-applied paste. Use the screws or clips to fasten the cooler. Tighten them evenly to avoid pressure on the CPU. Do not overtighten as it can cause damage.
Connecting Fan Headers
Find the CPU fan header on your motherboard. It is usually labeled “CPU_FAN.” Connect the cooler’s fan cable to this header. This allows the motherboard to control the fan speed. Proper connection helps keep the CPU cool and quiet. Check the fan spins after powering on the PC.
Final Checks And Boot-up
After installing your new motherboard and CPU, the final checks and boot-up steps are crucial. These steps ensure your system powers on correctly and runs smoothly. Careful attention here prevents damage and saves time troubleshooting later.
Double-checking Connections
Start by verifying all cables connect firmly. Check the CPU power cable and 24-pin motherboard power cable. Confirm RAM sticks fit tightly in their slots. Look over data cables for storage drives. Make sure the CPU cooler is properly seated and plugged in. Loose connections cause boot failures and hardware issues.
First Power-on Steps
Switch on the power supply and press the power button. Watch for any signs of life, such as fan movement or LED lights. Listen for beep codes from the motherboard speaker. A single beep usually means a successful POST. No power or continuous beeps indicate hardware problems. If everything looks good, enter BIOS to continue setup.
Bios Configuration Tips
Enter BIOS by pressing the key shown at startup, often Del or F2. Check the CPU and RAM are recognized correctly. Set the date and time. Adjust boot order to prioritize your main drive. Enable XMP or DOCP profiles to run RAM at rated speed. Save changes and exit BIOS to let the system boot into the OS.
Troubleshooting Common Issues
Troubleshooting common issues after upgrading your motherboard and CPU can save time and frustration. Problems might stop your system from starting or cause crashes. Knowing how to identify and fix these issues helps keep your PC running smoothly.
No Power Or Post Failures
No power means your PC does not turn on at all. Check power cables and connections first. Make sure the power supply switch is on. If the PC powers on but shows no display, it might fail the POST (Power-On Self-Test).
POST failures often cause beep codes or blinking lights. These signals tell what part has a problem. Common causes include loose RAM, incorrect CPU installation, or incompatible parts. Reseat the CPU and RAM firmly in their slots. Verify that the motherboard supports your CPU model.
Overheating Problems
Overheating can cause sudden shutdowns or slow performance. Check that the CPU cooler is properly installed. Apply thermal paste evenly between the CPU and cooler. Ensure fans spin freely and dust is cleared from vents.
Good airflow inside the case is crucial. Add extra fans if needed. Monitor temperatures using BIOS or software tools to avoid damage.
Hardware Detection Errors
Your system may not detect new hardware after an upgrade. This issue often happens with storage drives or RAM. Double-check all cables and connectors. Update your motherboard BIOS to support new components.
Use BIOS settings to enable or configure devices. Sometimes resetting BIOS to default can fix detection issues. Confirm all parts are compatible with your motherboard.
Credit: www.xda-developers.com
Frequently Asked Questions
What Tools Do I Need To Upgrade Motherboard And Cpu?
You need a screwdriver, thermal paste, anti-static wrist strap, and a clean workspace. These ensure safe and efficient installation.
How To Check Cpu Compatibility With Motherboard?
Check the motherboard’s CPU socket type and chipset. Verify if the CPU matches these specifications for compatibility.
Can I Reuse Old Ram When Upgrading Cpu And Motherboard?
Yes, if the RAM type and speed match the new motherboard’s supported specifications, reuse is possible without issues.
How To Transfer Data Before Upgrading Motherboard And Cpu?
Backup all important files to an external drive or cloud storage to prevent data loss during hardware changes.
Conclusion
Upgrading your motherboard and CPU can improve your computer’s speed and performance. Take your time to choose parts that fit well together. Always check compatibility before buying new components. Remember to back up your data to avoid losing important files.
Follow safety steps to protect your hardware during installation. With careful work, your PC will run smoother and handle tasks better. Keep learning and enjoy your upgraded system’s benefits every day. Simple changes can bring noticeable improvements.