
Are you struggling with keeping your CPU cool? Installing a fan on your CPU might seem tricky, but it’s easier than you think.
With the right steps, you can improve your computer’s performance and prevent overheating. In this guide, you’ll learn exactly how to install a fan on your CPU quickly and safely. Keep reading to make sure your system stays cool and runs smoothly every time.
Choosing The Right Cpu Fan
Choosing the right CPU fan is key to keeping your computer cool and running well. A good fan stops the CPU from overheating. It also helps your PC work quietly and last longer. Picking the right fan can seem hard, but knowing a few things makes it easy.
Types Of Cpu Fans
There are mainly two types of CPU fans. Air coolers use a fan and heat sink to move heat away. They are common and easy to install. Liquid coolers use water or coolant to carry heat away. These coolers are often quieter and better for high power CPUs.
Factors To Consider
Size matters. The fan must fit inside your PC case. Noise level is important if you want a quiet computer. Look for fans with low decibels. Airflow and speed affect cooling power. Higher airflow cools better but can be louder. Check the fan’s durability and warranty too.
Compatibility With Your Cpu
Make sure the fan fits your CPU socket type. Different CPUs need different mounting systems. Check your CPU model and find fans that match it. Also, confirm the fan fits your motherboard and case. Correct compatibility avoids installation problems and keeps your CPU cool.
Preparing For Installation
Preparing for the installation of a CPU fan is important. It helps avoid mistakes and saves time. Before starting, make sure you have a clean and safe workspace. Take a few minutes to get ready. This will make the process smooth and easy.
Gathering Necessary Tools
Collect all the tools you need before starting. A screwdriver is usually required. You might also need thermal paste and cleaning materials. Having everything ready stops interruptions. Check the fan package for extra parts.
Powering Down And Unplugging
Turn off your computer completely. Unplug the power cable from the wall socket. Press the power button for a few seconds to remove leftover power. This prevents electric shock and damage. Safety first.
Cleaning The Cpu Surface
Remove old thermal paste carefully. Use isopropyl alcohol and a soft cloth. The surface must be clean and dry. A clean CPU helps the new fan work better. Avoid scratching or damaging the CPU.
Applying Thermal Paste
Applying thermal paste is a key step when installing a CPU fan. This paste helps the CPU and fan work together to keep the processor cool. Without it, the heat from the CPU may not move to the fan well. This can cause the CPU to get too hot and slow down or stop working. The process is simple but needs care and the right amount of paste.
Why Thermal Paste Matters
Thermal paste fills tiny gaps between the CPU and the fan base. These gaps hold air, which blocks heat transfer. The paste acts like a bridge for heat to move from the CPU to the fan. This keeps the CPU cooler and running smoothly. Using thermal paste can prevent overheating and extend the CPU’s life. It also helps the fan work less hard, saving energy and noise.
How To Apply Thermal Paste Correctly
Start with a clean CPU surface. Use a soft cloth or alcohol wipe to remove old paste. Apply a small pea-sized dot of thermal paste in the center of the CPU. The pressure from the fan will spread it out evenly. Avoid using too much paste because it can spill over and cause issues. After placing the fan, press down gently but firmly to spread the paste. Check the fan is secure and connected properly.
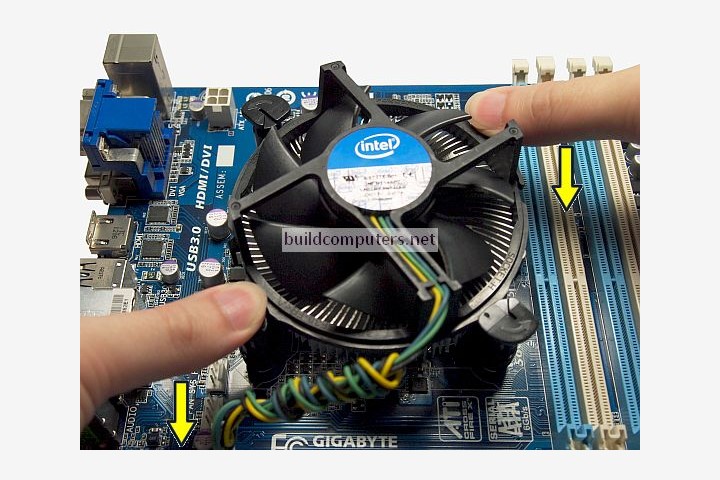
Credit: www.buildcomputers.net
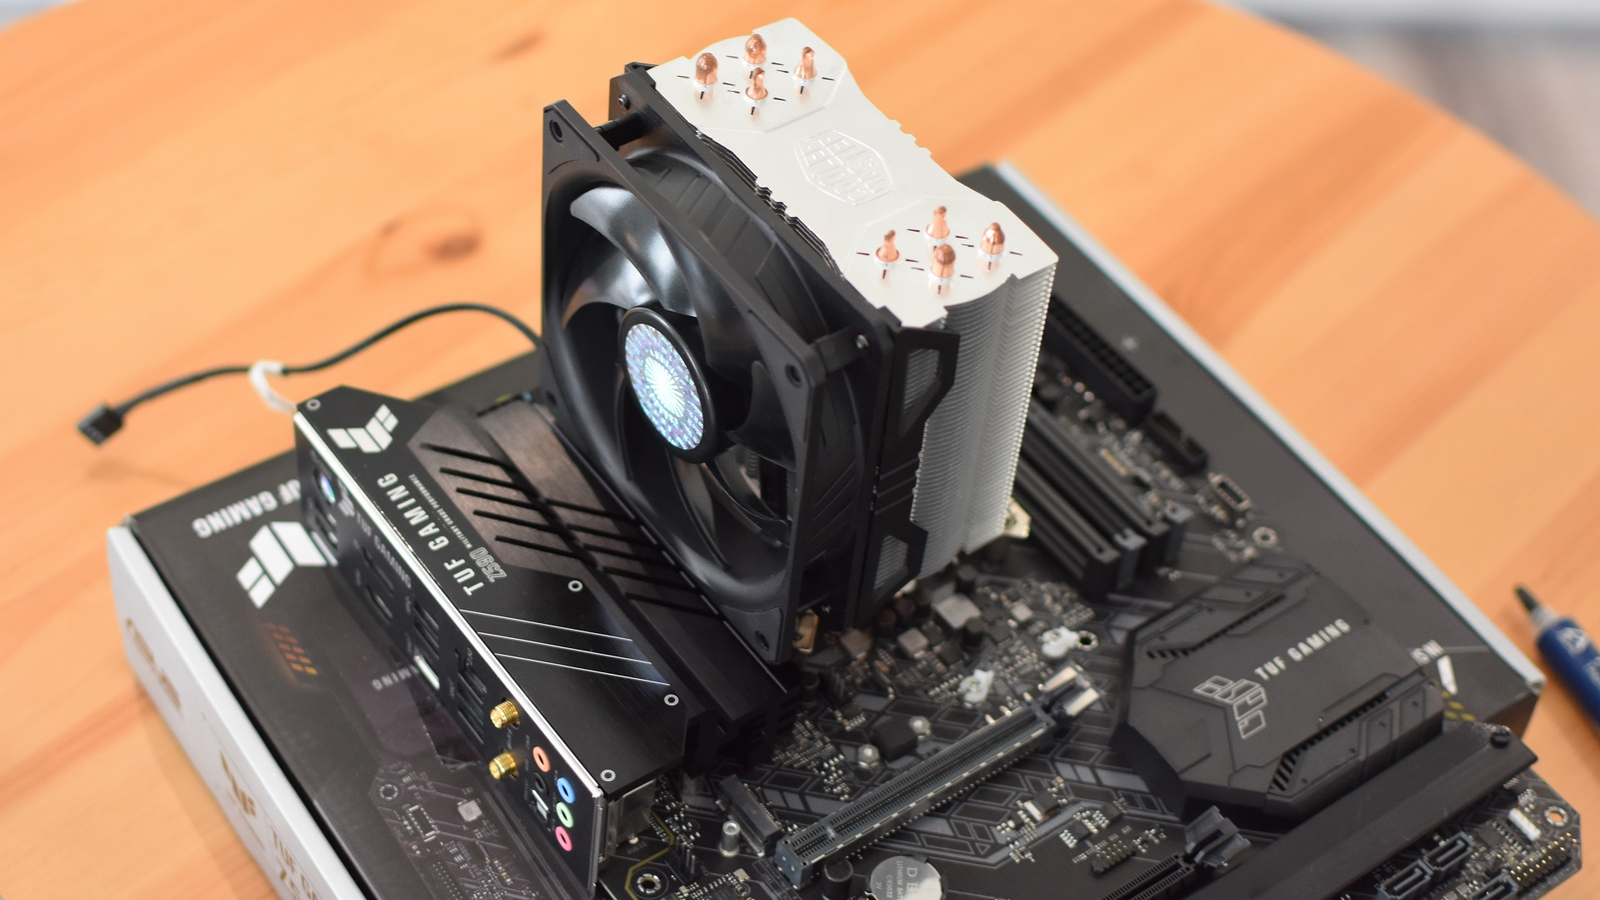
Mounting The Cpu Fan
Mounting the CPU fan is a key step to keep your computer cool. A properly installed fan helps the CPU stay at safe temperatures. This section guides you through mounting the fan correctly for best performance.
Aligning The Fan With The Cpu
Place the fan directly over the CPU heat spreader. Make sure the fan’s base matches the CPU’s shape. Check the fan’s pins or clips align with the socket holes. Avoid forcing the fan into place to prevent damage.
Securing The Fan Properly
Use the screws or clips that came with the fan. Tighten screws evenly to avoid tilting the fan. Do not overtighten; this can break the motherboard or fan. Secure the fan firmly to avoid vibration and noise.
Connecting The Fan To The Motherboard
Find the CPU fan header on the motherboard. It usually says “CPU_FAN” near the pins. Plug the fan’s power cable firmly into this header. Ensure the connector matches the pin layout to avoid damage.
Testing And Optimizing Cooling
Testing and optimizing your CPU fan is key to keeping your computer cool. Proper cooling helps your CPU work better and last longer. After installing the fan, you must check its performance. This step makes sure your computer stays safe from overheating. Small adjustments can improve the cooling system’s efficiency. Follow these simple tips to test and optimize your CPU fan.
Powering On And Monitoring Temperatures
Turn on your computer and enter the BIOS or use software tools. These tools show your CPU temperature in real time. Watch the temperature closely during startup and normal use. A healthy CPU temperature is usually below 70°C. If the temperature is too high, the fan might not be working properly. Check that the fan spins smoothly and without noise. Monitoring temperatures helps catch problems early.
Adjusting Fan Speed Settings
Use BIOS or fan control software to adjust fan speed. Higher fan speeds cool the CPU faster but make more noise. Lower speeds are quieter but may not cool well. Find a balance between noise and cooling power. Some software allows setting fan speed curves based on temperature. This means the fan runs faster only when needed. Proper speed control extends fan life and improves comfort.
Maintaining Your Cpu Fan
Keep the fan clean from dust and debris. Dust blocks airflow and reduces cooling efficiency. Use compressed air to blow out dust regularly. Check the fan blades for dirt and clean gently if needed. Make sure the fan stays securely attached to the CPU. Loose fans can cause vibrations and noise. Regular maintenance helps your CPU fan work better for longer.
Credit: www.rockpapershotgun.com

Credit: www.youtube.com
Frequently Asked Questions
How Do I Install A Cpu Fan Correctly?
To install a CPU fan, align it with the CPU socket. Secure the fan using mounting clips or screws. Connect the fan cable to the CPU fan header on the motherboard. Ensure the fan faces the correct airflow direction for cooling efficiency.
What Tools Are Needed To Install A Cpu Fan?
You typically need a screwdriver, thermal paste, and cleaning materials. A Phillips-head screwdriver is essential for securing screws. Thermal paste helps improve heat transfer between the CPU and fan. Have a soft cloth to clean old paste before installation.
How To Apply Thermal Paste Before Installing The Cpu Fan?
Apply a small pea-sized amount of thermal paste at the CPU’s center. Spread it evenly or let the fan pressure distribute it. Avoid using too much paste to prevent overheating. Proper application ensures efficient heat transfer and better cooling performance.
Can I Install A Cpu Fan Without Thermal Paste?
No, thermal paste is crucial for heat conduction between the CPU and cooler. Without it, heat won’t transfer efficiently, risking CPU overheating. Always clean old paste and apply new thermal paste before installing the fan for optimal cooling.
Conclusion
Installing a fan on a CPU keeps your computer cool and safe. Follow each step carefully for the best results. Check that the fan fits well and connects properly. Clean the area before installing to avoid dust build-up. Listen for unusual noises after turning on the fan.
A properly installed fan helps your CPU last longer. Take your time and be patient during the process. Now, your computer will run smoother and stay cooler.