
Are you struggling to clean off old CPU paste without damaging your processor? Removing CPU paste might seem tricky, but with the right steps, you can do it quickly and safely.
Whether you’re upgrading your cooling system or troubleshooting overheating issues, knowing how to properly clean your CPU is essential. In this guide, you’ll discover simple, effective methods to remove CPU paste like a pro—no special tools required. Keep reading, and you’ll be ready to handle your CPU maintenance with confidence.
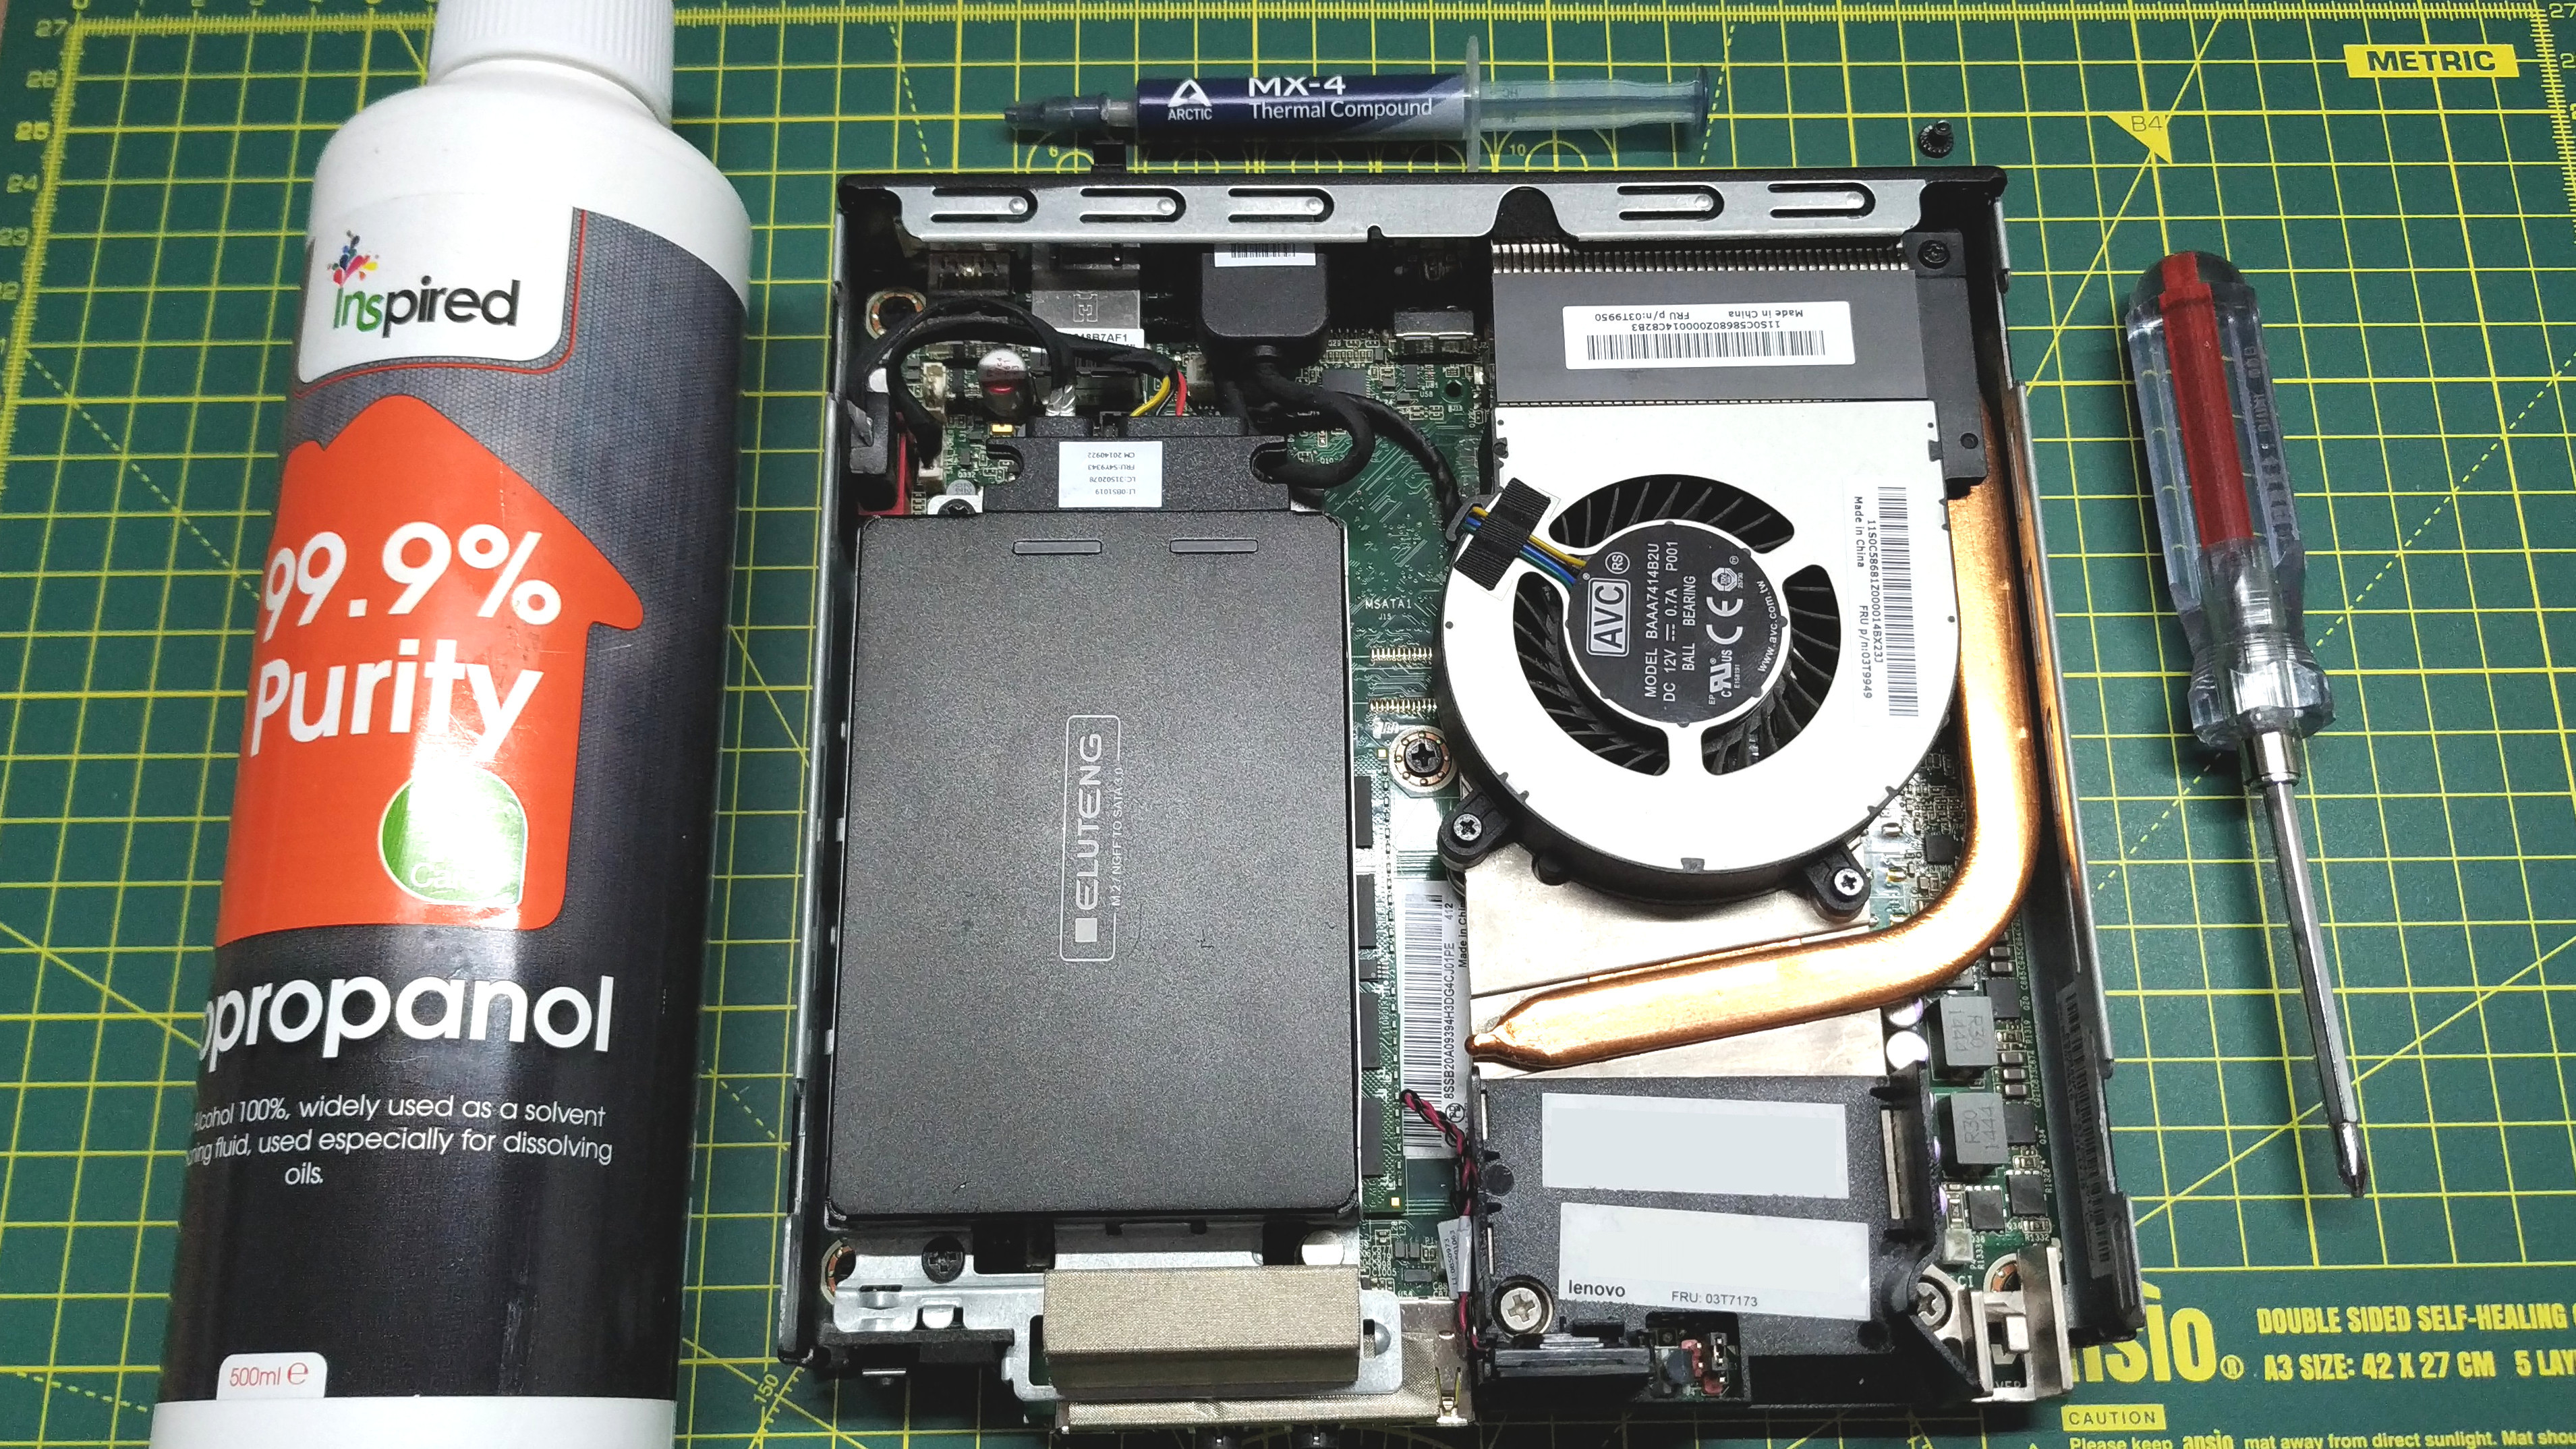
Credit: www.tomshardware.com
Why Remove Cpu Paste
Removing old CPU paste is a key step in keeping your computer cool. Over time, thermal paste loses its ability to transfer heat efficiently. This can cause your CPU to run hotter than it should. Cleaning off the old paste and applying new paste helps maintain proper cooling. It also prevents damage to your processor and improves performance. Understanding why and when to remove CPU paste can save your computer from overheating problems.
When To Clean The Cpu
Clean the CPU whenever you remove the cooler or heatsink. This happens during upgrades or repairs. Also, clean the CPU if you notice higher temperatures. Overheating can mean the paste is dry or worn out. Cleaning ensures good contact between the CPU and cooler. This keeps your system running smoothly.
Risks Of Old Thermal Paste
Old thermal paste can dry out and crack. This reduces its heat transfer ability. The CPU then runs hotter, risking damage. Overheating may cause the system to shut down unexpectedly. It can also shorten the CPU’s lifespan. Cleaning off old paste and applying fresh paste avoids these issues.
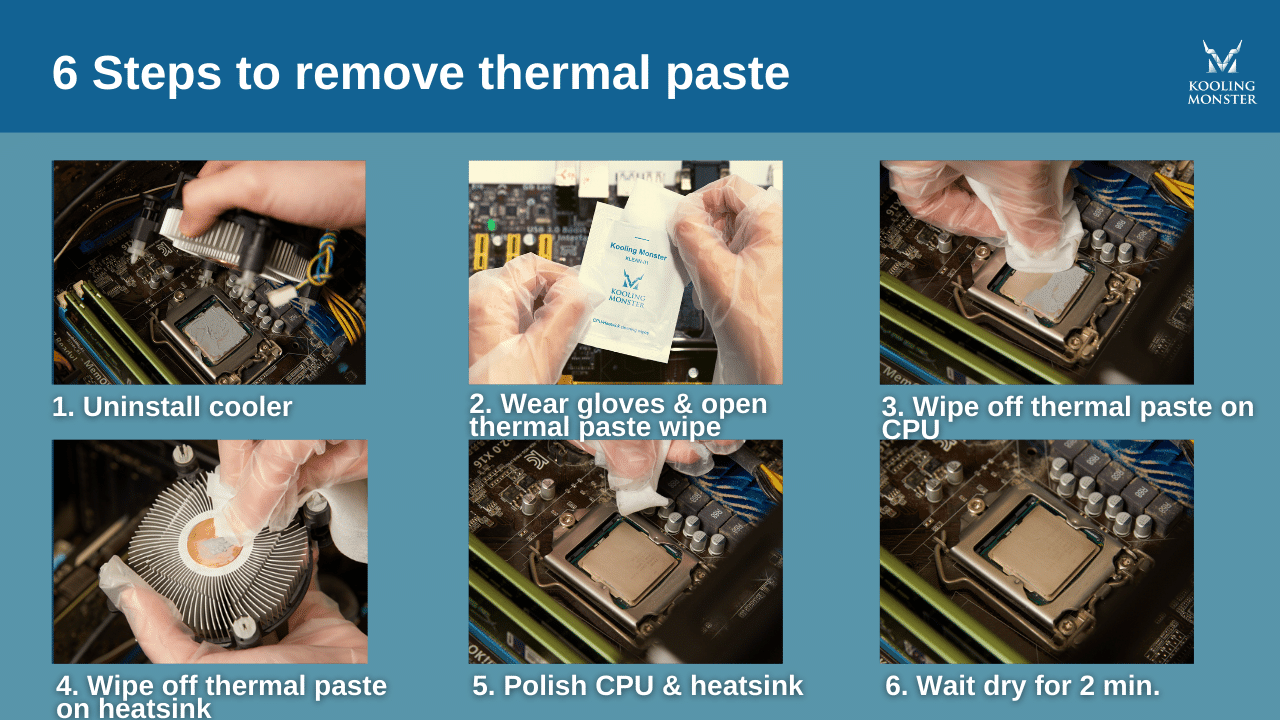
Credit: koolingmonster.com
Tools Needed
Removing CPU paste requires the right tools for a clean and safe process. Using proper materials helps protect your CPU and motherboard. It also ensures no old paste remains to affect cooling performance. Prepare these tools before starting to save time and avoid mistakes.
Recommended Cleaning Materials
Isopropyl alcohol with 90% or higher concentration is best for cleaning. It evaporates quickly and leaves no residue. Use lint-free cloths or coffee filters to wipe off the paste. Cotton swabs help reach tight spots around the CPU socket. A plastic or wooden tool can gently scrape off thick paste without damage.
Optional Supplies For Better Results
Thermal paste remover solutions speed up the cleaning process. They dissolve old paste easier than alcohol alone. Compressed air cans blow away dust and tiny particles. Anti-static wristbands protect your computer parts from static damage. Gloves keep oils from your hands off the CPU surface.
Preparing The Workspace
Preparing the workspace is the first step to safely remove CPU paste. A clean and organized area helps avoid mistakes. It also protects your computer parts from damage. Taking time to set up correctly makes the process smooth and safe.
Power Down And Disconnect
Turn off your computer completely before starting. Unplug the power cable from the wall socket. Remove any connected devices like keyboard, mouse, and monitor. This stops electricity from flowing and reduces risk of shocks. It also prevents damage to sensitive components.
Static Safety Tips
Static electricity can harm computer parts easily. Touch a metal object to discharge static before touching the CPU. Use an anti-static wrist strap if you have one. Work on a non-carpeted surface to lower static build-up. Keep your movements slow and steady to avoid static shocks.
Removing The Cpu Cooler
Removing the CPU cooler is the first step before cleaning off old thermal paste. It requires care to avoid damage to your CPU or motherboard. Follow simple steps to detach the cooler safely and handle the CPU properly.
Take your time. Rushing can cause problems. Prepare your workspace and gather tools before starting.
Detaching The Cooler Safely
Turn off your computer and unplug it. Wait for the system to cool down. The cooler might be hot right after use.
Locate the screws or clips holding the cooler in place. Loosen them gently. Do not force the cooler off. It may stick due to the thermal paste.
Move the cooler carefully side to side. This helps break the bond between the cooler and CPU. Lift it slowly once it feels loose.
Place the cooler on a clean surface. Avoid touching the base or fan blades.
Handling The Cpu
The CPU is fragile and sensitive. Avoid touching the metal pins or contacts.
If the CPU comes loose, handle it by the edges only. Place it on an anti-static mat or container.
Keep your workspace clean and static-free. Use an anti-static wrist strap if possible.
Do not apply pressure on the CPU. Avoid bending or dropping it.
Cleaning The Cpu Surface
Cleaning the CPU surface is a crucial step before applying new thermal paste. A clean surface ensures better heat transfer and prevents overheating. Old paste can block contact between the CPU and the cooler. Removing it properly keeps your CPU safe and cool.
Applying Cleaning Solution
Start by choosing a good cleaning solution. Isopropyl alcohol with 90% or higher purity works best. Apply a small amount to a lint-free cloth or cotton swab. Avoid pouring liquid directly on the CPU. This prevents damage to other parts.
Wiping Techniques
Gently wipe the CPU surface in a circular motion. This helps lift the old paste without scratching. Use light pressure and change cloth sections often. Keep wiping until the surface looks shiny and clean. Avoid leaving fibers or residue behind.
Dealing With Stubborn Paste
Some paste may be hard to remove. Soak a cloth in alcohol and press it on the paste for a minute. This softens the paste for easier removal. Repeat gentle wiping with clean cloth pieces. Patience is key to avoid damaging the CPU.

Credit: www.wikihow.com
Cleaning The Cooler Base
Cleaning the cooler base is an important step in removing old CPU paste. It helps keep your processor cool. A clean base ensures better contact between the cooler and the CPU. This improves heat transfer and prevents overheating.
Take your time to clean the base carefully. Avoid scratches or damage to the surface. Use the right tools and materials for best results.
Removing Old Paste
Start by wiping off the old paste with a soft cloth. Use a paper towel or lint-free wipe. Avoid rough materials that can scratch the base. Apply a small amount of isopropyl alcohol. It helps dissolve the old paste quickly. Gently rub the surface until the paste is gone. Repeat if needed. Make sure no residue remains.
Ensuring A Smooth Surface
Check the cooler base for any scratches or bumps. A smooth surface improves contact with the CPU. Use a soft cloth to polish the base lightly. Avoid using abrasive materials or sandpaper. The goal is to keep the base flat and clean. A smooth surface helps the new paste spread evenly. This keeps the CPU cool during use.
Reapplying Thermal Paste
Reapplying thermal paste is key for a cool and stable CPU. Old paste dries out and loses its power to transfer heat. Removing the old paste and adding new paste helps the CPU run better and last longer.
Careful steps make sure the thermal paste works well. Two main points to focus on: choosing the right paste and applying the correct amount.
Choosing The Right Paste
Select a thermal paste that fits your needs. Some pastes work better for high-performance CPUs. Others are easy to apply and clean. Look for pastes with good heat transfer and safe materials. Avoid pastes that dry quickly or are too thick. A good paste stays soft and spreads evenly.
Applying The Correct Amount
Use a small drop of paste in the center of the CPU. Too much paste can block heat transfer. Too little paste leaves gaps that trap heat. The paste should spread thinly when the cooler is attached. Press the cooler gently but firmly to spread the paste. Check for even coverage without spilling over the sides.
Reinstalling The Cpu Cooler
Reinstalling the CPU cooler is a key step after cleaning off old thermal paste. This part keeps your CPU cool and running well. Proper installation ensures good heat transfer and prevents overheating. Take your time to place it correctly and avoid damage.
Aligning And Securing
Place the cooler gently on the CPU. Check that it lines up with the mounting holes. Hold it steady and press down evenly. Screw or clip the cooler in place carefully. Tighten screws in a cross pattern to spread pressure. Avoid over-tightening, which can damage parts.
Checking For Proper Contact
Good contact between the cooler and CPU is crucial. It helps the thermal paste work well. After securing, look for any gaps or uneven spots. Run your fingers lightly to feel if the cooler is flush. If unsure, remove and try again. Proper contact keeps your CPU cool and safe.
Post-cleaning Checks
After removing old CPU paste and applying new thermal compound, checking the results is key. Post-cleaning checks help ensure your CPU runs cool and stable. These steps confirm the paste spreads correctly and the cooler contacts the CPU well.
Monitoring Cpu Temperatures
Watch your CPU temperature closely after cleaning. Use software tools to track temperature during idle and load. Normal temperatures mean the paste spreads well and the cooler sits properly. High temperatures might indicate poor contact or too much paste. Check often for any unusual spikes or steady rises.
Signs Of Good Thermal Contact
Good thermal contact means heat moves efficiently from the CPU to the cooler. Look for stable temperatures under stress tests or gaming. The CPU should not overheat quickly. The cooler should feel slightly warm, not hot. No sudden shutdowns or throttling also shows good contact.
Frequently Asked Questions
What Tools Do I Need To Remove Cpu Paste?
You need isopropyl alcohol, a lint-free cloth, and cotton swabs. These safely dissolve and wipe away old thermal paste. Avoid harsh chemicals or abrasive materials to prevent damage.
How Do I Safely Clean Old Cpu Paste?
Apply isopropyl alcohol to a cloth or swab. Gently wipe the CPU surface until all paste is removed. Let it air dry completely before applying new paste or reassembling.
Can I Reuse Old Cpu Paste After Removal?
No, reusing old CPU paste can reduce thermal efficiency. Always clean off old paste and apply a fresh, thin layer for optimal cooling performance.
How Often Should I Remove And Replace Cpu Paste?
Replace CPU paste every 1 to 2 years or during CPU upgrades. Over time, paste dries out, lowering heat transfer and risking overheating.
Conclusion
Removing CPU paste is simple with the right steps. Clean the old paste gently and apply new paste evenly. This helps your CPU stay cool and work well. Take your time and be careful to avoid damage. Following these tips keeps your computer healthy and running smooth.
Remember, good care of your CPU improves its life and performance. Try these steps next time you need to change the paste. Your computer will thank you.