
If you’ve ever opened up your computer, you know that old thermal paste on your CPU can cause overheating and slow performance. But cleaning it off isn’t as tricky as it seems.
In fact, with the right steps, you can easily remove the old paste and keep your CPU running cool and smooth. In this guide, you’ll learn exactly how to clean old thermal paste off your CPU safely and effectively. Keep reading—you’re just a few simple steps away from boosting your computer’s health and speed.
Tools Needed
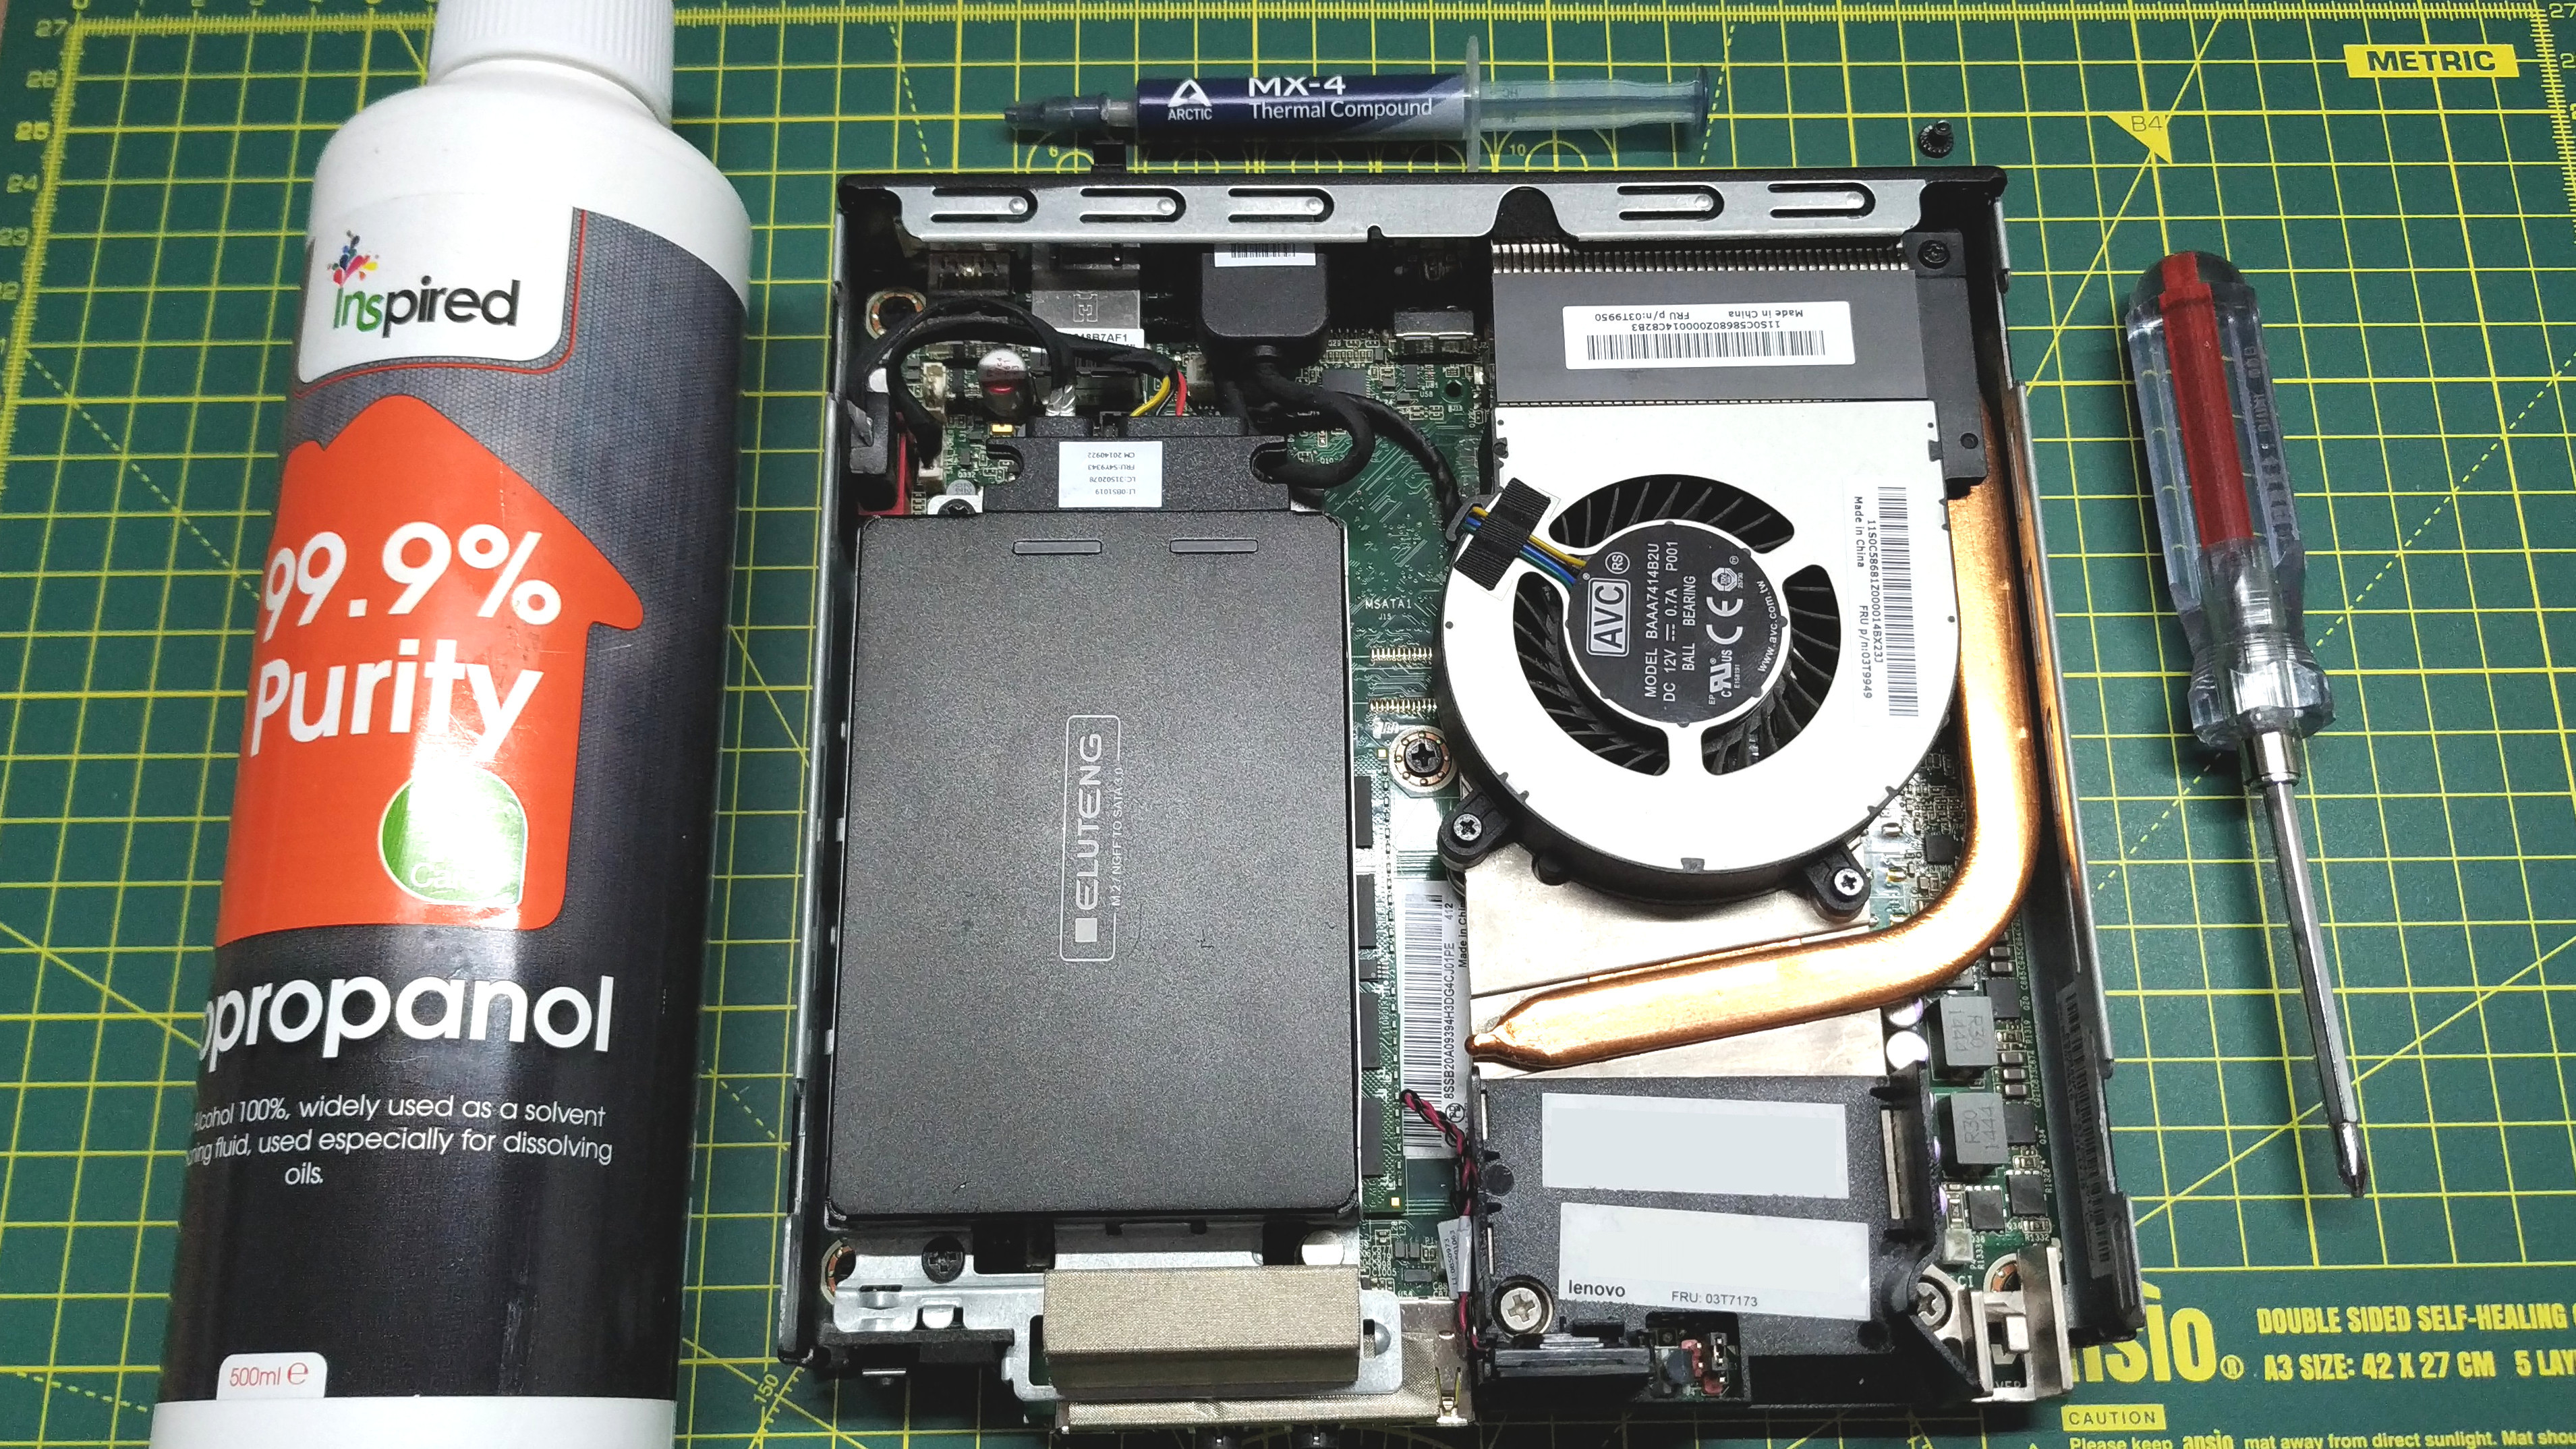
Cleaning old thermal paste off a CPU requires the right tools. Using proper supplies makes the job easier and safer. Without the correct tools, you risk damaging the CPU or motherboard. Gather everything before you start. This helps to work smoothly and quickly.
Essential Cleaning Supplies
Isopropyl alcohol is the best cleaner for thermal paste. Choose 90% or higher for fast drying and good cleaning. Use lint-free cloths or coffee filters to avoid leaving fibers. Cotton swabs help reach small or tight areas. A plastic or wooden tool can gently scrape off thick paste without scratching. Gloves protect your hands and stop oils from your skin from spreading.
Optional Accessories
Compressed air can blow away dust and loose particles. Small brushes help clean corners and crevices. Thermal paste remover kits include special wipes and solutions. These kits cost more but may speed up cleaning. A magnifying glass helps inspect the CPU surface closely. Use a soft, static-free mat to place the CPU on safely.
Preparing The Workspace
Preparing the workspace is the first step to clean old thermal paste from a CPU. A clean, organized area helps avoid mistakes and keeps parts safe. Setting up well saves time and effort during the process.
Safety Precautions
Turn off the computer and unplug all cables. Touch a metal surface to remove static electricity. Use an anti-static wrist strap if possible. Work on a non-carpeted floor to reduce static risks. Avoid eating or drinking near the workspace to prevent spills.
Organizing Components
Gather all tools before starting. Keep small screws and parts in a container. Use a clean, flat surface to place the CPU and tools. Have isopropyl alcohol and lint-free cloths ready. Arrange items so you can reach them easily during cleaning.
Removing The Cpu Cooler
Removing the CPU cooler is the first step to clean old thermal paste. The cooler sits tightly on the CPU to keep it cool. Over time, the thermal paste dries out and needs replacement. To clean the old paste, you must carefully take off the cooler. This process requires patience and care.
Handle the cooler gently to avoid damage. The cooler connects to the motherboard with a mounting mechanism. You need to loosen this mechanism before lifting the cooler. Follow simple steps to remove the cooler safely.
Loosening The Mounting Mechanism
Find the screws or clips holding the cooler in place. Use the right tool, usually a screwdriver, to loosen them. Turn screws slowly and evenly to avoid bending the CPU. Some coolers have levers instead of screws. Release these levers carefully. Do not force the cooler; it may damage the CPU or motherboard. Keep track of all screws and parts for reassembly.
Handling The Cooler Safely
Once the mounting is loose, gently lift the cooler straight up. Avoid twisting or pulling sideways. Old thermal paste can make the cooler stick to the CPU. Wiggle the cooler lightly if it does not come off easily. Place the cooler on a clean, flat surface to prevent damage. Avoid touching the bottom of the cooler or the CPU surface. Clean your hands before handling any parts. Keep the cooler away from dust and moisture until you reattach it.
Cleaning The Old Thermal Paste
Cleaning old thermal paste from your CPU is an important step before applying new paste. The old paste can block heat transfer and cause overheating. Careful cleaning helps your CPU work better and last longer. Follow the right steps to remove all residue without damage.
Using Isopropyl Alcohol
Isopropyl alcohol is perfect for cleaning thermal paste. Use 90% or higher concentration for best results. Apply a small amount on a soft cloth or cotton swab. Avoid pouring alcohol directly on the CPU. It dissolves the paste safely and evaporates quickly.
Wiping Techniques
Gently wipe the CPU surface in one direction. Avoid scrubbing hard to prevent scratches. Use soft, lint-free cloths or coffee filters. Change cloth parts often to remove paste effectively. Repeat wiping until the surface looks clean and shiny.
Dealing With Stubborn Residue
Some thermal paste may stick strongly to the CPU. Soak a cloth with isopropyl alcohol and press it on the residue. Let it sit for a minute to soften the paste. Then wipe gently to remove the softened paste. Repeat if needed, but be patient and gentle.
Inspecting The Cpu Surface
After removing old thermal paste, check the CPU surface carefully. This step ensures the CPU is safe to use again. A clean and damage-free surface helps the new thermal paste work well. It also prevents overheating and hardware problems. Take your time to inspect every part of the CPU’s top surface.
Checking For Damage
Look closely at the CPU surface for any scratches or dents. Small marks can affect heat transfer. Bent or broken pins on the CPU can cause serious issues. Use a bright light and a magnifying glass if possible. If you find damage, avoid using the CPU until it is fixed or replaced.
Ensuring Complete Cleanliness
Make sure no old thermal paste or dust remains on the CPU. Use a soft cloth or cotton swab with isopropyl alcohol. Gently wipe the surface until it looks clean and shiny. Avoid using water or harsh chemicals. A spotless surface helps the new paste spread evenly and cool the CPU better.
Credit: www.tomshardware.com
Applying New Thermal Paste
Applying new thermal paste is a key step after cleaning the old paste off your CPU. It helps your processor stay cool and work well. Using the right amount and applying it correctly ensures the best contact between the CPU and the cooler. This prevents overheating and improves performance.
Choosing The Right Amount
Use a small pea-sized drop of thermal paste. Too much paste can cause spills and reduce cooling. Too little paste leaves gaps that trap air. Air blocks heat flow and makes the CPU hotter. The right amount spreads evenly under the cooler.
Application Methods
Place the drop in the center of the CPU surface. When you attach the cooler, it will spread the paste evenly. Another way is to spread the paste thinly with a plastic card. Avoid using your fingers or metal tools. These can damage the CPU or cause uneven layers.
Reassembling The Cpu Cooler
Reassembling the CPU cooler is a key step after cleaning old thermal paste. It ensures your CPU stays cool and works well. Doing it right prevents damage and keeps your system stable. Take your time and follow these tips for the best results.
Proper Mounting Tips
Place the CPU cooler carefully back on the CPU. Align it with the mounting holes exactly. Tighten the screws evenly in a cross pattern. This helps spread pressure evenly across the CPU surface. Avoid over-tightening screws to prevent damage. Check the cooler sits flat and snug on the CPU. Make sure no cables get caught or pinched under the cooler.
Testing After Reassembly
Power on your computer after reassembling the cooler. Watch the CPU temperature in the BIOS or a monitoring app. The temperature should be lower than before cleaning. Listen for unusual fan noises or vibrations. If temperatures are high or the fan sounds wrong, turn off the PC. Recheck the cooler’s position and screw tightness. Proper testing confirms your cooler works well and your CPU stays safe.
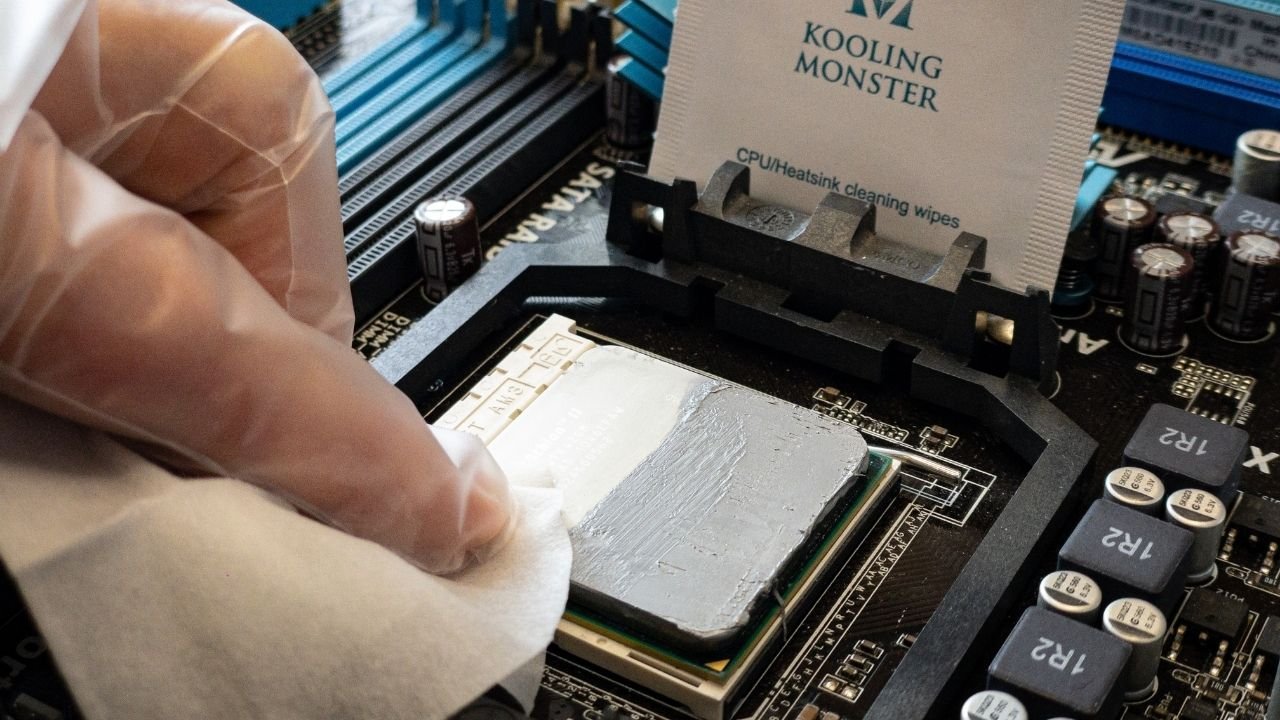
Credit: koolingmonster.com
Maintenance Tips
Proper maintenance of your CPU’s thermal paste is key to keeping your computer cool and efficient. Old or dried paste can reduce heat transfer, causing higher temperatures. Cleaning and replacing thermal paste regularly helps avoid damage and keeps your system running smoothly.
When To Replace Thermal Paste
Replace thermal paste every 1 to 2 years for most computers. If you open your CPU cooler, check the paste’s condition. Dry, cracked, or crumbly paste needs replacement. Also, apply new paste after removing the cooler for any reason. Fresh paste ensures good contact between the CPU and the cooler.
Signs Of Overheating
Watch for sudden shutdowns or slow computer speed. High CPU temperatures can cause these problems. Use temperature monitoring software to check your CPU heat. If temperatures stay above 80°C during normal use, clean and replace the thermal paste. Overheating can shorten your CPU’s life and lower performance.

Credit: www.wepc.com
Frequently Asked Questions
How Do I Safely Remove Old Thermal Paste From Cpu?
Use isopropyl alcohol and a lint-free cloth to gently wipe the old paste. Avoid harsh chemicals and excessive force to prevent damage.
What Tools Are Best For Cleaning Thermal Paste Off Cpu?
Use a microfiber cloth, cotton swabs, and 90%+ isopropyl alcohol for effective cleaning without residue or scratches.
Can I Reuse Thermal Paste After Cleaning The Cpu?
No, always apply fresh thermal paste after cleaning. Reusing old paste reduces cooling efficiency and risks overheating.
How Often Should I Clean Thermal Paste On My Cpu?
Clean thermal paste when replacing the CPU cooler or if temperatures rise unexpectedly, usually every 1-2 years.
Conclusion
Cleaning old thermal paste off your CPU is simple with the right steps. Use gentle materials like isopropyl alcohol and a soft cloth. Take your time to avoid damage. A clean CPU helps keep your computer cool and working well.
Regular maintenance can extend your device’s life. Now, you know how to remove old paste safely. Keep your PC running smoothly and avoid overheating issues. Easy and effective—just follow these tips every time.