
Are you curious about which GPU your Windows 11 computer is using? Knowing your GPU can help you understand your system’s power, improve gaming performance, or troubleshoot issues.
But finding this information isn’t always obvious. Don’t worry—you’re just a few simple steps away from discovering your GPU details quickly and easily. Keep reading, and you’ll learn exactly how to see your GPU on Windows 11 without any hassle.

Credit: www.esseg.eu
Check Gpu Via Task Manager
Checking your GPU on Windows 11 is simple using the Task Manager. This tool shows real-time data about your system’s hardware. You can see how much GPU power your computer uses and other details. This helps you understand your PC’s performance better.
Task Manager is easy to access and gives quick insights. It is useful for gamers, designers, and anyone curious about their graphics card. Follow the steps below to find your GPU information fast.
Open Task Manager
Press Ctrl + Shift + Esc on your keyboard. This shortcut opens the Task Manager window instantly. You can also right-click on the Start button and select Task Manager from the menu. The Task Manager will open showing the Processes tab by default.
Locate Gpu Performance Tab
Click the Performance tab at the top of the Task Manager. On the left side, look for GPU or GPU 0. Selecting this will show detailed information about your graphics card. You will see usage percentage, memory details, and driver version here.
This tab gives you a clear picture of how your GPU performs during tasks. It updates in real time, so you can watch changes as you run applications or games.
Credit: www.windowscentral.com
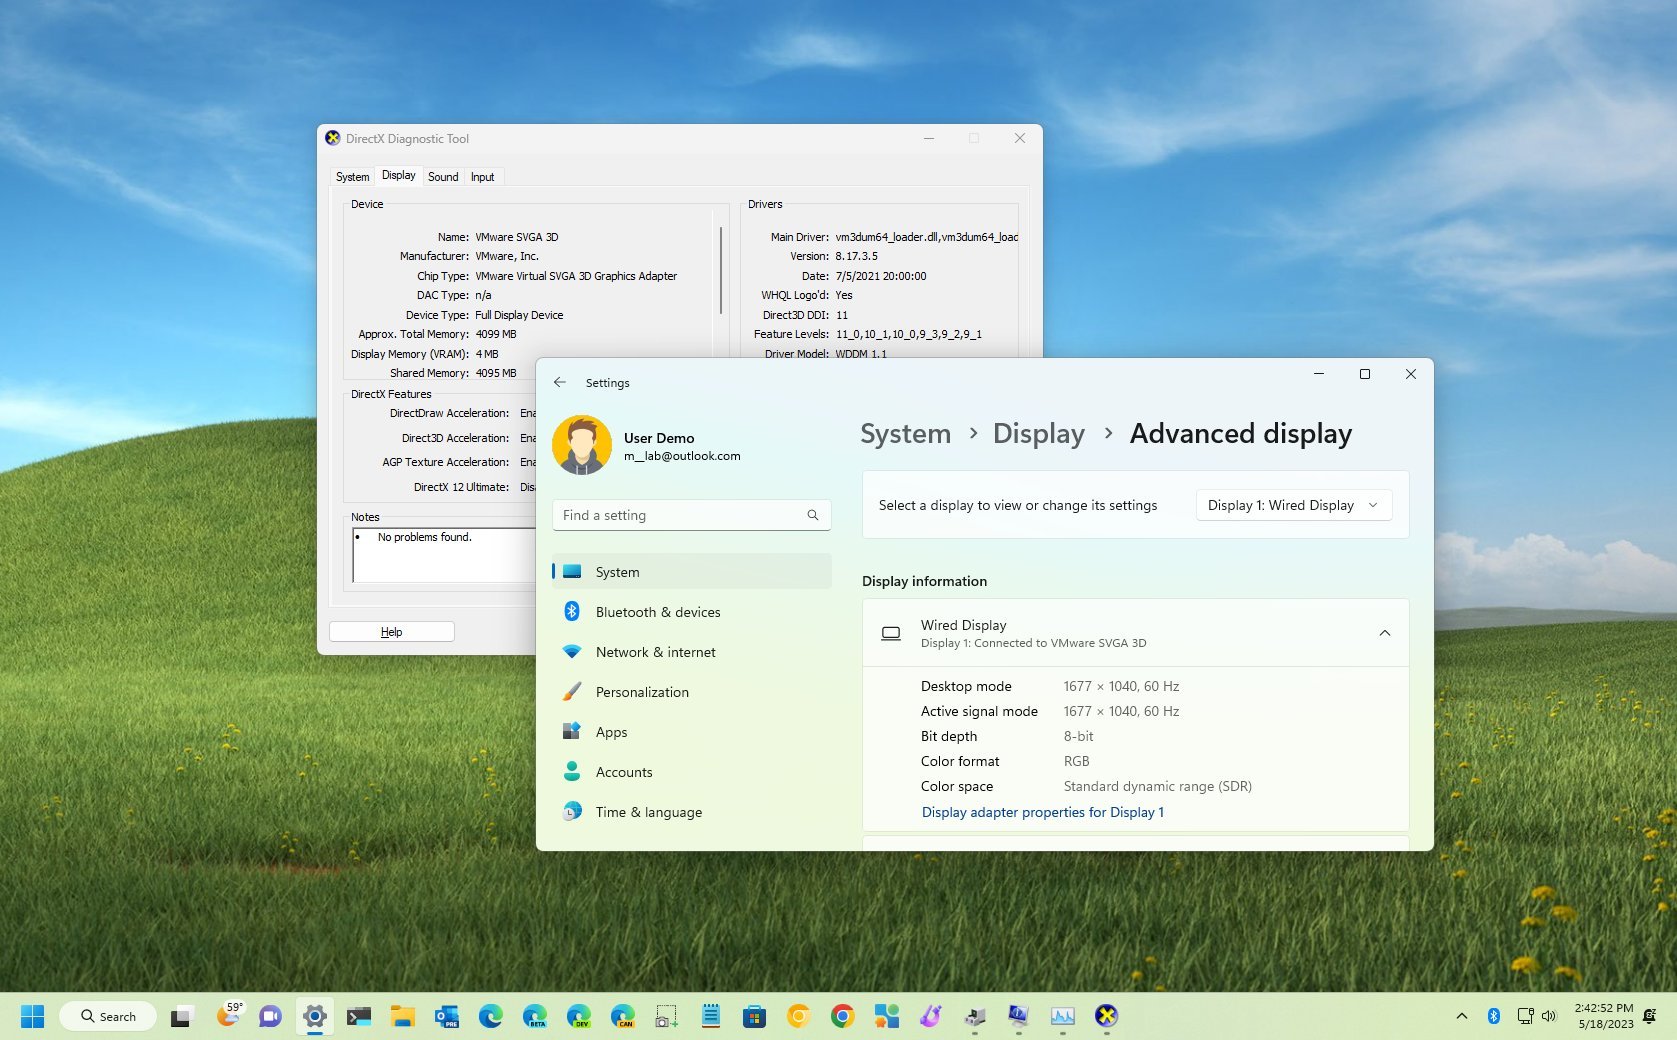
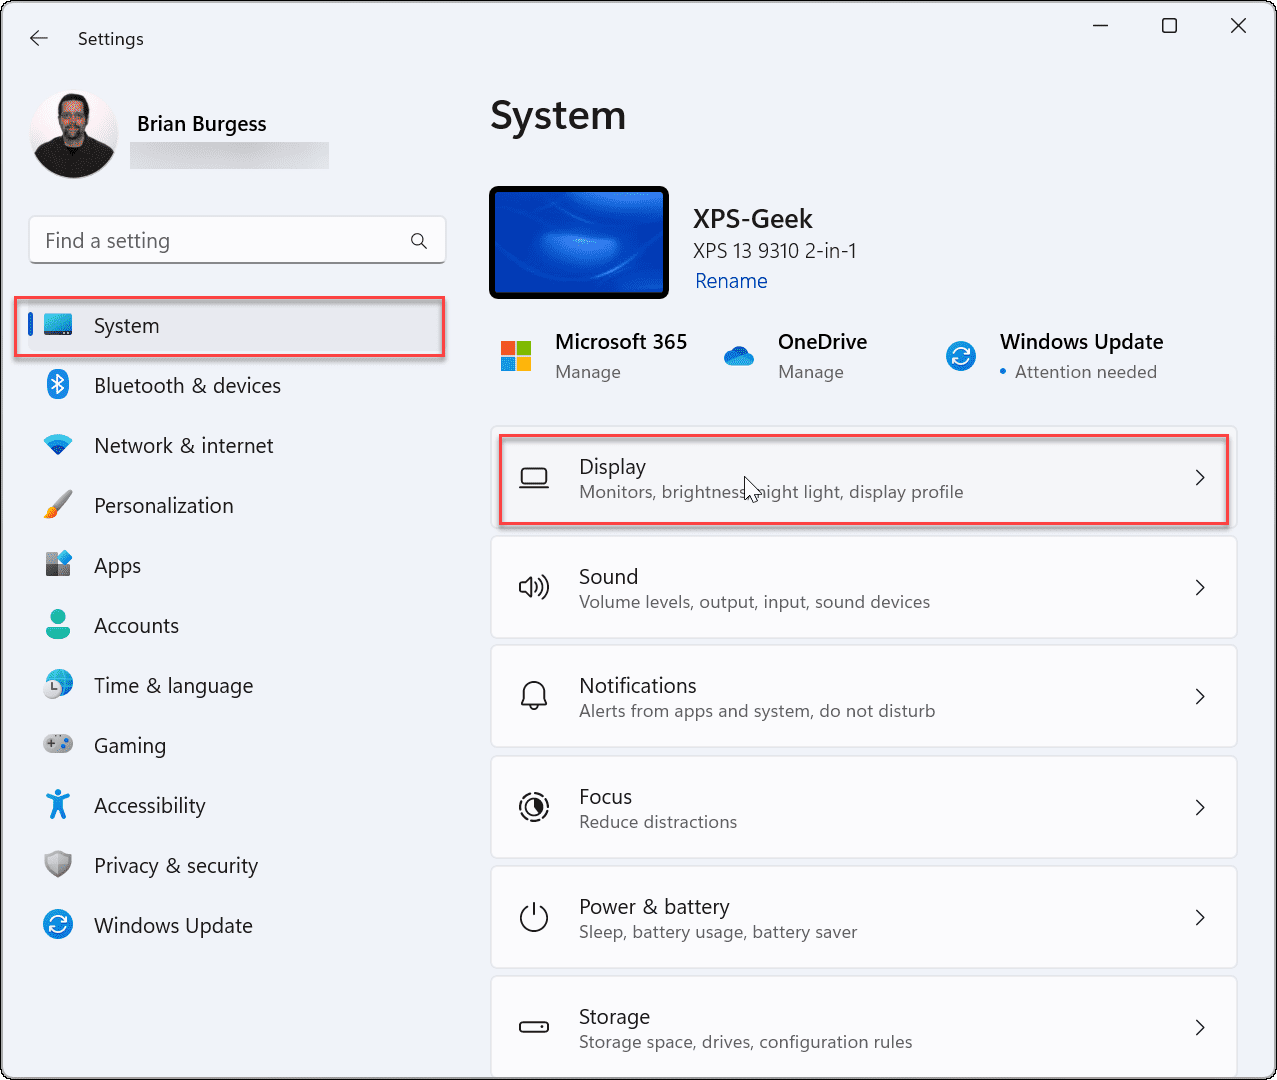
View Gpu Details In Settings
Viewing your GPU details in Windows 11 is simple and fast. The Settings app lets you check your graphics card info without extra tools. This helps you know your device’s power and troubleshoot issues.
Below are clear steps to find your GPU information inside Windows 11 Settings.
Access Display Settings
Open the Start menu by clicking the Windows icon. Select the “Settings” gear to open it.
In Settings, choose “System” from the left menu. Click on “Display” to open display options.
Scroll down and look for the “Advanced display” link. Click it to see display details.
Here, you find the name of your GPU under “Display information.” This shows the graphics card powering your screen.
Find Graphics Settings
From the main “System” menu, select “Display” again. Scroll to the bottom of the page.
Click the “Graphics” link to open GPU performance options.
This section lets you manage GPU preferences for apps. You see your GPU listed here too.
Use this area to set which GPU an app should use. It’s helpful if you have multiple graphics cards.
Use Directx Diagnostic Tool
The DirectX Diagnostic Tool is a quick way to check your GPU on Windows 11. It shows detailed information about your graphics hardware and drivers. This tool helps you see the exact model of your GPU and its current status. You do not need extra software to use it.
Follow simple steps to open the tool and find your GPU details. It works on most Windows systems and gives reliable information. The process is easy and takes less than a minute.
Run Dxdiag Command
Press the Windows key + R on your keyboard. This opens the Run dialog box. Type dxdiag in the box and press Enter. The DirectX Diagnostic Tool window appears. It may take a few seconds to load all information.
Navigate To Display Tab
Look at the top of the tool window for tabs. Click on the Display tab. Here, you find details about your GPU under the Device section. It shows the name, manufacturer, and chip type of your graphics card. You can also see the display memory and driver version.
Identify Gpu With Device Manager
Identifying your GPU on Windows 11 is simple with Device Manager. This tool shows hardware details quickly. You can find the exact model of your graphics card here. Knowing your GPU helps in troubleshooting and updating drivers. It also helps you check system compatibility for software or games.
Open Device Manager
Press the Windows key + X to open a menu. Select “Device Manager” from the list. A new window will appear showing all device categories. Device Manager lists all hardware connected to your PC. This is where you start to find your GPU details.
Expand Display Adapters
Look for the “Display adapters” category in the Device Manager. Click the small arrow next to it to expand the list. You will see the name of your GPU or GPUs here. This entry shows the graphics card installed on your computer. You can double-click the device to see more details.
Utilize Third-party Software
Using third-party software is a smart way to check your GPU on Windows 11. These apps give detailed information about your graphics card. They show stats like temperature, memory use, and clock speed. This helps you understand how your GPU works in real time.
Many tools are free and easy to use. They often have clear interfaces. This makes them perfect for beginners and experts alike. You can also track your GPU’s performance during gaming or heavy tasks.
Popular Gpu Monitoring Tools
Several apps stand out for GPU monitoring on Windows 11. MSI Afterburner is one of the most popular choices. It shows real-time temperature and usage. Another good option is GPU-Z. It provides detailed specs and sensor readings.
HWMonitor is great for overall hardware tracking, including GPU. For gamers, RivaTuner Statistics Server offers on-screen display of GPU stats. These tools work well and provide reliable data.
Benefits Of External Apps
Third-party apps give more data than built-in Windows tools. They help you spot overheating or performance drops fast. This can prevent damage to your GPU. These apps often include alerts for high temperatures.
They also help in optimizing your GPU settings. You can adjust fan speeds or clock rates. This can improve your PC’s performance and lifespan. Using these tools is a smart move for every Windows 11 user.
Troubleshoot Gpu Detection Issues
Sometimes, Windows 11 does not detect your GPU. This can cause problems with graphics and gaming. Fixing this issue is simple with some basic steps. You can check the software and hardware to find the problem. Follow these tips to troubleshoot GPU detection issues quickly.
Update Gpu Drivers
Old or missing drivers often cause GPU detection problems. Updating drivers can fix bugs and improve performance. Use the Device Manager to check your GPU driver status. Right-click on the GPU name and choose “Update driver.” Select the option to search automatically for updates. Windows will download and install the latest driver for you. Restart your PC after updating the driver to apply changes.
Check Hardware Connections
Loose or faulty connections can stop Windows from detecting the GPU. Turn off your PC and unplug it from the power source. Open the case and check the GPU seating in its slot. Press the card gently to ensure it is fully inserted. Also, check the power cables connected to the GPU. Reconnect any loose cables carefully. Close the case and power on the PC. Check if Windows now detects the GPU correctly.
Credit: teks-tver.ru
Frequently Asked Questions
How Can I Check My Gpu On Windows 11?
To check your GPU on Windows 11, open Task Manager by pressing Ctrl+Shift+Esc. Click the “Performance” tab and select “GPU” to view details about your graphics card, usage, and memory.
Where Is Gpu Information In Windows 11 Settings?
GPU information is found under Settings > System > Display > Graphics. Here, you can view GPU details and set preferences for apps using the GPU.
Can I Use Directx Diagnostic Tool To See Gpu?
Yes, press Win + R, type “dxdiag,” and press Enter. The Display tab shows your GPU name, manufacturer, and driver information.
How Do I Find Gpu Details Via Device Manager?
Open Device Manager by right-clicking Start and selecting it. Expand “Display adapters” to see your GPU model and driver status.
Conclusion
Checking your GPU on Windows 11 is quick and simple. You can use built-in tools like Task Manager or Settings. These methods show your GPU details clearly. Knowing your GPU helps with gaming and software choices. Keep this guide handy for easy reference anytime.
Now you can see your graphics card without extra software. Stay confident managing your PC with this basic skill.