
Are you struggling with a noisy or overheating computer? Setting up your CPU fan correctly can make all the difference.
When your CPU fan is installed the right way, your computer stays cool, runs smoothly, and lasts longer. In this guide, you’ll learn simple, step-by-step instructions to set up your CPU fan quickly and safely—even if you’re not a tech expert.
Keep reading to discover how to protect your computer and boost its performance with the right fan setup.
Choosing The Right Cpu Fan
Choosing the right CPU fan is important for keeping your computer cool. A good fan stops your CPU from getting too hot. This helps your computer run better and last longer. Picking a fan is not hard if you know what to check.
Types Of Cpu Fans
There are two main types of CPU fans: air coolers and liquid coolers. Air coolers use a fan and a metal heatsink to move heat away from the CPU. They are easy to install and usually cheaper. Liquid coolers use water to move heat faster. They are quieter and better for high-performance computers. Each type has its own benefits depending on your needs.
Factors To Consider
Size matters. The fan must fit inside your computer case. Check the height and width before buying. Noise level is another factor. Some fans are very quiet, while others can be loud. Speed controls help you adjust noise and cooling. Power consumption affects your computer’s energy use. Look at the fan’s wattage to save power. Also, consider how easy the fan is to install and clean.
Matching Fan To Cpu And Case
Not all fans work with every CPU. Check your CPU socket type and choose a fan that fits. Your computer case also limits fan size. Small cases need compact fans. Larger cases can hold big fans or liquid coolers. Think about airflow inside the case. Good airflow helps the fan cool better. Match your fan to both the CPU and the case for best results.
Credit: www.reddit.com
Preparing Your Workspace
Preparing your workspace is the first step to setting up a CPU fan properly. A clean and organized area helps avoid mistakes. It also protects sensitive parts from damage. Taking time to prepare makes the installation smoother and safer.
Gathering Tools And Materials
Collect all tools before starting. You will need a screwdriver, thermal paste, and cleaning cloth. Have the CPU fan and its manual ready. This saves time and keeps everything within reach.
Ensuring Static Safety
Static electricity can harm computer parts. Use an anti-static wrist strap or touch a metal object often. Work on a non-metal surface to reduce static. Avoid wearing clothes that create static, like wool.
Clearing The Work Area
Clear your desk or table completely. Remove any drinks, food, or clutter. Good lighting helps you see small parts clearly. A tidy space prevents losing screws or other tiny items.
Removing The Old Cpu Fan
Removing the old CPU fan is the first step in installing a new one. This process requires care to avoid damage to the CPU or motherboard. Follow simple steps to safely detach the fan and prepare the CPU for the new cooler.
Take your time and handle parts gently. This helps keep your computer safe and ready for the next fan.
Powering Down And Unplugging
Turn off your computer completely. Do not just put it to sleep or hibernate. Unplug the power cable from the outlet to avoid any electric shock. Press the power button a few times to drain leftover power from the system.
Detaching Fan Connectors
Open the computer case carefully. Find the cable connecting the CPU fan to the motherboard. Gently unplug this connector by pulling it straight out. Avoid pulling on the wires directly to prevent damage.
Next, check how the fan is mounted. Remove screws or unclip the brackets holding the fan in place. Lift the fan slowly, without forcing it. It may stick slightly due to thermal paste.
Cleaning Residual Thermal Paste
Old thermal paste must be cleaned off before adding new paste and a new fan. Use a soft cloth or paper towel with isopropyl alcohol. Gently wipe the CPU surface until it looks clean and smooth.
Do not use water or harsh chemicals. Make sure the CPU is dry before continuing. Proper cleaning helps the new fan cool the CPU better.
Installing The New Cpu Fan
Installing a new CPU fan is an important step for keeping your computer cool. It helps your CPU work well and stops it from overheating. Follow these simple steps to install the fan correctly and avoid problems later.
Applying Thermal Paste Correctly
Start by cleaning the old thermal paste from the CPU surface. Use a soft cloth or alcohol wipe for this. Apply a small pea-sized amount of new thermal paste in the center. The paste helps heat move from the CPU to the fan. Too much paste can cause problems. Too little paste will not cool properly.
Mounting The Fan Securely
Place the fan carefully over the CPU. Align it with the holes on the motherboard. Use the screws or clips that came with the fan to fix it in place. Tighten the screws evenly to avoid pressure on one side. The fan must sit flat and firm for good contact with the CPU.
Connecting The Fan To The Motherboard
Find the CPU fan header on your motherboard. It is a small 3 or 4-pin connector near the CPU socket. Plug the fan cable into this header gently. Make sure it fits snugly and does not come loose. This connection allows the motherboard to control the fan speed and keep the CPU cool.
Configuring Fan Settings
Configuring fan settings helps keep your CPU cool and quiet. Proper fan control prevents overheating and reduces noise. You can adjust settings through BIOS, software, or preset profiles. Each option gives you control over fan speed and behavior. This section explains how to set up these options easily.
Accessing Bios/uefi
Start by restarting your computer. Press the key shown on the screen to enter BIOS or UEFI. Common keys are Delete, F2, or Esc. Inside BIOS, find the “Hardware Monitor” or “Fan Control” section. Here, you can see fan speed and temperature data. Use arrow keys to navigate and select fan settings. Save changes before exiting BIOS to apply new fan speeds.
Adjusting Fan Speed Profiles
Many BIOS setups offer fan speed profiles. Profiles include Silent, Standard, and Performance modes. Silent mode lowers fan speed for less noise. Performance mode increases speed for better cooling. Choose a profile that fits your needs. You can also create custom profiles with specific speed limits. Adjust fan curves to control speed based on temperature changes.
Using Software For Fan Control
Software tools let you change fan settings inside Windows. Popular programs include SpeedFan and motherboard utilities. These apps show fan speed, temperature, and system health. You can set custom fan curves and alarms. Software control is easier for quick adjustments. It also lets you monitor fan performance over time.

Credit: www.youtube.com
Testing Cooling Performance
Testing cooling performance is a vital step after setting up your CPU fan. It ensures your CPU stays cool under different conditions. Proper testing helps you avoid damage and keeps your computer running smoothly.
Monitoring Cpu Temperatures
Start by checking your CPU temperature right after setup. Use software tools like HWMonitor or Core Temp. These tools show real-time temperature readings. Keep an eye on the temperature during normal use. Ideal CPU temperatures usually stay below 70°C. If temperatures rise quickly, your fan may not be working well.
Running Stress Tests
Stress tests push your CPU to its limits. Programs like Prime95 or AIDA64 can help. Run these tests for at least 15 minutes. Watch the temperature closely during the test. If the CPU stays cool, your fan setup is good. High temperatures mean you need to improve cooling.
Troubleshooting Overheating Issues
If your CPU overheats, check the fan first. Make sure the fan is spinning correctly and is clean. Check the thermal paste between the CPU and the cooler. Replace it if dry or old. Ensure the fan is connected to the right motherboard header. Also, verify airflow inside the case is not blocked.
Maintaining Your Cpu Fan
Maintaining your CPU fan is essential for your computer’s health. A clean and well-functioning fan keeps the CPU cool. This prevents overheating and system crashes. Simple care extends the fan’s life and improves performance. Follow these tips to keep your CPU fan in good shape.
Regular Cleaning Tips
Dust and dirt build up quickly on CPU fans. Turn off your computer before cleaning. Use a can of compressed air to blow dust away. Hold the fan blades to stop them from spinning. Clean the surrounding area to remove all debris. Repeat cleaning every few months for best results.
Replacing Fans When Needed
Fans can wear out over time. Listen for unusual noises like grinding or rattling. Check if the fan stops spinning or spins slowly. These signs mean the fan needs replacement. Buy a fan that matches your CPU socket and size. Carefully remove the old fan and install the new one.
Upgrading For Better Cooling
Upgrading your CPU fan improves cooling and reduces noise. Choose fans with higher airflow and lower noise levels. Consider fans with larger blades or better bearings. Installing a better fan helps your CPU run cooler. This can improve your computer’s speed and lifespan.
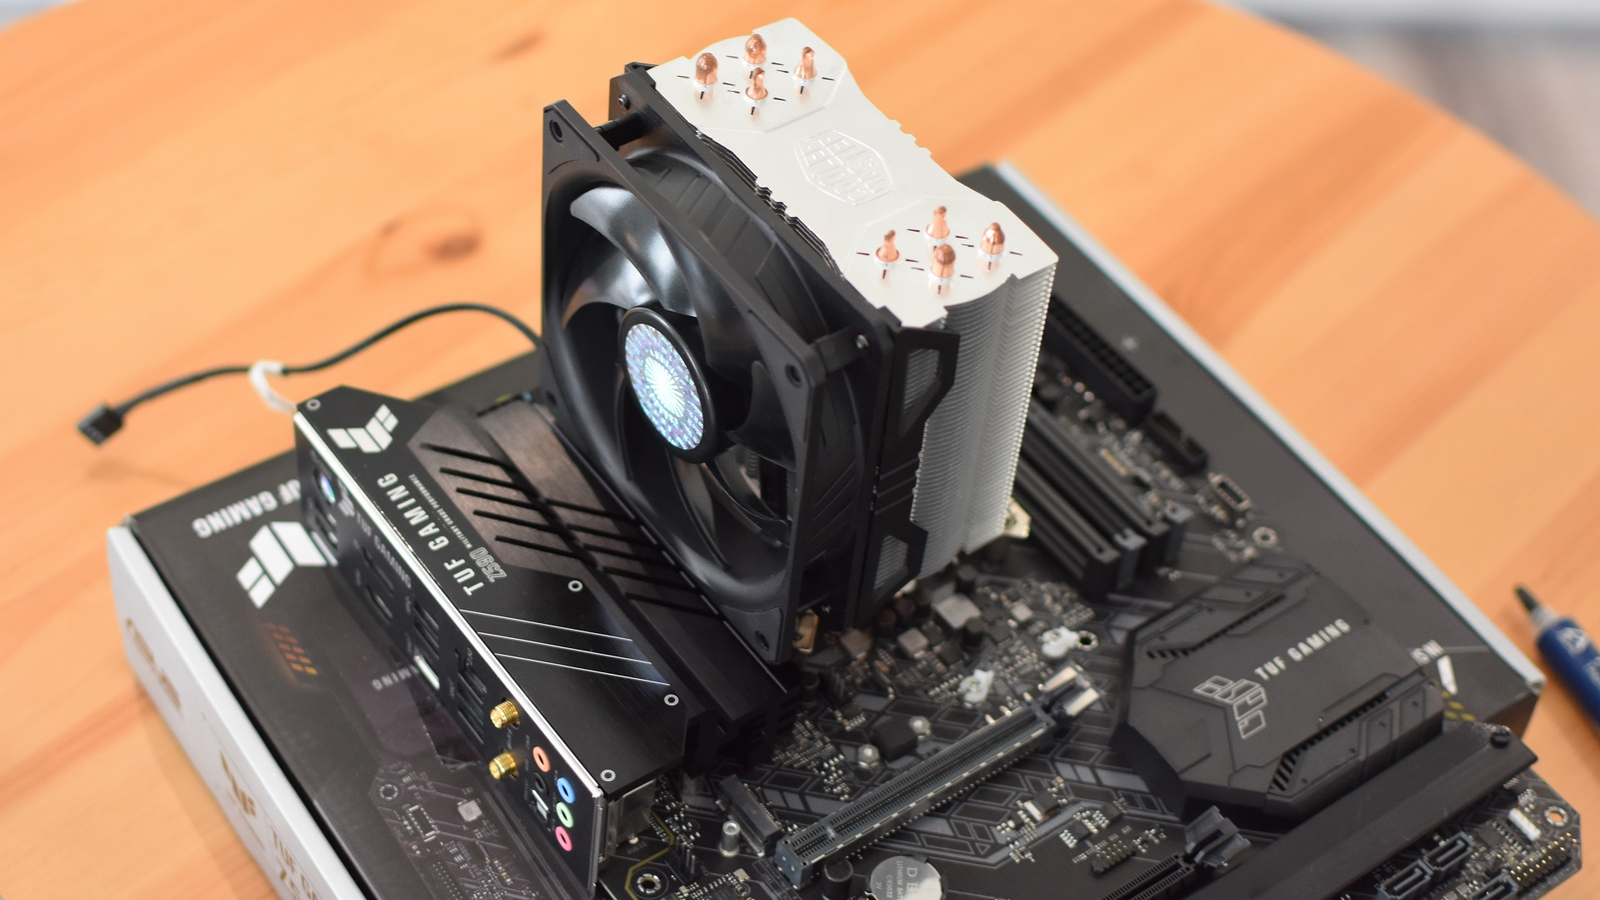
Credit: www.rockpapershotgun.com
Frequently Asked Questions
How Do I Connect A Cpu Fan To The Motherboard?
Locate the CPU fan header on the motherboard, usually near the CPU socket. Align the fan connector pins properly, then gently push it in until secure.
What Is The Correct Cpu Fan Orientation?
The CPU fan should face the heatsink to push air through it. This ensures optimal cooling and prevents overheating.
How Tight Should I Mount The Cpu Fan?
Mount the CPU fan firmly but avoid over-tightening screws. Excess force can damage the motherboard or fan, while loose mounting reduces cooling efficiency.
Can I Use Any Cpu Fan With My Processor?
No, CPU fans must be compatible with your CPU socket type and size. Check manufacturer specifications before purchasing a replacement or upgrade.
Conclusion
Setting up a CPU fan is simple with the right steps. Keep your computer cool to avoid damage. Always check the fan’s direction and power connection. Use gentle force when attaching the fan to avoid breaking parts. Clean dust regularly to keep the fan working well.
A properly installed CPU fan helps your computer run smoothly. Take your time and follow the guide carefully. Your PC will thank you with better performance and longer life.