
Are you tired of your laptop struggling to run games or heavy graphics programs? Changing your GPU might be the solution you’ve been looking for.
But how exactly do you change the GPU on a laptop? It’s not as simple as swapping parts like on a desktop, and many people don’t know where to start. You’ll discover clear, step-by-step guidance to help you upgrade your laptop’s graphics power safely and effectively.
Keep reading, and you’ll learn everything you need to know to give your laptop a serious performance boost.
Preparing To Replace Your Laptop Gpu
Preparing to replace your laptop GPU takes careful steps. This process helps avoid damage and ensures success. Start by checking your laptop’s compatibility with the new GPU. Then, gather all necessary tools to complete the task safely. Finally, back up your important data to prevent loss during the upgrade. Each step is important for a smooth GPU replacement.
Checking Laptop Compatibility
Not all laptops allow GPU upgrades. Some have GPUs soldered to the motherboard. Check your laptop’s manual or manufacturer website for details. Look for removable GPU options or MXM slots. Confirm the new GPU fits your laptop model. Also, check power and cooling requirements. This helps avoid buying incompatible parts.
Gathering Necessary Tools
Prepare tools before starting the upgrade. Common tools include a small screwdriver set and an anti-static wrist strap. A plastic pry tool helps open the laptop without damage. Keep a clean, flat workspace ready. Organize screws and parts to avoid loss. Having the right tools saves time and prevents harm.
Backing Up Important Data
Backing up data protects your files during the upgrade. Use an external hard drive or cloud storage to save important documents and photos. Power failures or errors can cause data loss. Backup ensures your information stays safe. Confirm your backup is complete before proceeding.
Removing The Old Gpu
Removing the old GPU from your laptop is a careful process. It needs steady hands and patience. Follow these steps to safely take out the old graphics card. This prepares your laptop for the new GPU installation.
Powering Down And Unplugging
First, shut down your laptop completely. Do not just close the lid or put it to sleep. Unplug the power cord from the laptop. Remove any connected devices like USB drives or external keyboards. This stops any power flow and avoids damage.
Opening The Laptop Case
Turn the laptop upside down on a soft surface. Find the screws that hold the back cover. Use a small screwdriver to remove them carefully. Keep the screws safe for later use. Gently lift the cover to reveal the inside parts.
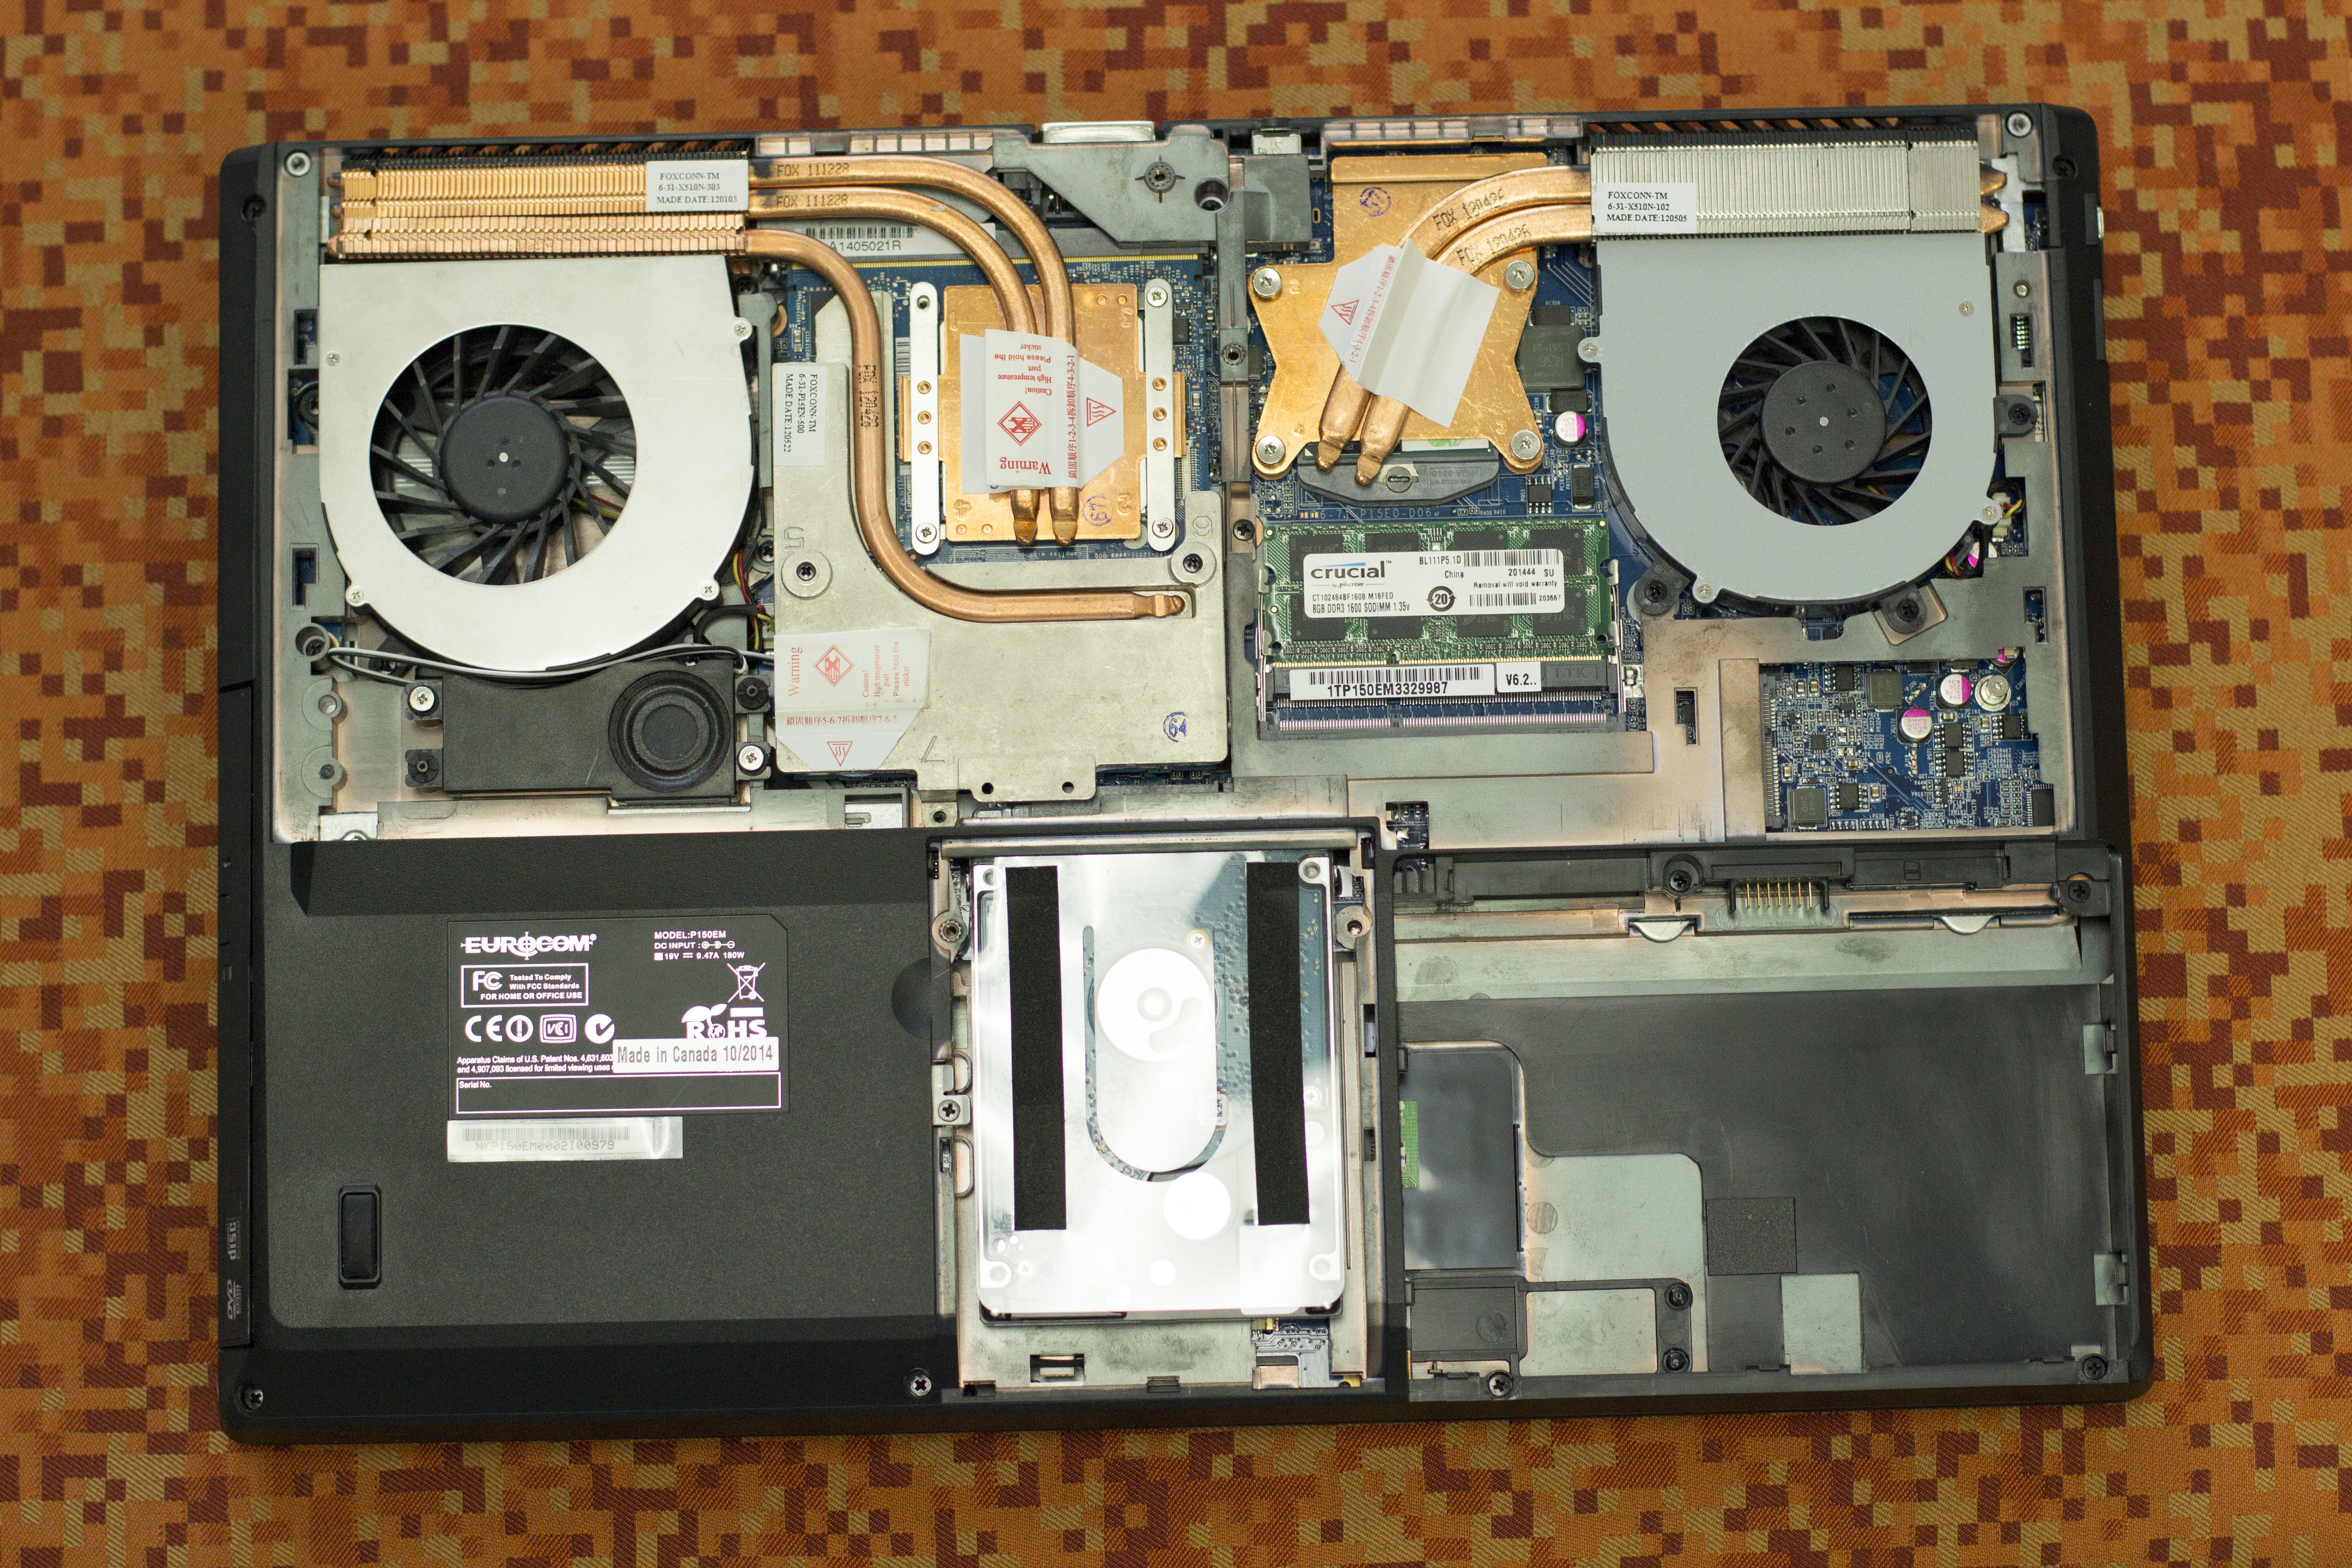
Locating The Gpu
Look inside for the graphics card. It is usually near the center or side with a cooling fan. The GPU is attached to the motherboard. It might have a metal or plastic shield on top. Identify it before moving to removal.
Detaching The Gpu Carefully
Check for screws or clips holding the GPU. Unscrew or unclip them slowly. Avoid forcing or pulling hard. Disconnect any cables linked to the GPU gently. Lift the GPU straight up and out. Store it safely if you plan to reuse or sell it.
Installing The New Gpu
Installing the new GPU in your laptop is a careful process. It needs steady hands and patience. Following the right steps helps avoid damage and ensures the GPU works well.
Positioning The New Gpu
Hold the new GPU gently by its edges. Align it with the laptop’s GPU slot. Make sure the connectors match the slot perfectly. Do not force the card. It should fit smoothly into the slot.
Securing The Gpu In Place
Once the GPU sits properly, secure it with screws. Use the screws from the old GPU or new ones that came with it. Tighten the screws just enough to hold the card firmly. Avoid overtightening to prevent damage.
Reconnecting Cables And Components
Reconnect all cables you disconnected earlier. Check for any power cables or display connectors attached to the GPU. Plug them back carefully. Make sure all connections are tight and secure before closing your laptop.
Credit: vixencomposites.com
Reassembling And Testing
After installing the new GPU, the next step is reassembling and testing your laptop. This stage ensures your laptop works correctly with the new hardware. Careful reassembly prevents damage and keeps your laptop safe. Testing confirms the GPU installation is successful and runs smoothly.
Closing The Laptop Case
Start by placing the laptop cover back on carefully. Align all clips and screws properly. Tighten screws in a diagonal pattern for even pressure. Avoid over-tightening to prevent damage to the case. Double-check that no cables are pinched or loose inside. A well-closed case protects internal parts from dust and damage.
Powering On And Installing Drivers
Turn on the laptop and watch for normal startup signs. The screen should display without errors or flickers. Install the latest GPU drivers from the manufacturer’s website. Updated drivers improve performance and fix bugs. Restart the laptop after driver installation to apply changes.
Running Performance Checks
Run simple tests to check the GPU’s function and speed. Use built-in tools or free software like GPU-Z or MSI Afterburner. Monitor temperature and clock speeds during tests. Watch for crashes or graphical glitches that indicate problems. Confirm the laptop runs games or software smoothly. Testing helps catch issues early and ensures stable performance.
Troubleshooting Common Issues
Changing the GPU on a laptop can bring better performance. Yet, some common issues may arise after the swap. Troubleshooting helps fix these problems quickly. This section covers typical troubles and how to solve them.
Handling Display Problems
After installing a new GPU, the screen might stay black. Check if the GPU is seated properly in its slot. Loose connections cause display issues. Also, make sure the laptop’s display cable is connected well.
Try restarting the laptop to refresh the display. If the screen flickers or shows errors, update the graphics driver. Sometimes, the old driver conflicts with the new GPU. Resetting the display settings can help too.
Addressing Overheating
New GPUs may run hotter than the old ones. Overheating can cause slowdowns or sudden shutdowns. Ensure the laptop’s cooling system is clean and working. Dust inside blocks airflow and raises temperature.
Use a cooling pad to improve air circulation. Monitor the GPU temperature with software tools. If overheating continues, reduce the graphics settings for less heat output. Proper cooling keeps the laptop safe and stable.
Dealing With Driver Conflicts
Driver conflicts happen when old and new drivers clash. These conflicts cause crashes or poor GPU performance. Uninstall the old GPU drivers completely before installing new ones. Use a driver cleaner tool for thorough removal.
Download the latest driver from the GPU manufacturer’s website. Install it fresh and restart the laptop. Keeping drivers updated avoids many common problems. Clean driver installation ensures the new GPU works smoothly.

Credit: aquisefaladesantos.com.br

Credit: www.youtube.com
Frequently Asked Questions
Can I Upgrade The Gpu On Any Laptop?
Not all laptops support GPU upgrades. Most have integrated or soldered GPUs. Check your laptop’s manual or manufacturer website for compatibility before attempting an upgrade.
How Do I Know If My Laptop Gpu Is Replaceable?
Look for laptops with MXM slots or modular GPU designs. If your GPU is soldered on, it is not replaceable. Consult your laptop’s service manual for specifics.
What Tools Are Needed To Change A Laptop Gpu?
You typically need a small Phillips screwdriver, anti-static wrist strap, and thermal paste. Some laptops may require special tools; always check your laptop’s disassembly guide.
Will Changing My Laptop Gpu Void The Warranty?
In most cases, opening your laptop and changing hardware voids the warranty. Check your warranty terms before upgrading to avoid losing coverage.
Conclusion
Changing a GPU on a laptop takes care and patience. Always check compatibility before you start. Use the right tools for a smooth process. Take your time and follow each step closely. This helps avoid damage and ensures success. Remember, not all laptops allow easy GPU changes.
If unsure, ask a professional for help. With careful work, you can improve your laptop’s graphics. Enjoy better performance and a clearer display. Simple steps lead to great results.