
If your GPU is running hotter than usual or your games and apps are lagging, the problem might be old or dried-out thermal paste. Changing the thermal paste on your GPU can make a huge difference in cooling performance and extend the life of your graphics card.
But if you’ve never done it before, the idea might seem tricky or even risky. Don’t worry—you’re in the right place. This guide will walk you through simple, clear steps to replace your GPU’s thermal paste safely and effectively. By the end, you’ll know exactly how to keep your GPU cool and running smoothly.
Ready to take control of your system’s performance? Let’s get started.
Signs You Need To Change Thermal Paste
Thermal paste plays a key role in keeping your GPU cool. Over time, it can dry out or lose effectiveness. This causes problems that affect your computer’s performance. Knowing the signs helps you decide when to replace the thermal paste. Pay attention to these clear signals.
Overheating Symptoms
Your GPU may get very hot during use. Fans may run louder than usual. The computer could shut down suddenly to protect itself. High temperatures often mean the thermal paste is no longer working well.
Reduced Performance
Games or programs may slow down or lag. Frame rates drop even with the same settings. Your GPU might throttle speed to avoid damage. This slowdown can indicate poor heat transfer from old thermal paste.
Age Of Thermal Paste
Thermal paste usually lasts a few years. If you bought your GPU more than two or three years ago, it may be time. Old paste dries and cracks, losing its ability to cool the chip effectively.
Tools And Materials Required
Before changing the thermal paste on your GPU, gather all necessary tools and materials. Having the right supplies helps you work safely and efficiently. Prepare a clean workspace to avoid dust and dirt. This section lists essential items for the task.
Thermal Paste Options
Choose a good thermal paste for better heat transfer. Common types include ceramic-based and metal-based pastes. Ceramic pastes are safe and affordable. Metal-based pastes offer higher performance but need careful handling. Avoid old or dried-out paste. Buy a small tube to apply fresh paste properly.
Cleaning Supplies
Clean the GPU surface before applying new paste. Use isopropyl alcohol (70% or higher) to remove old paste. Soft lint-free cloths or coffee filters work well for cleaning. Avoid using paper towels or tissues that leave fibers. Cotton swabs help clean tight spots around the GPU chip.
Screwdrivers And Other Tools
Use the right screwdrivers to open your GPU. Most GPUs need a Phillips-head screwdriver. Keep a small container to hold screws safely. Tweezers help remove small parts without damage. A plastic pry tool can separate parts without scratching. Have everything ready to avoid delays during the process.
Preparing Your Workspace
Preparing your workspace is the first step in changing the thermal paste on your GPU. A clean, organized area helps you work safely and efficiently. Taking time to prepare prevents mistakes and damage to your components.
Focus on creating a calm, static-free environment. Arrange tools and parts neatly before starting. This setup saves time and makes the process smoother.
Static Safety Measures
Static electricity can damage sensitive computer parts. Ground yourself by using an anti-static wrist strap. Attach it to a metal part of your desk or computer case. Avoid working on carpets or rugs that create static.
Touch a metal object before handling the GPU to discharge static charge. Keep electronic devices unplugged during the process. These steps protect your GPU from harmful electric shocks.
Organizing Components
Lay out all tools and parts within easy reach. Use small containers or trays to hold screws and small pieces. Label each container to avoid confusion during reassembly.
Keep the old thermal paste and cleaning materials separate from new paste. This organization prevents mixing and contamination. A tidy workspace reduces stress and speeds up the job.
Credit: www.nicehash.com
Removing The Gpu Cooler
Removing the GPU cooler is the first key step to change the thermal paste. It allows you to access the GPU chip safely. Doing this carefully prevents damage to the graphics card and its parts.
Work on a clean, static-free surface. Keep track of all screws and small parts. Take your time to avoid mistakes.
Unscrewing The Heat Sink
Start by turning the graphics card over. Find the screws that hold the heat sink in place. Use the correct screwdriver to avoid stripping the screws.
Loosen the screws in a diagonal pattern. This helps avoid pressure on one side. Keep the screws in a small container so they don’t get lost.
Gently lift the heat sink from the GPU. If it feels stuck, wiggle it slightly. Do not use force to prevent damage.
Handling Cables And Connectors
Look for any cables connected to the heat sink or fan. These cables must be unplugged carefully. Use your fingers, not tools, to avoid breaking connectors.
Pull connectors straight out, not at an angle. Check for locking clips and release them gently. Keep the cables safe and avoid pulling on the wires.
Set the cooler and cables aside in a safe place. This will keep them clean and ready for reassembly.
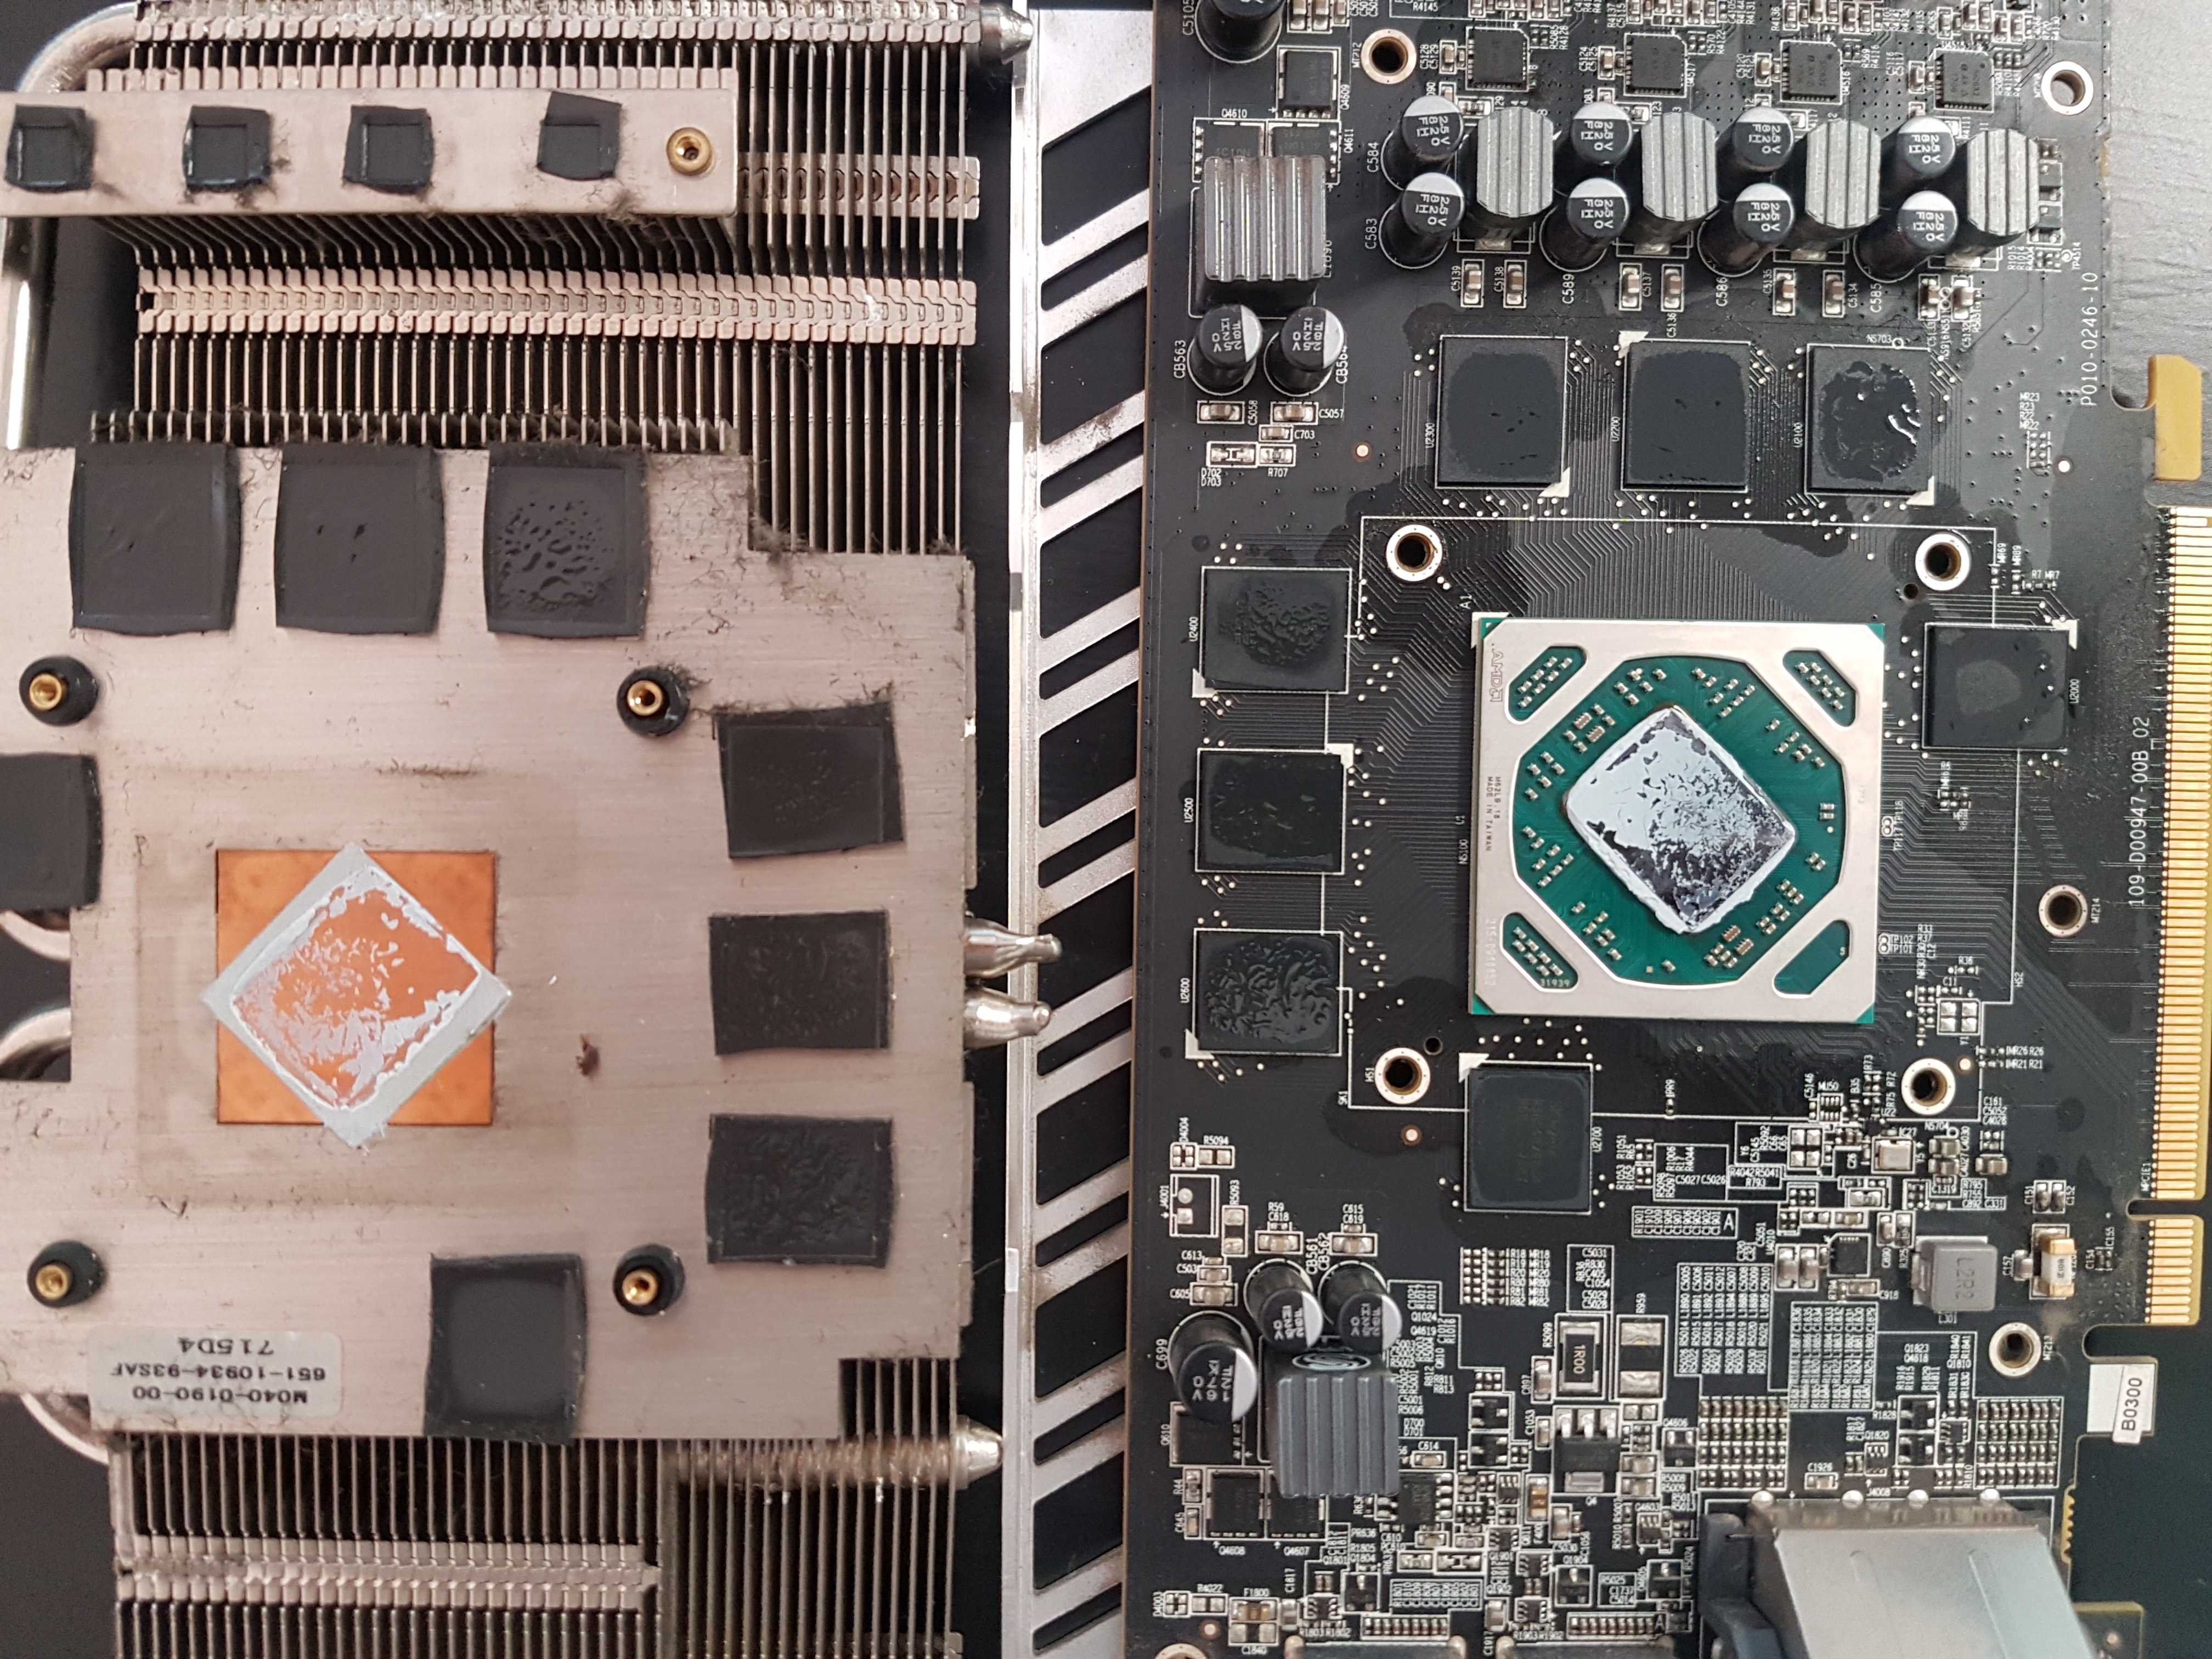
Cleaning Old Thermal Paste
Cleaning old thermal paste is a key step before applying new paste on your GPU. It helps keep the GPU cool and works better. Removing all the old paste ensures good contact between the GPU chip and the heatsink. Dirt or leftover paste can cause overheating and reduce performance.
Take your time to clean the GPU gently but thoroughly. This step protects the GPU from damage and helps the new paste spread evenly. Use the right tools and materials for the best results. A clean surface makes a big difference in cooling efficiency.
Using Isopropyl Alcohol
Isopropyl alcohol is perfect for cleaning old thermal paste. Use a high concentration, like 90% or more, for fast drying. Dip a lint-free cloth or cotton swab into the alcohol. Gently wipe the GPU chip and heatsink surface. Avoid soaking the area with too much liquid. The alcohol breaks down the old paste and removes oils. Let the surfaces dry completely before the next step.
Removing Residue Thoroughly
Check carefully for any leftover paste or residue. Use a fresh cloth or swab with alcohol to clean stubborn spots. Do not rush this process. Even small bits of old paste can block heat transfer. Clean until the surface looks smooth and shiny. Avoid scratching the GPU chip or heatsink. A clean, residue-free surface ensures better cooling and longer GPU life.
Applying New Thermal Paste
Applying new thermal paste to your GPU is a key step in keeping it cool and running well. The paste helps carry heat from the GPU chip to the cooler. Applying it the right way ensures better heat transfer and prevents overheating. This process needs care and the correct amount of paste to work properly.
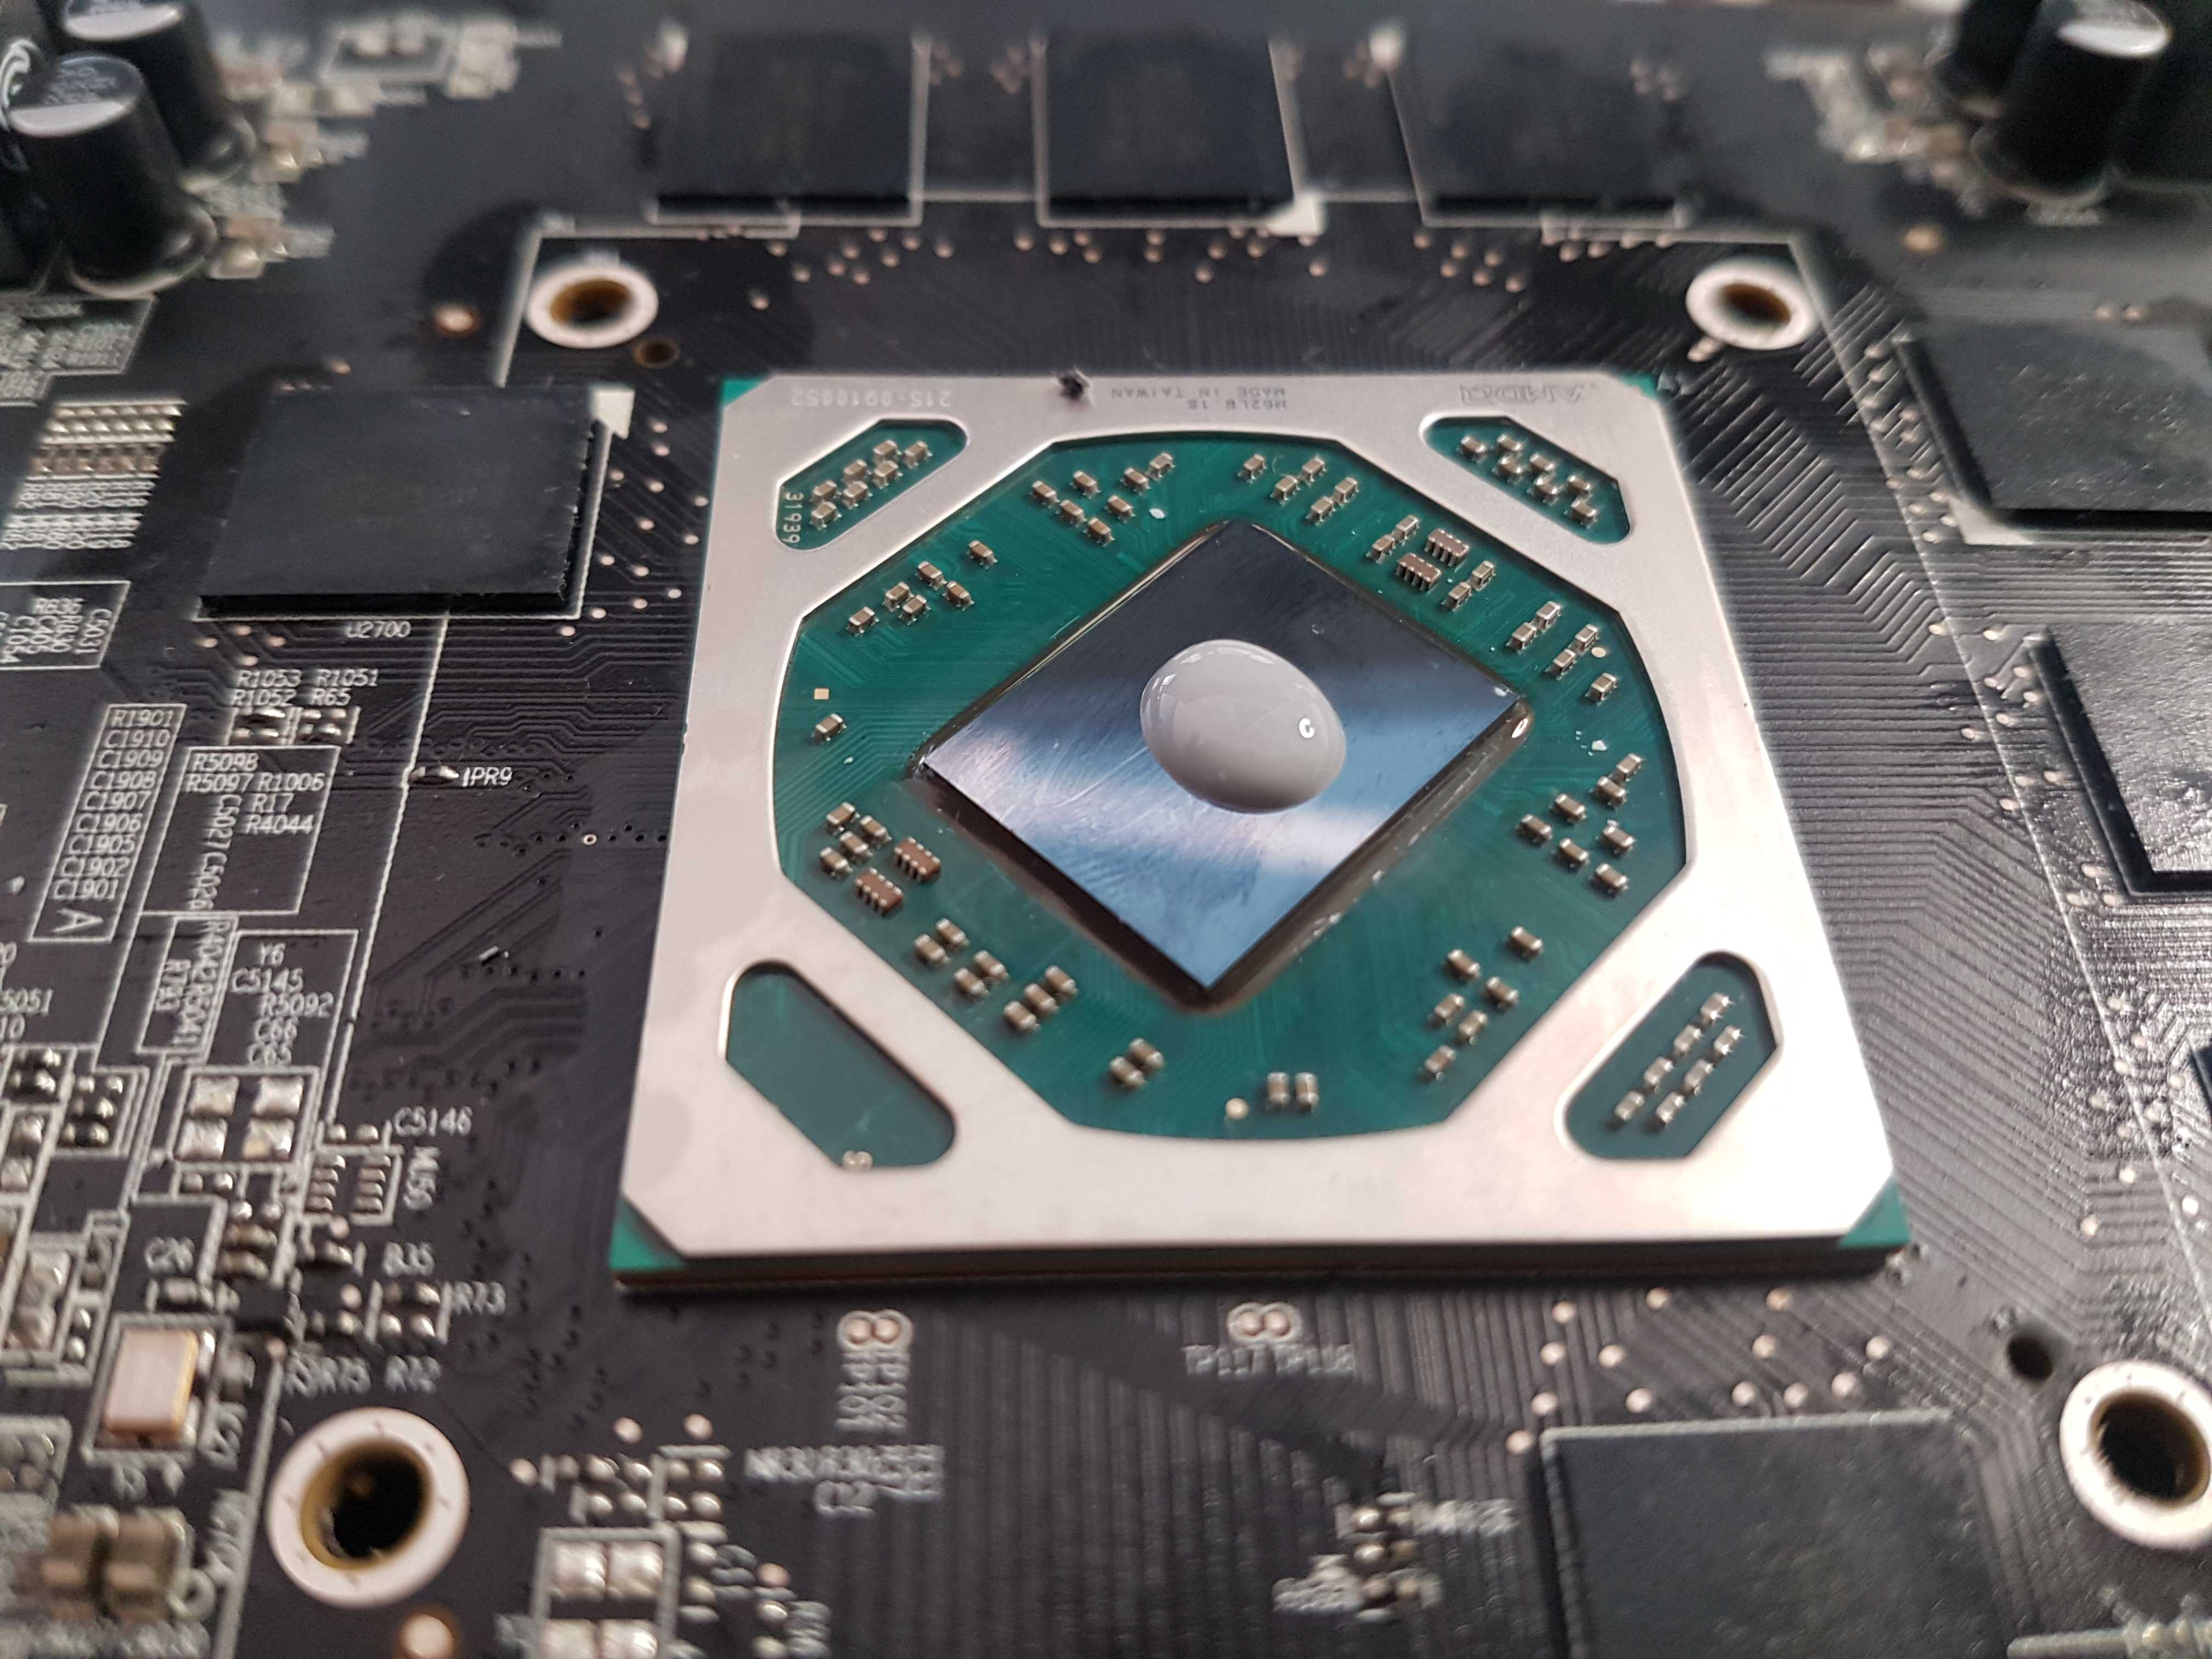
Choosing The Right Amount
Use a small amount of thermal paste. About the size of a pea or a grain of rice is enough. Too much paste can cause poor heat transfer. Too little paste will not cover the chip properly. The goal is to create a thin, even layer between the GPU and the cooler. This helps heat move away from the GPU efficiently.
Spreading Techniques
Some users prefer to spread the paste with a plastic tool or a finger covered in plastic. This method helps cover the whole chip evenly. Others place the paste directly and let the cooler spread it when mounted. Both methods work well if done carefully. Avoid air bubbles and gaps. These reduce the paste’s ability to transfer heat. Apply steady pressure when attaching the cooler to spread the paste evenly.
Reassembling The Gpu
After applying new thermal paste, it is time to reassemble your GPU. This step is important to make sure the GPU cools properly. Reassembling must be done carefully to avoid damage and ensure good contact between the cooler and the GPU chip.
Reattaching The Cooler
Start by placing the cooler back on the GPU. Align it carefully with the screw holes. Avoid shifting the thermal paste. Screw the cooler in a cross pattern. This helps spread pressure evenly. Tighten screws gently, not too hard. Check that no cables or parts are pinched. Take your time to prevent mistakes.
Ensuring Proper Contact
Proper contact between the cooler and GPU is key. This contact helps the heat transfer effectively. Press the cooler slightly after mounting it. You should feel it sit firmly on the chip. Avoid gaps or loose areas. If the cooler moves, it can cause overheating. Double-check the screws for tightness. Good contact means better GPU performance and longer life.
Testing Gpu Temperature
Testing your GPU temperature is important after changing the thermal paste. It shows if the paste is working well. High temperatures can harm your GPU and lower its performance. Checking the temperature helps keep your GPU safe and running smoothly.
Using Monitoring Software
Use software to check your GPU temperature. Programs like MSI Afterburner or HWMonitor show real-time temperature. They are easy to install and use. Watch the temperature before and after changing the paste. This helps you see if the new paste cools better.
Benchmarking For Performance
Run a benchmark to test GPU stress and temperature. Tools like FurMark or 3DMark push your GPU hard. They reveal how hot your GPU gets under load. Compare results from before and after the thermal paste change. Lower temperatures mean the paste is working well.
Tips For Maintaining Optimal Cooling
Maintaining optimal cooling for your GPU is key to better performance and longer life. Good cooling stops your graphics card from getting too hot. This helps avoid slowdowns and damage. Follow simple tips to keep your GPU cool and working well.
Regular Cleaning
Dust and dirt block airflow and make your GPU hotter. Clean your GPU and fans every few months. Use a soft brush or compressed air to remove dust. Keep the vents and heatsinks clear. Clean parts cool better and last longer.
Monitoring Thermal Paste Lifespan
Thermal paste dries out over time and loses its power. Check your thermal paste every 1 to 2 years. If your GPU runs hotter than usual, it might need new paste. Replace old paste to keep heat moving away from the chip. Fresh paste keeps temperatures low.
Credit: www.nicehash.com
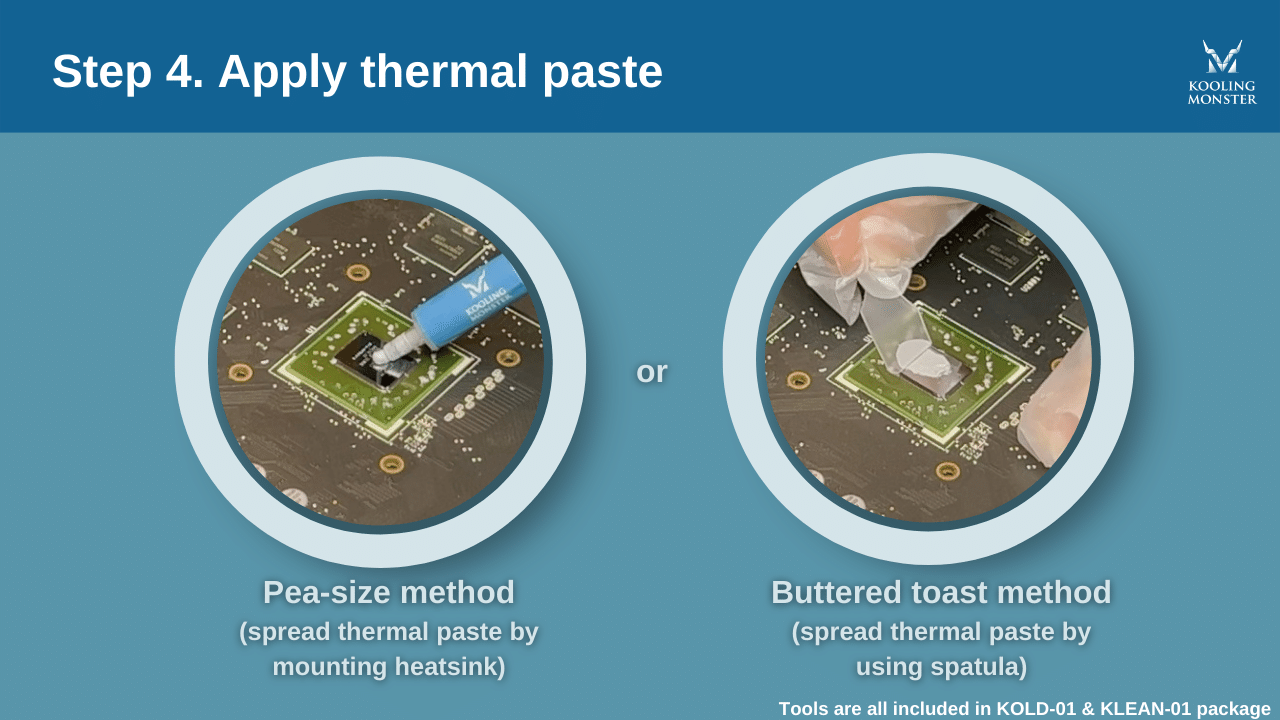
Credit: koolingmonster.com
Frequently Asked Questions
How Often Should I Change Thermal Paste On My Gpu?
It is recommended to replace GPU thermal paste every 2-3 years. This ensures optimal heat transfer and prevents overheating issues. If you notice higher temperatures or fan noise, consider changing it sooner for better cooling performance.
What Tools Do I Need To Change Gpu Thermal Paste?
You need isopropyl alcohol, lint-free cloth, thermal paste, a screwdriver, and an anti-static wrist strap. These tools help safely remove old paste and apply new paste without damaging GPU components.
Can Changing Thermal Paste Improve Gpu Temperature?
Yes, applying fresh thermal paste improves heat conduction between the GPU and cooler. This lowers operating temperature and can enhance performance and lifespan by preventing thermal throttling.
Is It Difficult To Change Thermal Paste On A Gpu?
Changing thermal paste requires basic technical skills. Carefully disassemble the GPU, clean old paste, and apply new paste evenly. Follow a detailed guide to avoid damaging sensitive parts.
Conclusion
Changing thermal paste on your GPU helps keep it cool and working well. Clean the old paste carefully before applying the new one. Use a small, even layer for best heat transfer. Tighten screws gently to avoid damage. Regularly check your GPU’s temperature to ensure it stays safe.
Taking these simple steps can extend your GPU’s life and improve performance. It’s a small task that makes a big difference. You’ve got this!