
Thinking about upgrading your computer’s graphics power? Knowing how to change a GPU can boost your gaming, video editing, and overall performance like nothing else.
But if you’ve never done it before, the process might seem tricky or even intimidating. Don’t worry—you’re about to learn a simple, step-by-step guide that will make swapping out your GPU quick and easy. By the end of this article, you’ll feel confident opening up your PC and giving it the upgrade it deserves.
Ready to take your setup to the next level? Let’s get started.

Credit: www.wikihow.com
Preparing For The Upgrade
Preparing for a GPU upgrade is an important step. It helps avoid mistakes and saves time. Taking the right approach makes the process smooth and safe. Let’s explore key actions to get ready.
Choosing The Right Gpu
Select a GPU that fits your computer’s specifications. Check the power supply wattage and available slots. Confirm compatibility with your motherboard and case size. Think about what you want: gaming, video editing, or general use. Research models with good reviews and performance within your budget.
Gathering Necessary Tools
Collect tools before starting the upgrade. A screwdriver is usually the main tool needed. Anti-static wristbands help prevent static damage to components. Have a clean, flat workspace ready. Prepare some soft cloth or paper towels for cleaning the old GPU area.
Backing Up Important Data
Save your important files before hardware changes. Use an external drive or cloud storage for backup. This protects data from unexpected issues during the upgrade. It only takes a few minutes and adds a safety layer. Better safe than sorry.
Credit: vixencomposites.com
Removing The Old Gpu
Removing the old GPU is the first step in upgrading your computer’s graphics. This process requires care and attention to avoid damage. Each step ensures safety and prepares the system for the new card. Follow these instructions carefully to remove the GPU safely.
Powering Down And Unplugging
Turn off your computer completely. Do not use sleep or hibernate modes. Unplug the power cable from the wall or power strip. This cuts all electricity to your system. Wait a few seconds to let the components power down fully.
Opening The Computer Case
Place your computer on a clean, flat surface. Locate the screws or latches holding the side panel. Remove these carefully and set the panel aside. This gives you access to the inside of the case. Avoid touching other parts to prevent static damage.
Disconnecting Power Cables
Find the power cables connected to the GPU. These usually come from the power supply unit. Gently press the clip or tab on the connector. Pull the cable out slowly without forcing it. Keep the cables out of the way for now.
Unsecuring The Gpu From The Slot
Look for the screws securing the GPU to the case. These are often near the back where the ports are. Use a screwdriver to remove these screws. Some cases have a latch or clip on the PCI slot. Release this latch carefully to free the GPU.
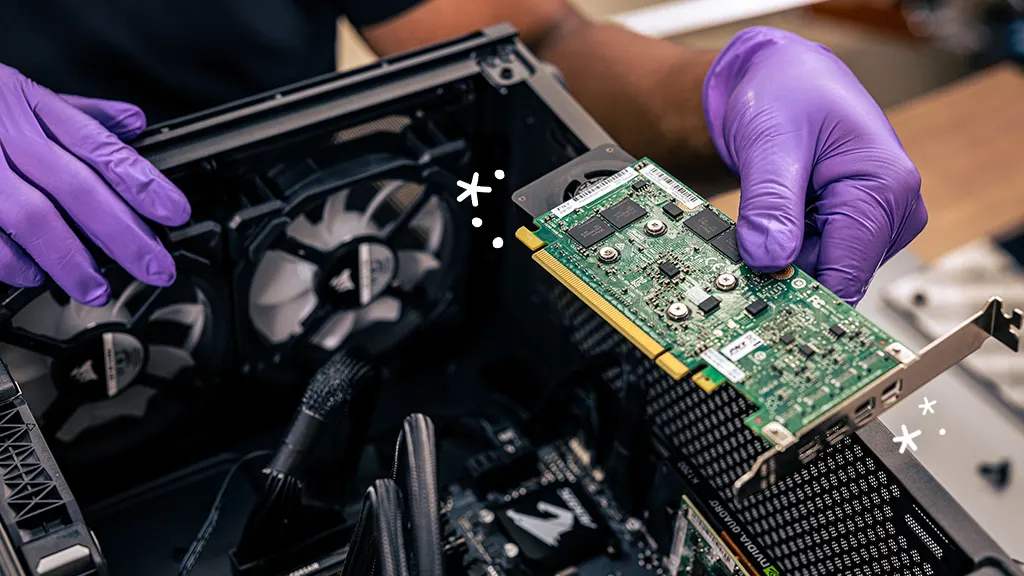
Carefully Removing The Gpu
Hold the GPU firmly by its edges. Do not touch the gold connectors or chips. Gently pull the card straight out of the PCI slot. Avoid twisting or bending the card. Place the old GPU on an anti-static surface or bag.
Installing The New Gpu
Installing the new GPU is a key step in upgrading your computer. It requires care to avoid damage and ensure proper function. This part focuses on placing the GPU correctly and securing it for use.
Aligning The Gpu With The Slot
First, find the PCIe slot on your motherboard. This slot is where the GPU will fit. Hold the GPU by its edges. Line the gold connectors with the slot carefully. The GPU should fit without force. Check the back ports align with the case openings.
Securing The Gpu In Place
Press the GPU gently into the PCIe slot until it clicks. Locate the screw holes on the GPU bracket. Use screws to fix the GPU to the case. Tighten screws enough to hold it firmly. This keeps the GPU stable and safe.
Connecting Power Cables
Most GPUs need extra power from the PSU. Find the power connectors on the GPU. Connect the matching cables from the power supply. Make sure cables fit snugly and securely. Loose connections can cause problems later.
Closing The Computer Case
Once the GPU is installed and connected, close the case. Replace the side panel and screw it back on. This protects your hardware from dust and damage. Your computer is now ready for the next step.
Configuring The New Gpu
After installing a new GPU, setting it up correctly is key. Proper configuration ensures your system runs smoothly. It also helps you enjoy better graphics and faster performance. Follow these steps to configure your new graphics card right.
Booting Up The System
Turn on your computer after installing the GPU. Watch the screen for any error messages. If the display stays blank, check the card’s connection. The system should detect the new hardware automatically. Wait until Windows or your OS finishes loading.
Installing Latest Drivers
Drivers help your GPU work with the system. Visit the GPU maker’s website to download the newest drivers. Avoid using old or generic drivers. Run the installer and follow the instructions carefully. Restart your computer once the installation is complete.
Adjusting Display Settings
Open your system’s display settings after driver installation. Set the correct screen resolution for your monitor. Adjust refresh rate for smoother visuals if available. Arrange multiple monitors if you use more than one. Customize color and brightness to your liking.
Testing Performance
Run simple games or graphics tests to check GPU performance. Use benchmarking tools for detailed results. Look for smooth gameplay and clear images. Monitor the GPU temperature to avoid overheating. Confirm the new card runs without errors or crashes.
Troubleshooting Common Issues
Troubleshooting is key after changing your GPU. Problems can happen, but most have simple fixes. Identifying the issue saves time and stress. This section covers common problems and easy solutions. Follow these tips to get your system running smoothly again.
No Display Output
No picture on the screen is a common issue. Check if the GPU is seated firmly in the slot. Make sure the monitor cable is connected to the new GPU, not the motherboard. Confirm the power connectors are plugged into the GPU. Try a different cable or port to rule out hardware faults.
System Crashes Or Freezes
Crashes often mean a hardware or software conflict. Ensure the GPU is compatible with your motherboard and power supply. Remove old graphics drivers completely before installing new ones. Keep your system’s BIOS and drivers up to date. Test the GPU in another PC to check for hardware failure.
Driver Installation Problems
Driver issues block proper GPU function. Download drivers only from the official manufacturer website. Use clean installation options during setup. Uninstall previous drivers using a tool like DDU for best results. Restart your computer after installation to apply changes.
Overheating Concerns
Overheating causes slowdowns and shutdowns. Confirm the GPU cooler is securely attached. Clean dust from fans and vents for better airflow. Check that case fans are working properly. Apply fresh thermal paste if the GPU temperature stays high. Monitor temperatures using software tools to avoid damage.

Credit: vixencomposites.com
Tips For Maintaining Your Gpu
Keeping your GPU in good condition helps it last longer and run better. Simple habits can prevent damage and improve your computer’s speed. Follow these tips to take care of your GPU after installation.
Regular Cleaning
Dust and dirt can block your GPU’s fans and vents. Clean your GPU every few months using a soft brush or compressed air. Avoid using water or wet cloths. Keep the inside of your computer case clean too.
Monitoring Temperatures
High heat can damage your GPU over time. Use software tools to check your GPU temperature often. Stay below 85°C for safe operation. If it gets too hot, improve case airflow or lower your GPU workload.
Updating Drivers
GPU drivers control how your hardware works with software. Update your drivers regularly from the official website. New drivers fix bugs and improve performance. Avoid using drivers from unknown sources.
Optimizing Game Settings
Running games at high settings strains your GPU. Lowering graphics settings reduces heat and power use. Choose settings that balance good visuals and smooth play. This helps your GPU run cooler and last longer.
Frequently Asked Questions
How Do I Safely Remove An Old Gpu?
First, power off and unplug your PC. Open the case, disconnect power cables from the GPU. Release the PCIe slot latch, then gently pull out the GPU. Avoid force to prevent damage to the slot or GPU.
What Tools Do I Need To Change A Gpu?
You’ll need a Phillips screwdriver to remove screws. An anti-static wrist strap is recommended to prevent static damage. Having a clean, static-free workspace also helps during the GPU replacement process.
How To Install A New Gpu Correctly?
Align the GPU with the PCIe slot carefully. Insert it firmly until the latch clicks. Secure it with screws, then connect the power cables. Close the case, power on, and install the latest GPU drivers.
Can I Upgrade To Any Gpu In My Pc?
Check your motherboard’s PCIe slot compatibility and power supply wattage. Also, ensure your PC case fits the new GPU size. Confirm these before buying to avoid compatibility issues.
Conclusion
Changing a GPU can seem hard, but it is simple with the right steps. Take your time and follow safety tips carefully. Always check compatibility before buying a new card. Clean your computer parts gently to avoid dust build-up. After installation, test the GPU to ensure it works well.
This upgrade can improve your computer’s speed and graphics. Stay patient and enjoy your improved system performance. You can do this with confidence and care.